Compass Coffee

DCIM104GOPRO

Compass Coffee

Compass was my first planned coffee stop for the day.  The location I visited was just a few bus stops from the Dolcezza.  It is a single-story brick building packed to the gills with coffee products, seating, and what appears to be the compass coffee roasting operation.

I ordered a small drip coffee, which was made with their cardinal blend, and a saag-paneer filled pastry, similar to a bao.  The pastry dough was sweet, and the sag-paneer was spicy and bizarre, but in the best way.  The coffee was smoky and sweet, a little acidic but not very fruity.  The coffee was served in a paper cup.

DCIM104GOPRO

Roasting operation

I sat at a bar in front of their coffee roasters.  Like slipstream, light was provided mainly by numerous skylights and windows rather than with artificial lighting.  This, combined with the brick, gives the place a warm glow.  The place was pretty packed, with a long line when I arrived.  But there was plenty of space inside, and I think pretty much anyone who wanted a seat got one.

DCIM104GOPRO

Sitting area

As you can see in the photo, they have pretty much every kind of cafe chair, ranging from various heights of 4-legged metal stools, to orange and white metal chairs.  The wood was mostly light colored pine and veneer, which was complemented by the white paint and tile.  The somewhat high ceiling and skylights give it an airy, clean, and open feeling.  this feeling conflicts somewhat with the general cramped mess and busyness of the floorplan.

Chinatown Coffee Company

DCIM104GOPRO

The unassuming entrance

The CCC lacks the usual signage out front, but once you get inside, it is clear that it is a coffee shop.  They seem to serve intelligentsia coffee, but they also sell retail heart coffee.  As one would expect, the coffee is good. The coffee was balanced, with a smoky aftertaste.  It was served in an hourglass shaped diner mug, like the ones that Diesel sold before switching to intelligentsia-ware.

DCIM104GOPRO

This shop is long!

The interior of the shop is long.  The grey bulkhead that comes out of the ceiling, the rail, and the long coffee bar all help make it seem even longer, emphasizing a far away vanishing point.  Their logo is three cups over two bars, which is similar to the flag of the District of Columbia.  Definitely clever.

On the left side, there are small four legged stools mixed with creamsicle chairs- white on the outside, orange on the seat.  These seats face each other over low spool tables.  In the front of the shop there is a bar at the window, and two very expensive looking tables with matching benches.  These feature a dark wood tabletops, metal frames and narrow benches.  It was a surprisingly comfortable spot to sip my coffee and read my book.

Peregrine Coffee


DCIM104GOPRO

Peregrine next to NOT Peregrine (La Pain Quotidien)

Peregrine Coffee was the first stop on my coffee tour.  It seemed easy to get to form the Hirshhorn and it would be my only stop out on the east side of DC.  I arrived at about 4:00, drenched in sweat from my two-block walk over from the East Market stop on the Blue Line.  Say what you will about the heat on the west coast, but at least it is a dry heat!

This location is located right next to a non-peregrine cafe.  I was almost lured into buying coffee from them but the brew-o-matic and lack of coffee menu made me think twice, and check outside.  Sure enough, Peregrine was right next door.

Since it was about 90 degrees and humid, I opted for a smaller espresso instead of my usual small black coffee (the real standard for judging a coffee place).  I also ordered a ham and cheese pastry.

The pastry did not inspire any real confidence in me, with its single roll of ham and sparse cheese, but I devoured it anyway since I was hungry.  It was decent-edible but not a reason to come back.  Eventually my espresso was up (after a mix up that almost landed me with a macchiato).

The coffee on the other hand, was short- by that I mean it was a single shot of espresso.  One unusual thing I learned is that in DC, espresso is normally a single shot instead of the doubles you find in Boston and LA or SF.  Overall I was happy with the coffee.  It as fruity and the acid was fairly balanced.  They clearly have some idea of what they are doing over there with their machine and their counterculture coffee (they also have a house peregrine brand).  It was served in a standard white saucer/espresso cup/spoon, along side what I assume was supposed to be sparkling mineral water in a libbey druatuff glass.  Unfortunately this turned out to be lukewarm water, which was trumped by the free ice water they were also serving.

DCIM104GOPRO

Pear Eh Grin

The decor was cute, but not in a way that stands out.  It felt like it was new and nice, and organized.  Inviting, but not too exciting.  They did have a funny rendition of their name on the wall (pictured above).  There is interior and exterior seating available.  The inside consists of a small square of tables in the front (about 4 people/table), a bar for seating for three, and another line of tables going back to the back of the cafe, each seating two.  Next to the line of tables is the coffee bar, including a pastry case, espresso machine, and retail area.  This cafe (like the rest of the ones in DC) also boasts a restroom.  Outdoors there are five tables that can probably seat three people each.

DCIM104GOPRO

Nice, clean, but not exciting

The tables and chairs were a light blonde wood, probably pine.  The outdoor furniture is metal painted that rustoleum-lawn-furniture-green.  The counter echos this theme with a light wood and glass construction, giving the whole place a friendly (but not enlightening) interior.

Baked and Wired

DCIM104GOPRO

Line for days!  If you want coffee, you can probably skip it

When I arrived at Baked and Wired, after a bus and a schlep down 30th street,  I was extremely unenthused to find a line out the door.  What I did not know was that Baked and Wired is one of “those places” where people queue outside in 85 degree heat to buy expensive and trendy pastries.  There is nothing wrong with that, but typically this is not my scene.  I typically prefer a spot where I can grab a quick cup of coffee and a seat and spend a few hours lost in a book, writing emails, or pretending to be productive in some other way.

DCIM104GOPRO

The coffee bar, featuring finger

Once I was inside, I realized that it is actually that kind of place, or rather half the store is that kind of place.  There are actually two totally separate counters inside, one for coffee and one for baked goods, which form a delicious symbiosis.  From the bakery, I purchased a pistacio cupcake.  From the coffee bar, I bought a cup of coffee.

The coffee was acidic and a little fruity- a nice sharp note compared to the creamy sweetness of the cupcake.  And unlike most cupcakes, this one had little nut-nuggets in it to add a nice texture.  Together, the two of them made a lovely afternoon snack.  Alone, I think the coffee would have still been drinkable, but the cupcake certainly enhanced the experience.

DCIM104GOPRO

Blurry, but you get the idea.  ft. finger

The decor could best be described as mixed.  The coffee bar area has no seating.  The bakery is standard contemporary-cute and displays cupcakes under glass beakers.  Down a few steps from the bakery, there is a massive shell-shaped couch that faces an american flag.

DCIM104GOPRO

Bizzare

In the back, things get real weird.  Napinks are attached to napkins with baked and wired stickers in what must be a fire marshalls nightmare.  Somewhere under all the napkins, I am sure there is a wall with more napkins attached to it via stickers.  Each leaflet in the strata is marked with a thoughtful doodle or a few words.

La Colombe

DCIM104GOPRO

La Colombe!

La Colombe was (and is) my ultimate stop for coffee in D.C.  Ultimate in both senses of the word- final, as well as the best.  If you want to have the best coffee that I found in D.C., this is absolutely the place to go.  Sadly, I did a terrible job of getting photos of it, so you will have to bear with a mostly-words description.

La Colombe is decorated with sedate walnut stained wood, warm brick, and cool steel.  Everything else is black.  The lights are a slightly warm white, and are augmented (and overpowered) by a large skylight and by the windows.  The indirect light from is very warm since it is reflected off the reddish brick and wood surfaces.  The chairs and furniture appear to be site-specific and have matching stain and hardware across the store.  One notable feature is the black and brass features on the furniture- something I have not seen elsewhere.

The coffee was amazing.  I had something fruity from their workshop selection, and it was easily the best coffee I have had in at least a year- maybe more.  I described it in my notebook as “it smells and tastes of cherries.  It is acidic, fruity and clean”.  The coffee was served in a highly decorated mug, with blue and red floral and bird patterns.  The saucer had a matching bird and floral pattern.  Easily the coolest mug to date, aside from the old monkey-on-a-rocket-ship mugs from Diesel.  That is high praise coming from me!

The Best Coffee In Washington, D.C.


I visited D.C. over the weekend of the 9th to see an exhibit by one of my favorite artists- Robert Irwin.  After that I had a couple days to kill and I decided I would go on a coffee tour of the Capitol.  Based on recommendations from friends and cafes that I stumbled upon, I managed to visit 9 cafes in the D.C. area.  Below are my comments on each one.  Check out the map above for information on location and my recommendation.

Green Star = Best coffee in the area!

Green Pin = I visited and the coffee was good

Blue Pin = I visited a different branch and the coffee was good

Red Pin = I did not visit any of these cafes

Diamond = Would not recommend, better coffee nearby

My strategy was to hit all the outliers that had late closing times on my first “day” from about 3-8, and then sweep the Green/Orange line stops on my way to Union Station on day 2.  I decided to add peregrine to the list of day 1 locations so that I would have about 4 cafes on day one and 4 on day two- to even out the coffee intake.  The day one list was peregrine, filter (since foggy bottom was closed on the weekends, I ended up going to Dupont circle), Baked and Wired, and finally Northside Social, which was far away but had late hours.

Day two began, surprisingly, with Slipstream and Dolecezza, which I happened to run into on the way to Compass Coffee.  After Compass I hopped a bus down to Chinatown Coffee Co and finally La Colombe.

Northside Social

Peregrine

La Colombe

Baked and Wired

Filter

Slipstream

Compass Coffee

Chinatown Coffee Company

Custom Service with SD110 the NRF51288

As a person who makes their living in the IOT world, I decided it would be handy to learn how to get data to and from the venerable NRF51288, which is certainly a contender for the best bluetooth SoC out there.  One annoying thing is that the wonderful Softdevice that Nordic provides does not have a particularly clear English translation, or good pictures in their documentation.  Here I will try to describe with pictures and arrows that my mechE brain is accustomed to, instead of with comments like “Attribute metadata for the User Description descriptor, or NULL for default”.  Hopefully after reading this, you will have a better feel for how to make a custom service, as well as what the more formal terms are for the different parts of the service in the softdevice API.

How to read this:

The 10,000 meter view will start with the softdevce and the GATT server, then at 1,000 meters, we will inspect bas.h to see what the minimum viable functions for a bluetooth service are.  At 100 meters we will look at the softdevice calls that add the information to the GATT server.  at 10 meters we will look at what gets passed to those calls- the real key to understanding how to add things.  At the very end, I will show you how I changed the bas example to report acceleration values.  This is by no means a definitive guide, but hopefully it will give you a jumping off point for adding services to your code.

10,000 Meters: GATT and the Softdevice

path3459-1.png

The thing we want to do is add a new service to our Generic Attribute Profile (GATT) server.  Adafruit does a wonderful job of explaining it here, with pictures.  Once you connect to a BTLE device over a Generic Access Profile (GAP), your bluetooth client, usually something like a phone or computer, can access the GATT server, usually something like a the NRF5.

A GATT server can have characteristics, as well as services.  Services are groupings of characteristics.  Services are distinguished by a 128-bit UUID.  Some of them are reserved for particular types of services, like a heart rate monitor, but we will deal with making sure we don’t use those later.  Two that are always included are the Generic Access Service and The Generic Attribute Service.

Characteristics live inside of services, and have characteristic values.  These characteristics can also have descriptors, which can tell you useful stuff like what the name of the characteristic is.  Characteristics are things that can be read and written to the server.  A client might read log data or a sensor value, and it might write a new state for the device or a device name.

The way that you access the GATT server on the NRF51288 (as well as the NRF52) is through the nordic softdevice (SD), which is a pre-compiled binary that you append to the beginning of your user application code.  It handles all the GATT and GAP stuff, and you need to tell it to do things like add services and characteristics using calls to the softdevice that are provided by nordic.

1000 Meters: What is in bas.h

typedef struct
{
...
} ble_bas_init_t;

typedef struct ble_bas_s
{
...
} ble_bas_t;

uint32_t ble_bas_init(ble_bas_t * p_bas, const ble_bas_init_t * p_bas_init);

void ble_bas_on_ble_evt(ble_bas_t * p_bas, ble_evt_t * p_ble_evt);

uint32_t ble_bas_battery_level_update(ble_bas_t * p_bas, uint8_t battery_level);

Taking a look at an abbreviated version of what is in bas.h will let us know what kinds of things a a bluetooth service might need to do, and what kind of stuff we should have to use the SDK as a template.  Here is a listing of the most important stuff in bas.h

Structs:

ble_bas_init_t- this holds all the data for initializing the service

ble_bas_t – this holds all the data for actually running the service

Functions:

ble_bas_init – this initializes the service, and inserts your vendor specific UUID, your service, and characteristics into the softdevice

ble_bas_on_ble_evt – this is called when the softdevice thinks something interesting has happened over BT that concerns the bas service.  For example, a client might write a new value to the server, or want to read a new value from the server.

ble_bas_battery_level_update – this actually updates the value of the characteristic with the new battery level.

So, all the stuff you need is in ble_bas_init_t and ble_bas_t, for the actual data about the services, and then you call ble_bas_init and it gets added to the softdevice.  After that ble_bas_battery_level update gets called every now and then, and if anything interesting happens bluetooth-wise to the service, ble_bas_on_ble_evt handles it.

100 Meters: Adding a Service and Characteristics

Of these, ble_bas_init and ble_bas_battery_level_update are the most interesting functions, so we should look inside of them to see what is going on.  Here we will be focusing on sd_ble_XXXXXX calls, which actually add things to the Bluetooth Low Energy SoftDevice- hence sd_ble.  later we will go back and look at what we are actually feeding these functions.

ble_bas_init is a small function , but it also calls batter_level_char_add which we will need to take a look at- it is something we did not see in bas.h, but it adds the actual battery level characteristic to the service.  The big ble_sd calls here are:

BLE_UUID_BLE_ASSIGN

this is just a macro to put the BLE_UUID_BATTERY_SERVICE information into a struct for later- if we want to make a custom service we will have to do it a different way, since our custon ble UUID needs to be added to the softdevice.

sd_ble_gatts_service_add

This adds our service.  There are some options here, but as long as you have this you will be able to see a service with the BLE_UUID_BATTERY_SERVICE if you look at your device with something like the nrf master control panel app.

inside of battery_level_char_add, a lot of other ble_sd calls happen- lets take a look!

sd_ble_gatts_characteristic_add

this actually adds our characteristic.  This is pretty useful, since we want it added.

sd_ble_gatts_descriptor_add

this actually adds the descriptor of the characteristic to the characteristic.

10 Meters: What goes into Softdevice BLE Calls

This is the real dive into the nonsense that is the NRF5 SDK.  I think that a flow chart/visual way of organizing this information is nice, although you have to zoom way in to read the text.  This is just another way of organizing the data, but instead of having to jump around a bunch of windows and files, I put it all in one place- like a cheat sheet.

These are meant to be read from the bottom up- look at the “what can you control” bar to see what you can change, the “where it comes from” bar to see how to actually make the change, and then the “where you can put it” bar shows where you need to put the variables in the sd_ble call.

sd_ble_gatts_service_add

text4926-7

This char has three layers explaining the arguments of the sd call.  The bottom layer is what you can change, the middle layer is how to generate the change, and the top layer is the actual argument and type that gets passed to sd_ble_gatts_service_add.

Here you can change the type of service between primary and secondary.  A secondary service is a service within a service, which seems fairly unusual.  You can also set the UUID of the service.  If you want to use a bluetooth SIG approved service, then you want to something like:

BLE_UUID_BLE_ASSIGN(ble_uuid, BLE_UUID_BATTERY_SERVICE);


which is a macro that will fill the appropriate fields of ble_uuid with the info for a battery service UUID. NB, if you put weird characteristics inside of this service, the client may not be able to find the correct data, and you will not be compliant with the BTLE spec.

If you want to make your own custom service, you should do something like

sd_ble_uuid_vs_add(&acc_acce_uuid, &p_acc->uuid_type);
ble_uuid.type = p_acc->uuid_type;
ble_uuid.uuid = BLE_UUID_TYPE_VENDOR_BEGIN;


This will make a new vendor specific (vs) UUID and then you manually stuff the values into ble_uuid before passing it to sd_ble_gatts_service_add.  When the function is called, the softdevice will write to the pointer for the service handle.  This is important for later on, when you may want to modify the service- for example, adding a characteristic.

sd_ble_gatts_characteristic_add

Here you can change the service the characteristic is attached to, the characteristic metadata, and the structure that holds the characteristic value.  Just like sd_ble_gatts_service_add we also pass it a pointer to a handle that gets filled in by this function.  Unlike sd_ble_gatts_service_add there are about a million things that go in here, so each one will need its own diagram.

In the bas service example, we are adding a battery level characteristic to the service, so we should pass in the handle that was written by sd_ble_gatts_service_add.  We could pass in any service handle that was written by the softdevice, and it would add the service to that softdevice.

g6568.png

The characteristic metadata is how you control the properties of the characteristic, such as the read/write permissions and user description (a text description of the characteristic), but nothing to do with the value itself.  It has many many fields and some of those are actually other kinds of metadata structs.  The main groupings of structures are:

First, things that have to do with the properties of the characteristic, such as broadcast, indication, notification and read write permissions, writing with queued request and writing the characteristic user description, as well as the use of bluetooth assigned numbers to indicate the unit, exponent, and format, of the characteristic.  These are all about the actual characteristic and the value that it represents.  This is useful if you wanted to say that the value you are sending to the client is a uint16_t that represents micro-coulumbs for your battery measurement.

Second, the user description- this is really handy if you want to have a string associated with the value that you send that says “battery level”.  Here the important things are a pointer to a string buffer that holds the value, as well as the current length of the value, and the maximum length. Maximum length is important if the descriptor is re-written.  The last part of this grouping is the ble_gatts_attr_md_t, which controls how the description can be read and written.

The final grouping has to do with permissions around turning on and off notifications and indications, which live in the Server Characteristic Configuration Descriptor (SCCD) and Client Characteristic Configuration Descriptor (CCCD).  This post does a decent job of explaining it.

g6742

The last thing that goes into sd_ble_gatts_characterisitc_add is a structure that holds the characteristic value contains two main groupings.  The first is a pointer to a buffer that holds values of the characteristic, as well as information about the max length of the buffer, the size of each record in the buffer and the current offset.  The other grouping contains the metadata about r/w permissions.

sd_ble_gatts_descriptor_add

This is the last softdevicecall, and mercifully it is pretty short.  Just like the other calls, you give it the handle of the characteristic it belongs to, as well as a pointer to store the handle for the descriptor.  The only real data you need to set up for it is a ble_gatts_attr_t which is the same as the one used in the sd_ble_gatts_characteristic_add call.

1 meter view- Custom Service

Lets make a new service- this will document the major changes from bas to a custom accelerometer service with three characteristics that represent x, y, and z accelerations.  For the sake of clarity, we will assume there are functions that do things like get the accelerometer data.  I will show code snippets in the post, but you can also see the whole project here, commit 705deb.

First off, we need to add a custom UUID to our service in ble_bas_init.

ble_uuid_t ble_uuid;
ble_uuid128_t acc_acce_uuid = {{0xAA, 0xCA, 0x55, 0xAC, ..., 0xEF}};

err_code = sd_ble_uuid_vs_add(&acc_acce_uuid, &p_acc->uuid_type);

ble_uuid.type = p_acc->uuid_type;
ble_uuid.uuid = BLE_UUID_TYPE_VENDOR_BEGIN;


This adds our new made-up UUID to the softdevice, and then we pack the data into ble_uuid for later use in sd_ble_gatts_service_add.

Next up, we need to make some characteristics to belong to this service!  I will focus on only one characteristic here, because they are all acceleration data (just in different axes).

Compared to the battery level, we will want to make it a uint16_t instead of a uint8_t, give it a text description and add some nice units to our characteristic.

Lets start with making the value a uint16_t.  To change this in the GATT server, we will need to edit the ble_gatts_attr_t that represents the characteristic value that gets passed into sd_ble_gatts_characteristic_add.  In the code, that is called att_char_value.  To make the characteristic value a uint16_t instead of uint8_t, we need to do this:

attr_char_value.init_len  = sizeof(uint16_t);

attr_char_value.max_len = sizeof(uint16_t);


This will change the expected size of the record in the characteristic.  Now it is expected to be a uint16_t.  NB this only changes what the softdevice expects, so there are several other places in the code that will need to be changed to use the proper variable size.

Now for the text description.  This is handy, because your app might want to know what each characteristic represents, other than some crazy uuid.  This is pretty easy, since this information lives in the ble_gatts_char_md_t struct that we already passed to sd_ble_gatts_characteristic add.  We just have to change it by actually making a char buffer and passing the information about the user description size and max size into the struct, like this:

uint8_t user_desc[] = "ACCEL";

char_md.p_char_user_desc = user_desc;

char_md.char_user_desc_max_size = 5;

char_md.char_user_desk_size = 5;


We also have to give ble_gatts_add_descriptor an idea of the read/write permissions for the description.  We do this with a ble_gatts_attr_md_t

ble_gatts_attr_md_t user_desc_md;

memset(&user_desc_md, 0, sizeof(user_desc_md));

BLE_GAP_CONN_MODE_SET_OPEN(&user_desc_md.read_perm);


Although I could have set whatever permissions I wanted.

Finally, this all gets put into sd_ble_gatts_descriptor_add via the attr_char_value that holds all of the data.

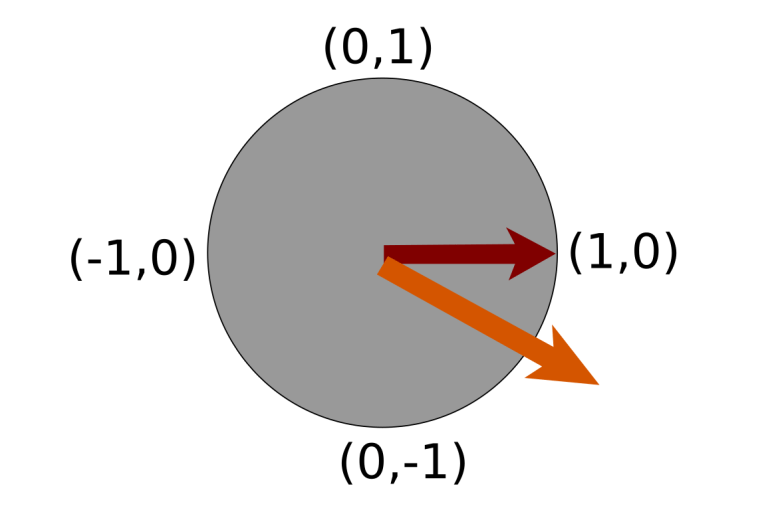
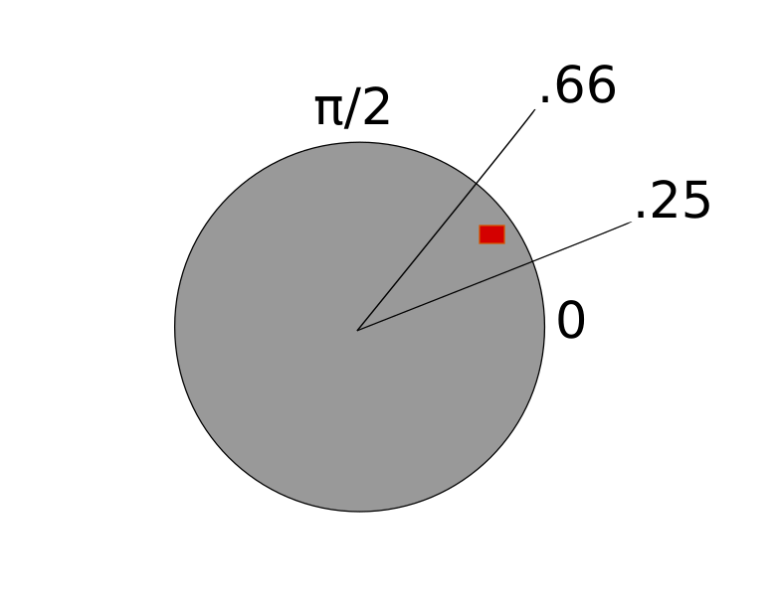
Finally, lets add presentation format data.  We make a presentation format characteristic variable and put some values in it:

ble_gatts_char_pf_t accel_pf;

memset(&accel_pf, 0, sizeof(accel_pf));
accel_pf.format    = BLE_GATT_CPF_FORMAT_UINT16;
accel_pf.exponent  = 0;
accel_pf.unit      = 0x2713; //code for acceleration


then add it to the characteristic metadata:

char_md.p_char_pf = &accel_pf;


With this field filled in, it will automatically be added when the characteristic is added with sd_ble_gatts_add_characteristic.

0 Meters: Inspecting The GATT Server

Screenshot_2016-07-03-15-10-42

To check to make sure the device is working properly, I used the nrf master control panel app to connect to and interrogate the GATT server.  As you can see, everything is working!

“Gravity” app for Misift Flash

After a long trip to CA, I am finally back at working on fun stuff.  First up is an app for the Misfit Flash that lights up the lowest LED on the board.  Source is here, but it is a bit hapazard and documentation is somewhat scarce.  So if you are going to build it make sure you have a few minutes.

The how:

This technique assumes that the board is not accelerating at much more than 1g in any direction- in other words, gravity has to be the dominant force.  It would not work very well if you were in a car speeding up, but it would work ok you were in a car with a constant velocity.

unit circ illus.png

To determine which way is down, I read the accelerometer and look at the X and Y components.  The Z does not have very much information for me, because tilting the board to the same angle in any direction will give you pretty much the same Z value.  The Z value would be good for something like a bubble level, but it is not useful here.  Another way to think about it is that a gravity vector straight down is being decomposed into ijk vectors that are fixed to the reference frame of the board.  We want to know in the ij plane which way is most “in line” with the gravity vector.  The X and Y axes of the accelerometer are collinear with the i and j unit vectors in this case.

The X and Y components form a vector that points in some direction on the face of the board (orange vector above).   Each LED lies along an imaginary circle with a radius of 64 units, although I show it as a unit circle above.  Each of these direction vectors is dotted with the XY vector, which gives a “score” of how much the XY vector is pointing in the direction of the LED.  The vector with the largest score has its LED illuminated.

Other Approaches and improvements:

atan

There are simpler ways to do this with non-integer math and conditionals, but floating point math is apparently “expensive” on a M0.  The easy way to do it with floats would be to make a table of inverse tangents, and find the ratio between the X and Y components.  Then it would be simple to just look up which range you were within- for example the 2 o’clock LED here is between .25 and .66.  There would have to be special provisions if X were ever 0 to avoid a division by 0 error, but that would be pretty simple.

An easier optimization would be to get “hints” from the sign of the XY vector, if optimizing for speed.  right now, each 12 dot product operations and 12 conditionals are evaluated each time.  This could probably be cut down to 4 dot products and 6 conditionals if by looking at the quadrant of to do the dot products in first, depending on the value of the XY vector.  Given that the processor is only doing one thing, it does not seem like it is useful to implement.

Commandeering the Misfit Flash Board

setup w friend1

The flash acting as a thermometer.  Also pictured, FTDI friend and discovery board aka stlink programmer

In my last post about the Flash, I showed all the LEDs lighting up, but I really did not have the board mapped out or the toolchain set up yet.  I just went on mbed, and turned all of the outputs on and off, a condition pretty much guaranteed to blink some LEDs on the board.

I wanted to do something a little more involved with this board, so I took the time to reverse engineer the connections and figure out to talk to the sensors and I/O elements on the board. I have figured out the LEDs, the button, the internal temperature sensors, and the accelerometer.

LEDs

This one was tedious, but not hard to figure out.  I knew all the LEDs would turn on, and that it was not likely to hurt anything if I had all the pins high.  All I had to do here was write a program that turned one pin on high at a time, until I had a map of pins to LEDs.  I was surprised to find out that the NRF was actually not sourcing the current to the LEDs- meaning that when the pin is low, the LED is on.

energizer_chart

For about .5 seconds, the battery can source ~33mA

I am not 100% sure why they did this, but my theory is that they found out that you can sink slightly more than the advertised current into the chip, and that the driving output is pretty limited.  According to the datasheet for the energizer CR3032, it looks like it can provide 33mA for a few seconds before some serious voltage drooping sets in.  It also seems like trying to output more current might drop the output voltage more, while low side drive might guarantee a lower voltage (and therefore a bigger voltage drop, and more current across the LED).

flash button hold2

The current the original firmware drew when doing an LED animation

This is a recording of the current drawn from a 3v power source by the device using the original firmware, with the LEDs on.  You can see that they were very careful to use a lot of PWM (about 50% duty cycle) to keep the average current low, but the instantaneous current got as high as 30mA!

Once I figured out what went where, I made a nice little animation that turns on all the LEDS starting at 12 o’clock, and added them to a custom flashboard.h header so it would be easy to reference and compile everything.  I did this a few too many times and ended up killing my battery!  But I also found out ALL the LEDs can be on.

Button

button0.jpg

What a nice little dome switch

The button was also tedious, and I ended up not figuring it out on the first try.  My initial approach was to run my clock animation any time the button was pressed, pulling the button high, and waiting for it to go low.  Unfortunately, this did not work quite right, because the button was already pulled high by an external pullup.  This made it pretty tricky to find the button by looking for a response when the button was pressed.  Eventually I just looked for connections on the board, and then tested a few likely candidates for voltage drops when the button was pressed.  I also found what looks like a voltage divider, which may be used for measuring battery voltage (but I am not sure yet).

Temperature

temps

It is toasty in there!

The NRF51288 has an internal temperature sensor, which I decided would be fun to print out over the UART.  It seems ballpark reasonable, as it settled on about 42 or 43 C for my body temperate- but it may be generating a bit of heat on its own. It is a cool “free” addition to the board.

Accelerometer

spi

CS: 2 MISO: 5 MOSI: 4 CLK: 5

After a bit of poking at registers, I wrote a little SPI routine to talk to the accelerometer on board.  After I made sure I could read the WHO_AM_I register, it was easy to get the rest of it working.  Figuring out the pins for this was super easy, because they are labeled on the board- I just looked at where they went and I was right on the first try!  I even got CPOL and CPHA right.

Things I might make

Well, now that I have all this stuff working, its time to make this into something else and call it a day.  There are a few ideas I thought would be worth a try:

  1. Digital plumb bob- the bottom most LED would always light up as the device was rotated
  2. Digital marble- simulate a marble or a drop of water that “settles” at the lowest point
  3. Vibration logger- how often are doors opened?  when does the HVAC run? when are toilets flushed?
  4. Height sensor- detect free fall, and count how long before hitting the ground

The Kossel Science Project

About two months ago I had a hankering for a personal 3d printer- one that I could fix and break at home, instead of just fixing the ones at work.  Like many engineers, I was unable to decide on buying an off the shelf, already functional printer- no instead I decided to buy a delta printer- specifically the cheapest one I could find, the FolgerTech Kossel.  No, you cant have the link.  If you want to buy one too, you will have to figure out how yourself-  if you can’t do that, it is unlikely that you will finish the kit.  Read on to find out why.  See my summary at the end if you don’t want to read the long form post.

NB: at the time of posting this, the kit has been changed a little bit, but I expect the quality and service are about the same.

Unboxing

IMG_6078

The general unboxing experience was pretty awesome.  It is hard not to be excited when you get something like a 3d printer in the mail.  Smaller items were sealed in little bubble mailers with labels on them, while larger items like the rails and the extrusion were taped together with “kaptan tape”.  One extremely annoying and totally frustrating thing was that the screws were all mixed together.  It seems like it would have been easy to separate out the ~10 types of screws into different bags, and in fact, it seems like folgertech took all the separate parts and then mixed them together, making it worse for the person who has to assemble it.  Boo.

IMG_6095

Fortunately, I had enough film canisters and petri dishes laying around to sort each fastener, bearing, and washer into a separate bin.  Hooray!

IMG_6160

A note on the general quality of the kit seems appropriate here.  Most of the non-printed parts are of acceptable quality.  By this I mean that there were 1-2 defective screws, and after lubrication and cleaning, the linear bearings seemed ok.  Some of the parts were of totally unacceptable quality and will absolutely need to be replaced by the user.  I have a complete list later on of things that I had to buy, but the worst offenders of quality were:

-The hot end platform was completely useless, burned, and blobby.  They clearly did not use support and the cantilevered parts suffered because of it

-The end effector was similarly scorched.  It looks like a z axis/bed leveling problem

-Despite the massive 14 AWG (.064″) cables for running the high current DC to the heated bed, the AC power cord is maybe 30 AWG (.010″) stranded, and it heats up noticeably when turning on the printer.  I worried that when I ziptied it to the frame, I would pinch off the flow of electrons.  It is also not IEC color coded, which means right now, it is possible that my machine is grounded on the wrong side of the fuse.

Assembly:

Assembly was not difficult, aside from the poor print quality, shoddy instructions and missing pieces.

According to the kossel BOM, you need about 100 m8x3mm screws to complete the printer.  I was shipped 36.  After complaining, I was shipped another 36.  While I was impressed that they shipped me the screws, I was not impressed by the fact that I was still 28 screws short of the full 100.  Fortunately I had already ordered backup screws from McMaster Carr.  This took about four days, since it was over a weekend.  I could have easily built the printer over that time, but I was $4 short in screws.

The print quality of the components is also quite low.  The infill is decent, but it seems like their extruder had some difficulty keeping up.  As a result, the prints are extremely vulnerable to de-laminating.  This complication is compounded by the prints not being properly sized to fit the extrusion through them- this means that as you push in the extrusion, it is trying to tear apart the print.  Fortunately, I got mine together with only slight damage, which should allow me to print new brackets at a later date.

Print quality issues also caused some problems in holding nuts, which screws were supposed to thread into.  Coincidentally, all of the holes that should have been clearance holes actually being interference fits for the screws, so I could screw them in with no nuts.  A few of the parts (the end effector parts) I had to re print, as the parts I received were unusable.

Now that we have covered the problems with low quality and missing parts, we can talk about the instructions, which for the most part are usable.  They are not well lit, high quality, or in focus, but they are usable.  What was totally unusable was that the instructions conflict and were apparently not shot on the same model of machine.  There are extra stepper drivers, wires, and connectors that are not wired in the printer, but do show up in the pictures.  To add to that, the limit switches are shown wired in such a way that when the switch is not closed, it shorts 12V to what seems to be the arduino ground, which is not the greatest thing to do for many reasons.  As a note, this makes the arudino drop off the USB, so if you see that check your endstops.

Troubleshooting/Small Electrical Fires:

Of course, none of these problems prevented me from eventually building and testing the printer.  And then the real fun began! If I started a print with these lines:

M190 S105 ; wait for bed temperature to be reached
M104 S235 ; set temperature

This would result in the bed temp going up to 105, and then the hot end temp would go up to about 100, then crash.  Slowly, the bed temp would go down after that, until they were both at 25C (my room temperature).  It seemed like an electrical problem, so I checked the power out of the power supply, which was good.  Next, I checked the temperature of the board.  Surprisingly, they were very very hot.  At this point, the MSTBA connector started to make smells, smoke and melt, which led to me unplugging the printer.

The problem was that the polyfuses had blown, and some combination of the polyfuses heating, the FETs heating, and living under the heated bed had caused the plastic of the connector to heat up and short the 30A 12V supply.  In retrospect, it was probably that the board was mounted with metal screws (as per the instructions).  The RAMPS wiki page says “DON’T secure Arduino/RAMPS with conductive screws through both mounting holes. The screw may cut into the positive trace creating a HIGH current short.”.   Either way, this was not good, and totally the fault of the instructions that folgertech provided.  Using non-conductive nylon fasteners might be one way to fix this.

I disconnected all the electronics and moved the controller out from what was essentially a 110C oven.  I oriented the heat sinks and polyfuses facing up (as they should be) in open air, instead of in an oven.  With the connectors extended, the terminal block plug connector removed and with wires soldered in place, I powered the printer on and much to my surprise…it printed!

Print quality:

Considering that the printer is held together with zip ties and given the generally low quality feel that I had as I put it together, my expectations for this printer were low.  However, I have to say that it has performed admirably so far.  It is extremely quick, and with a 1″ calibration cube (printed in the center) I measured that it was within about .005″ (that’s 120 microns for you metric people).  This is without bed leveling,  or really properly tensioned belts or anything, so I am pretty pleased.

NB: after further prints this turned out to be a fluke, the Z of this print was pretty far off.

Summary:

Count this as more of a box of parts, some of which you may be able to put into a usable printer.  The cost of the kit is about $350, but expect to need to spend another $50-100 on parts that you didn’t expect to need, but that you will need (and that will slow down your build).