In my last post, I discussed the basic requirements and layout of my lamp – I wanted it to be able to control the color temperature and brightness, and I wanted it to be really bright. I experimented with a single strip, and detailed how the control board would work. If you want to try to build your own, the code/boards are here, although it is not very well documented.
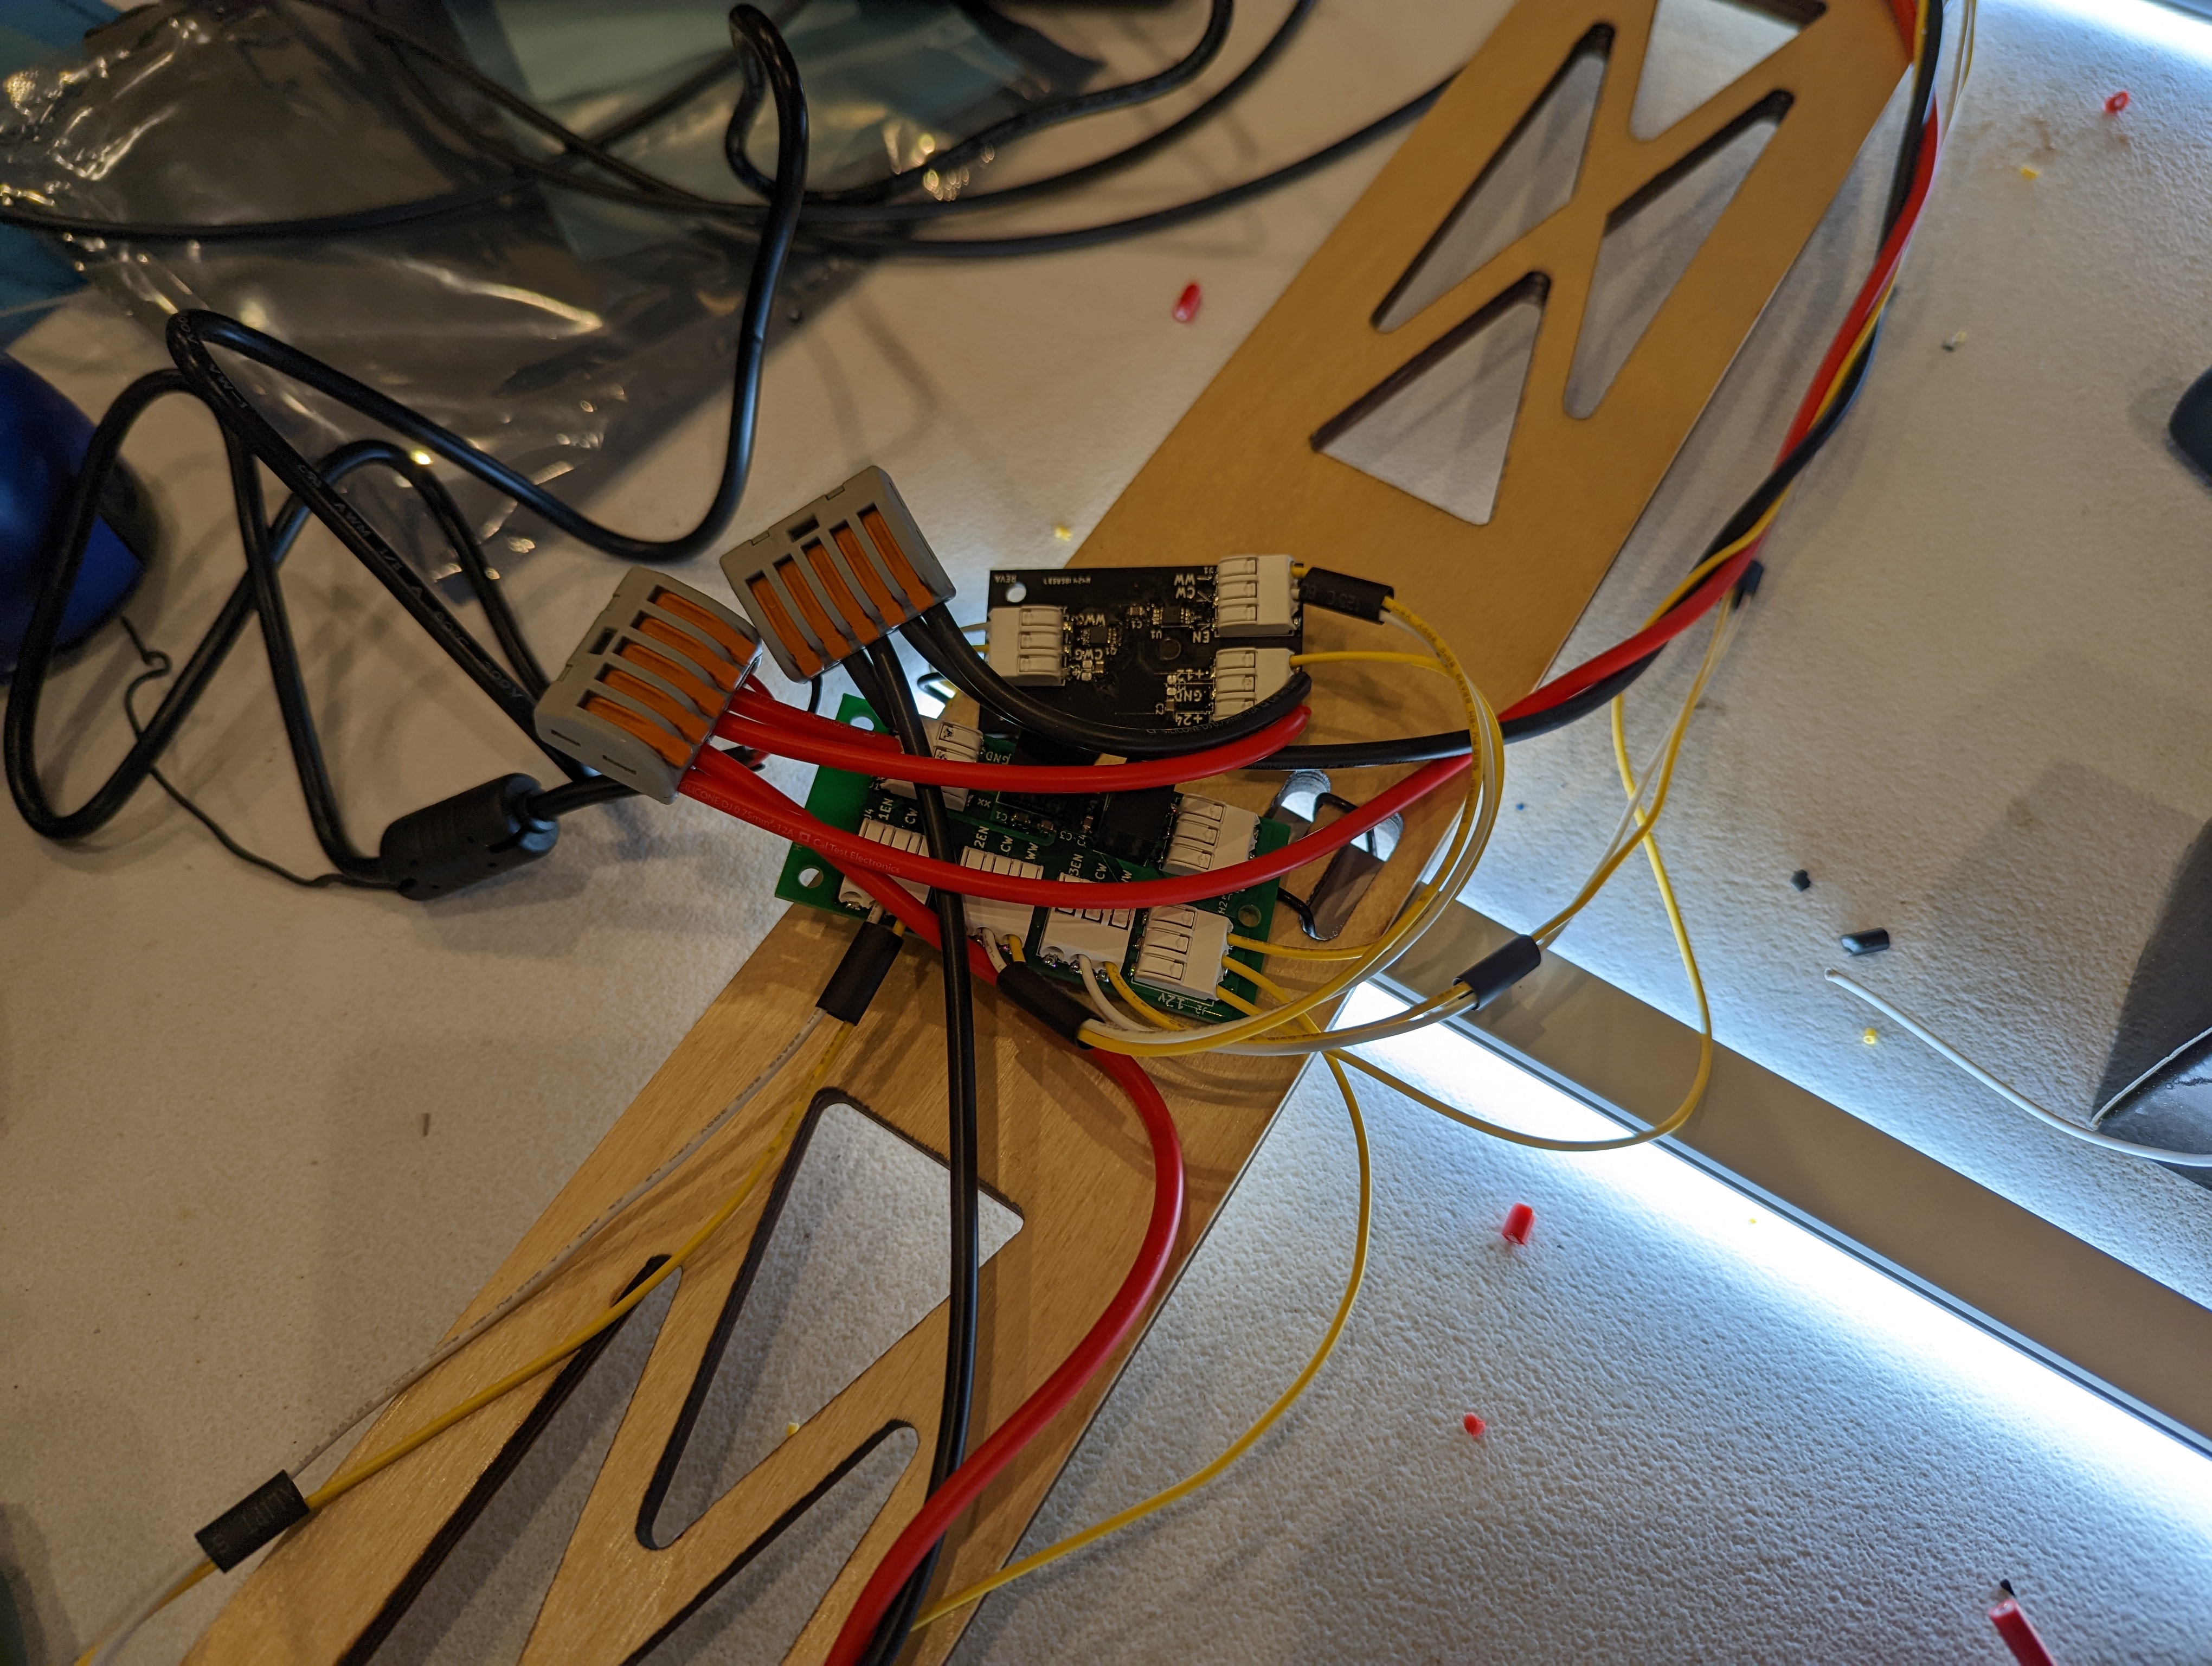
Here is the control board all wired up. It packs an ESP32-C3, because I had one on hand, and because connectivity is important for this project. In addition to manual over-the-air control, I want to be able to put the lamp onto a simulated daytime color temperature loop- a real-life version of f.lux, which turns up the warm temperature light on your display as the day progresses. I also would like to add a way to sync it to some kind of live color temperature data.
This wiring leaves a lot to be desired- this is because the boards and mechanical assembly were developed at different times, and the mechanical side of things ended up going to “plan b” aka laser cutting. It might be worth revisiting in the future, especially because a lot of ports/connectors ended up unused. For now, I am just happy to have a lamp.
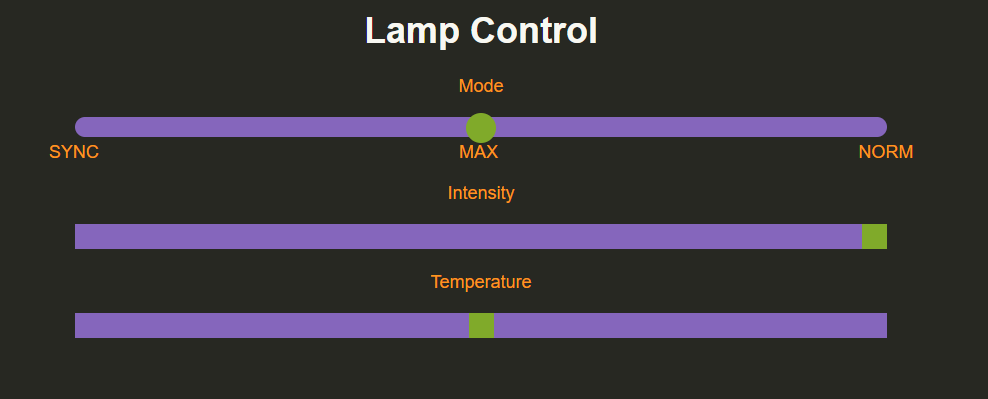
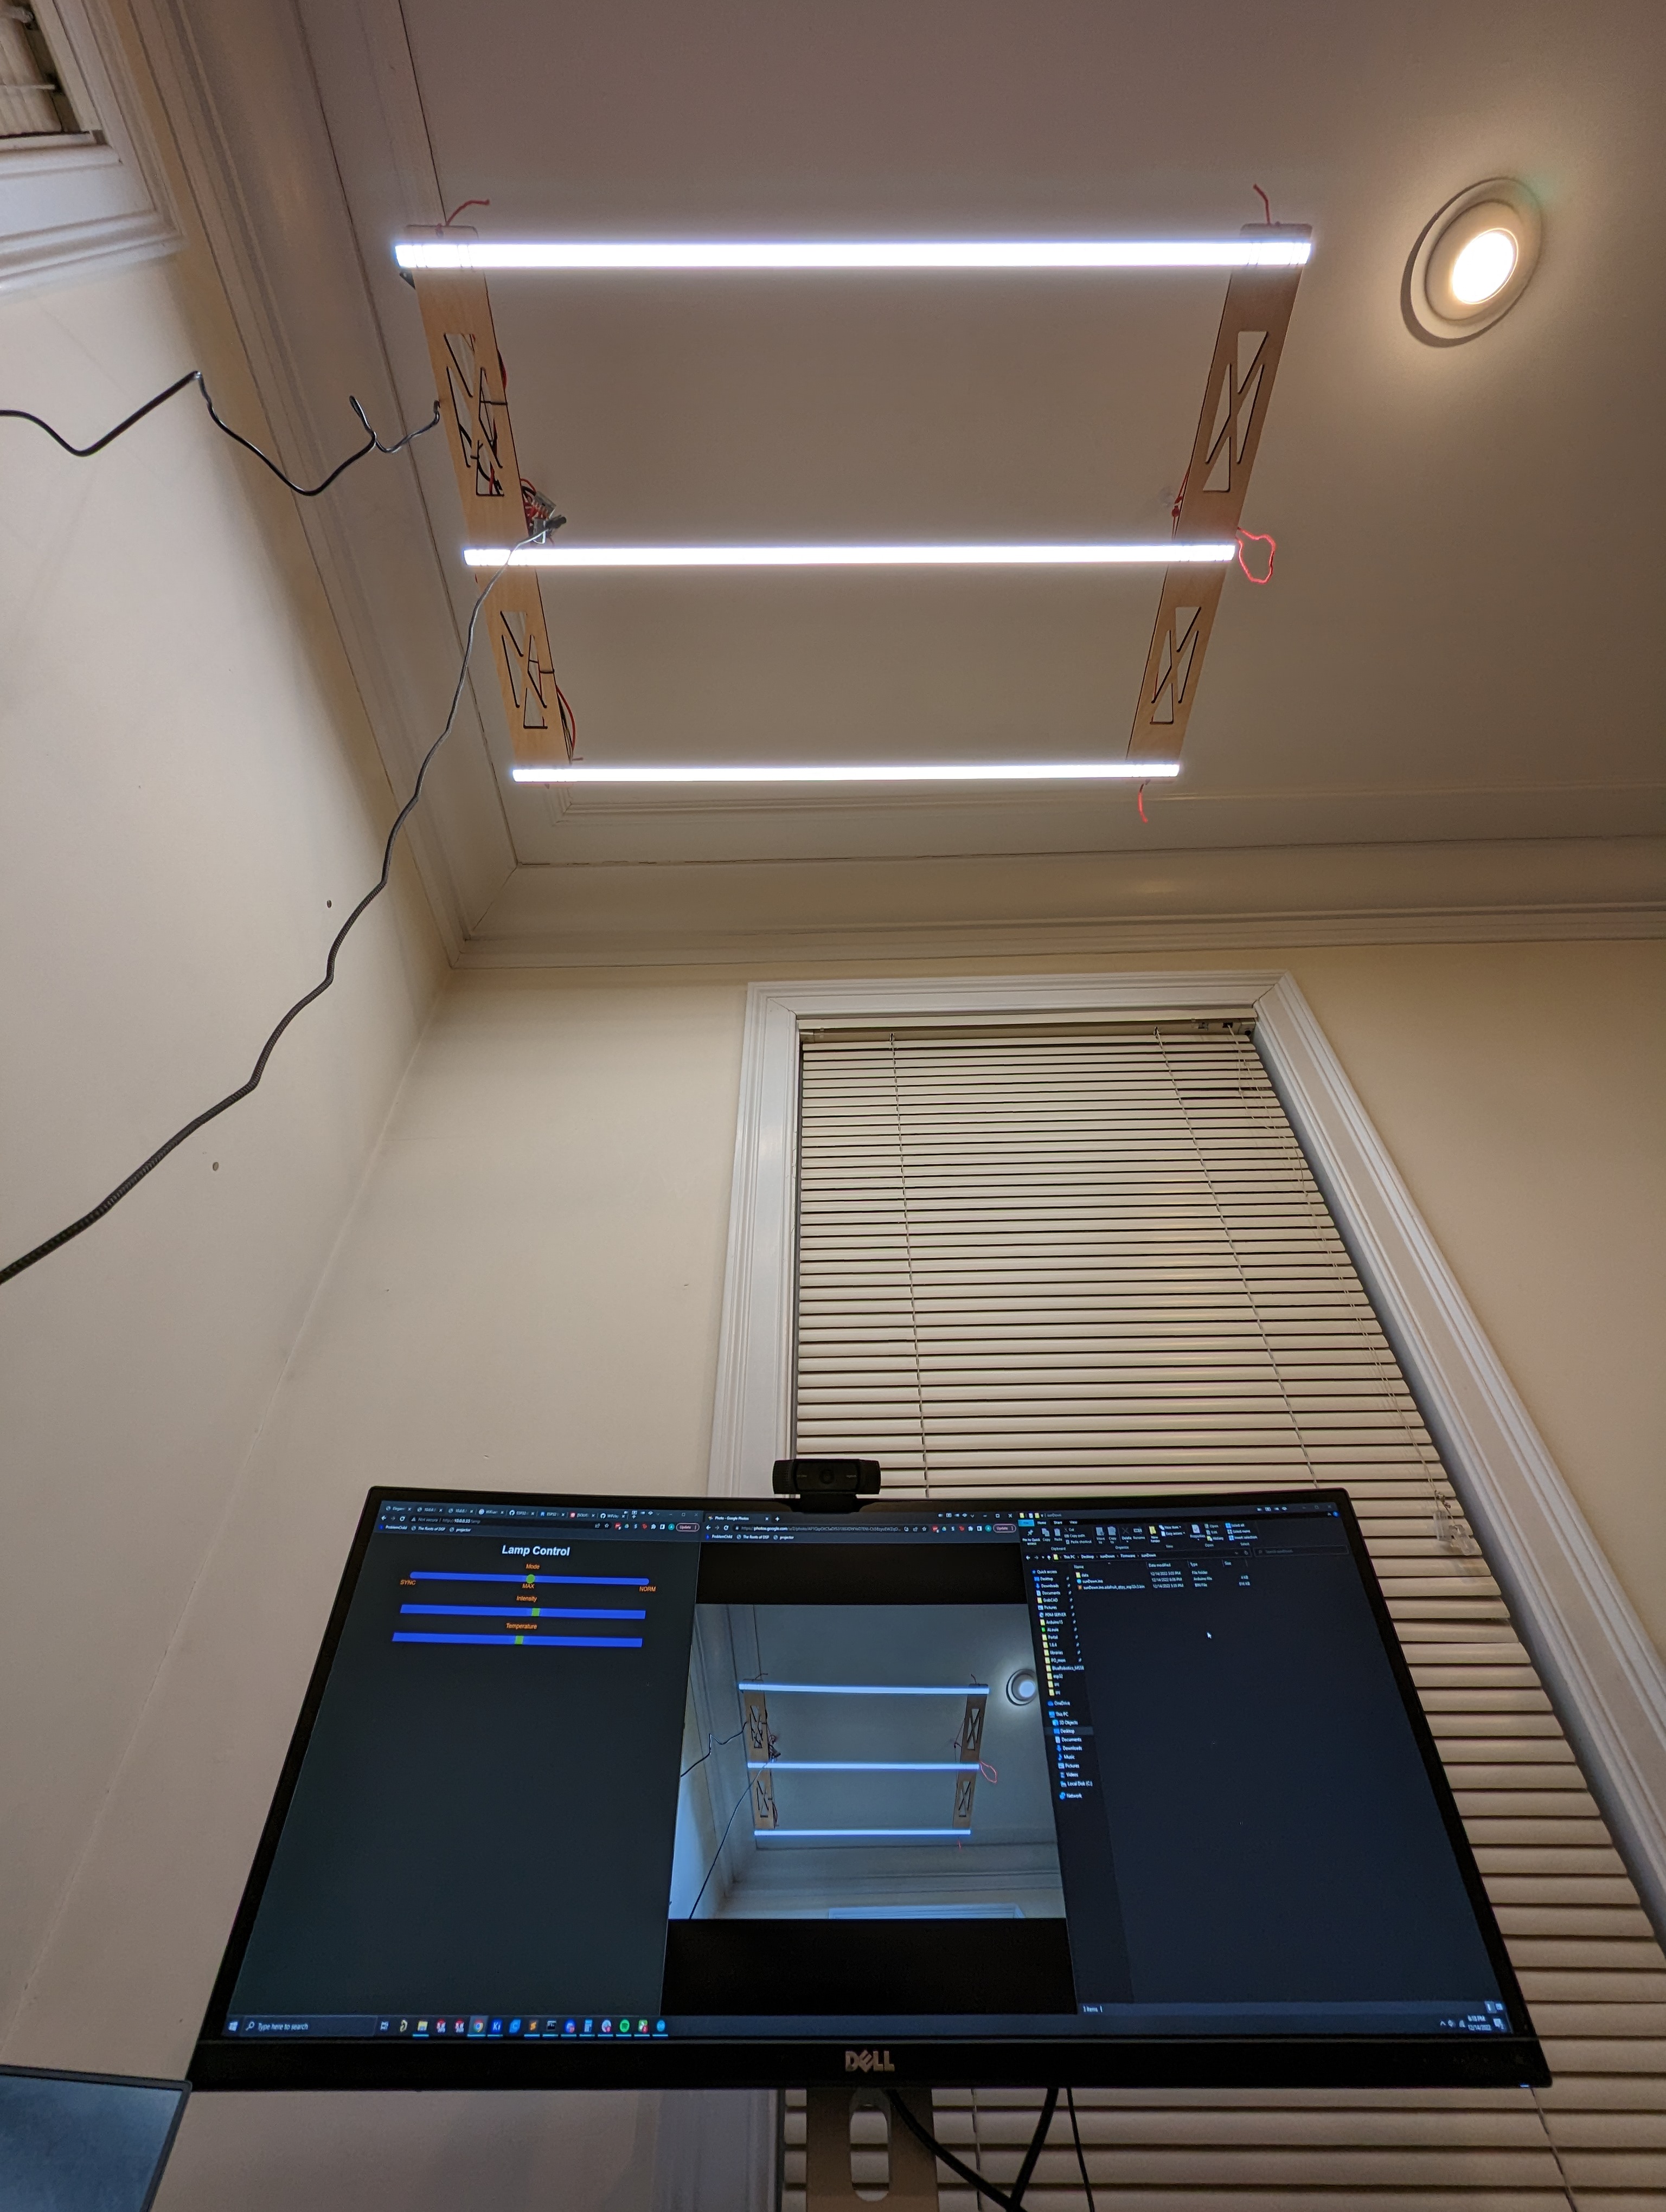
Here is the control page that the lamp serves up. It lets you choose a mode: SYNC, MAX, or NORM.
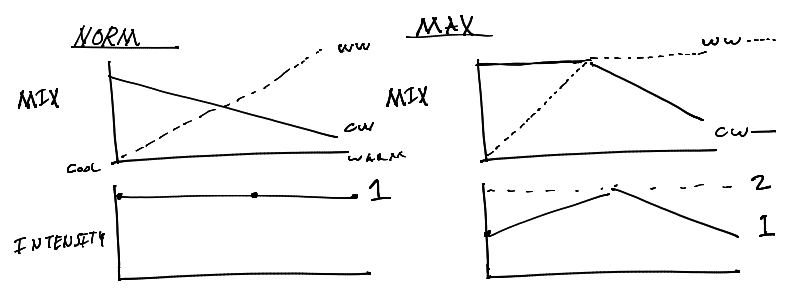
Norm is a smooth light intensity with changing color temperature- the output never exceeds the brightness of having all warm or all cool lights on, so when the temperature is “balanced” the output is 50% brightness warm, 50% brightness cool.
Max allows for the overall maximum light intensity to vary, but keeps the mix “smooth”. So at full warm, 100% intensity, the brightness of the warm strip is 100%, and at “balanced” temperature, 100% intensity, the output is 100% warm 100% cool.
SYNC will take over both intensity and temperature and to create a profile that mirrors a day, which is still TBD- to be developed. There are many ways this could be implemented, from having the lamp look up the weather/sunrise/sunset, to building a weather station, to having a server on a main home automation controller that tells the lamp what to do. Its also not totally clear to me what the ideal profile would be- for example I would like to have nice bright light, even in the early evening, so I don’t want it to totally follow the real “day” profile.
Mechanical Notes + Details
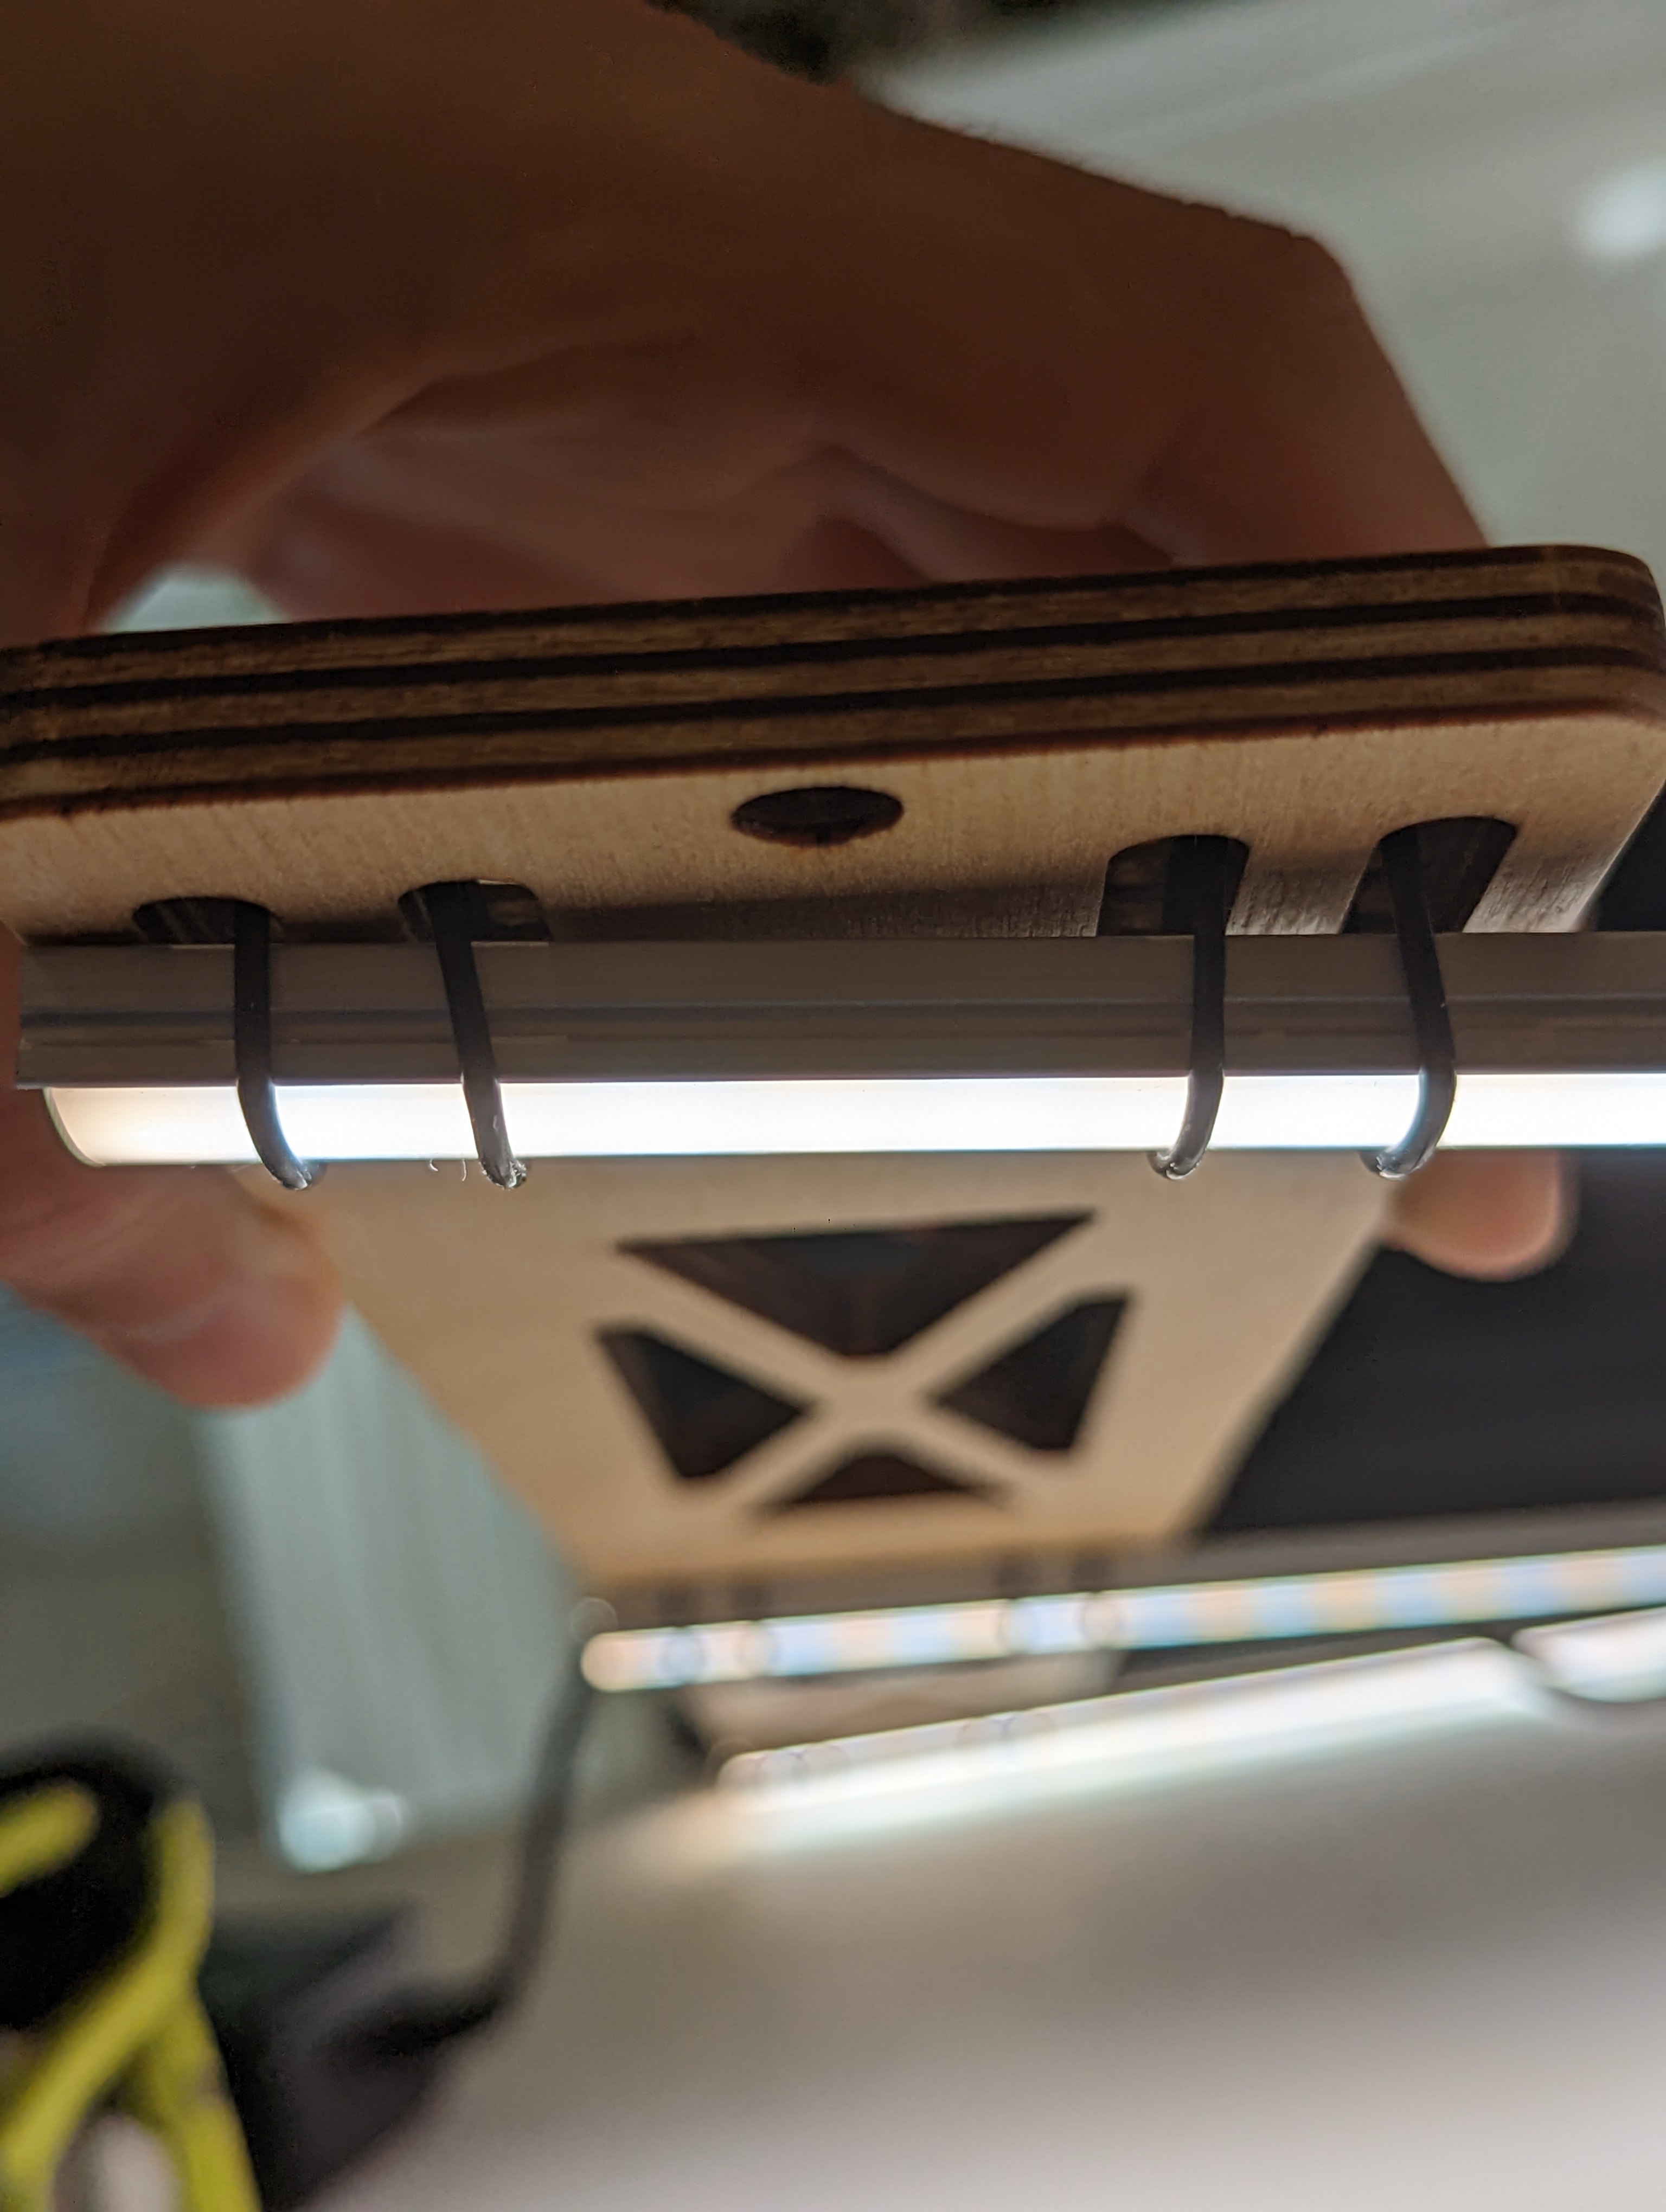
This lamp, despite not achieving one of my crazy tensegrity ideas, fancy woodworking concepts, or brass-pipe dreams, does use one of my favorite tricks: using orings as precision rubber bands. The LED channels are very thin, and therefore fairly hard to attach to with screws. They are meant to be mounted with supplied clips, but I didn’t feel great with those overhead, since they are not closed on the bottom.
Instead of clips, I used the aforementioned fancy rubber bands, with two per side (four total) per LED channel. This means that if one breaks, I will have time to notice and replace it. Since they are flexible, the overall alignment of the strips matters less and the hole placement does not need to be spot on. They are also very thin, so they don’t block light.
Another interesting fabrication note is how I removed the scorching from the laser cut cross-bars. These were completely covered in soot as-cut. Usually cleanup of parts like this is annoying and time consuming because the soot is ingrained in the plys of the wood. This means the parts need to be sanded back significantly in order to remove the soot, causing the overall shape of the part to change. In this case I had access to a media blasting cabinet- a light blast with glass media removed most of the scorched material, saving time and preserving the shape (and sanity).
Done?
This is the kind of project that could go on forever, but for now I will enjoy having a nice lamp. Here is a short list of improvements for “someday”:
- use websockets for more responsive control of the lamp
- make lamp status persistent
- find a nicer looking power supply
- add a setup page/wifi STAtion mode as a fallback in case it can’t get on the network
- finish daylight color tracking/sync mode
- redo the PCB +other components to make it less of a noodly mess
- add a display (of some sort) to show the IP address
- use the neopixel on the dev board to indicate connection status
- etc.

One thought on “Color Temperature Tunable, High-CRI LED Lamp”