
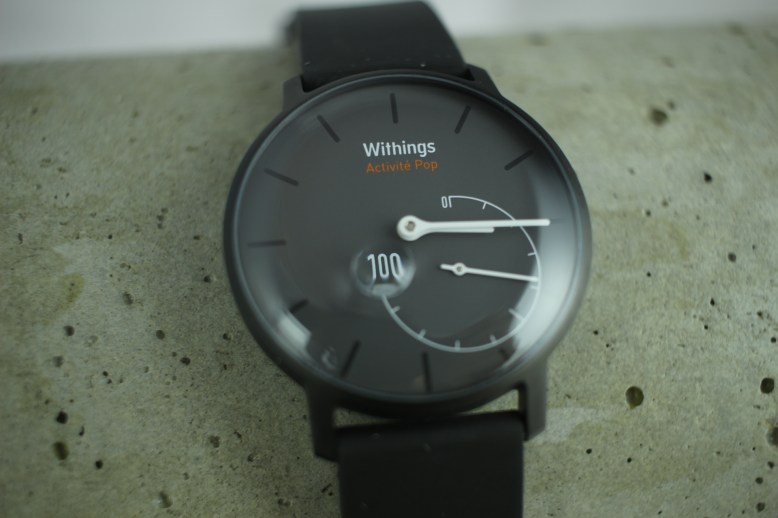
The best looking wearable I have seen, and this is the cheap version
Shockingly, nobody has taken the time to do a detailed teardown of the engineering marvel that is the Withings Activite. I snagged the “pop” version for $40 bucks on ebay and wore it for a few days before tearing it down. I noticed a couple of things in that time:
- it’s not good at measuring bouldering as activity
- the double tap function almost does not work
- the alarm seems like it works pretty well
- you cant read it in the dark, which makes it pretty useless as a watch
Now for the teardown- this will be the first of several posts. This just details actually taking the thing apart. The next two will look at the interesting electrical and mechanical aspects.
Mechanical Teardown:

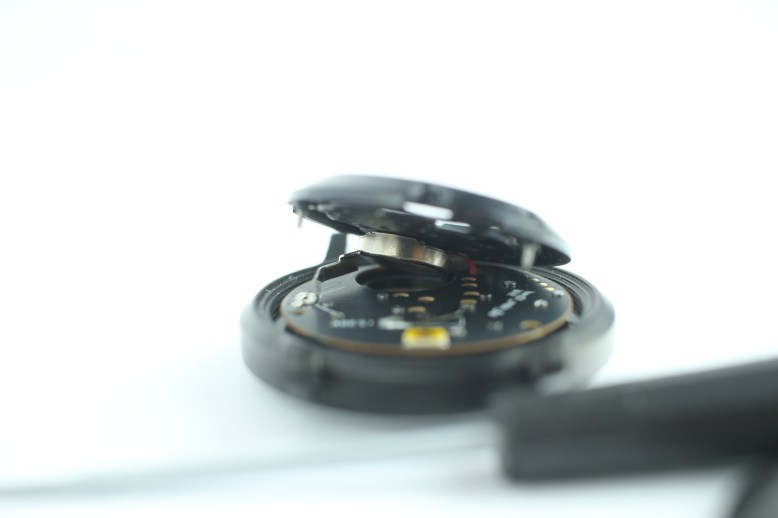
Step one is to pry off the back with a screwdriver using the small divot under the button. This is the official way to replace the battery, although withings recommends taking it to a professional screwdriver user to do this. NB if you are not going to destroy your watch, it is probably a good idea to do this with a soft, wide, rounded tool, not a random screwdriver. This will avoid marring the case. In the rear case there is a tiny spring plunger, a piece of foam to back up the battery, and an o ring.
Here you can see the back, the battery, and the watch. Note the holes on the left bottom of the watch. These cover a programming/debug header.
Once the screws are removed, the vibration motor needs to be carefully pried off of the plastic, since it is still attached to the PCB with wires.
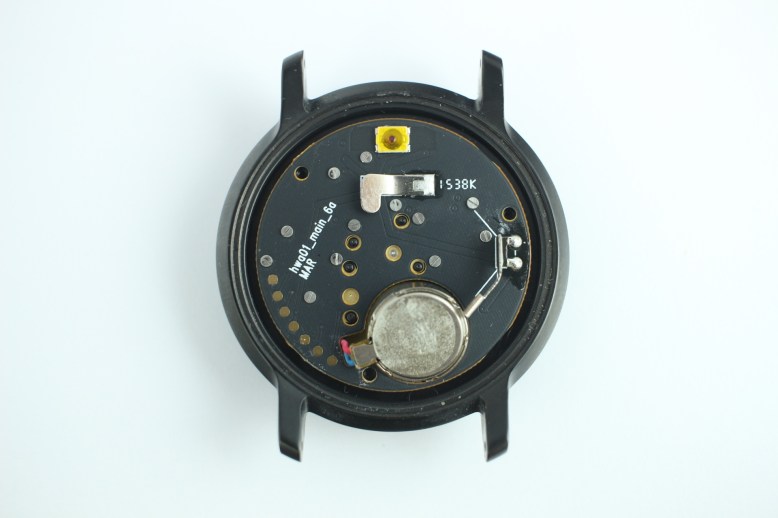
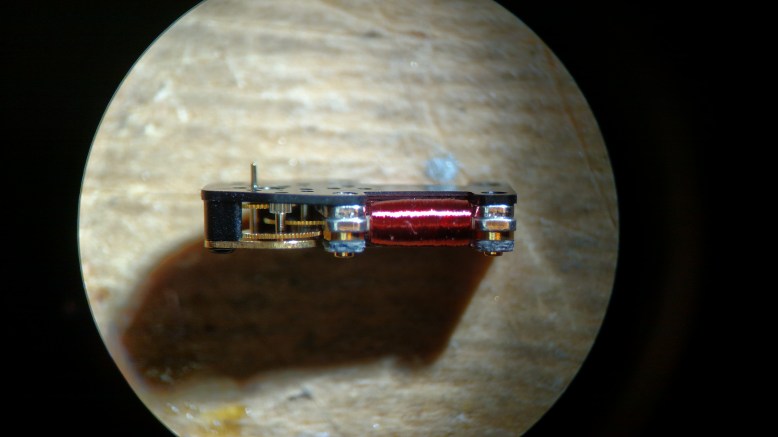
At last, the PCB is unmasked. Here you can see the vibration motor (6 o’clock), dome switch (12 o’clock, yellow), debug/programming header (6 o’clock to 9 o’clock), and battery clips. Also sprinkled throughout (and important) are a number of screw heads (silver) and test points (yellow).

With the smallest screws in the world removed, we can now separate the PCB from the movement of the watch. The V-twin in the middle is from the minute and hour hand, while the single-cylinder looking thing drives the activity meter. We can also see the front of the PCB for the first time. Interestingly, the movements are attached electrically to the thin PCB with ENIG plated pads being screwed directly to metal standoffs in the movements. Behind the movements is a piece of plastic, which serves to help orient the components and seat the vibe motor.

Here is the PCB. Major components include:
-NRF51288 Bluetooth SOC, of course. This is the WLCSP BGA version, which makes sense because much of the board is covered by the movements. (11 o’clock, rectangle)
–ADXL362 accelerometer by analog devices. A super low power accelerometer. It will be interesting to think about why they went with that over something cheaper from ST micro. (1:30, square)
-Probably an h-bridge or motor driver (4 o’clock, square)
The rest of the paraphernalia is the usual flotilla of antennas and crystals. Interestingly, there is a non-pop 8 pin device, 3 pin device, and 2 pin device. I will have to think about what those might be.
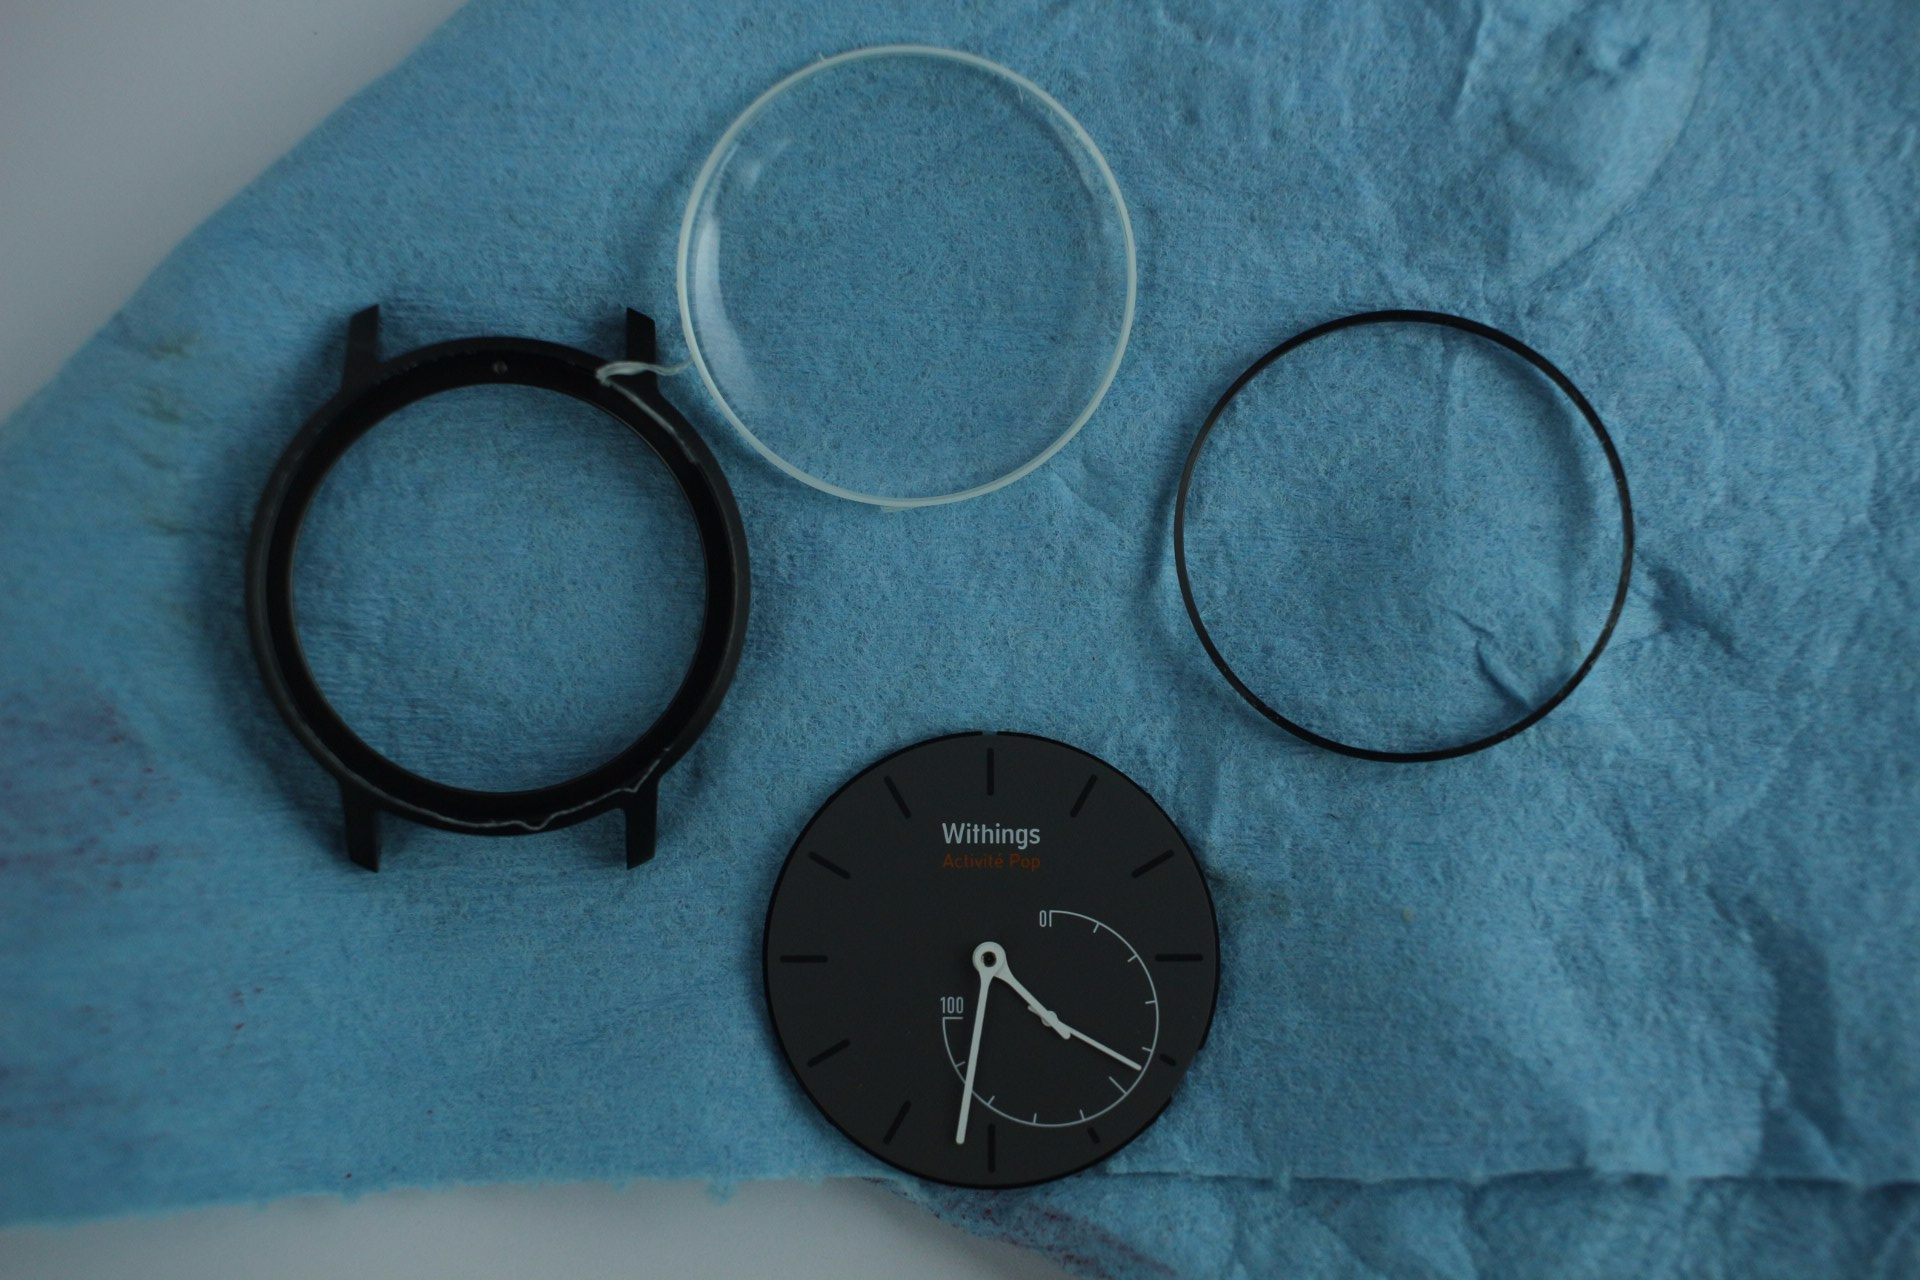 The next step of course is to remove the crystal/glass (in this case, lime glass). This is so I can take off the hands, which will let me take a closer look at the movements by detaching them from the face of the clock. I was not sure how everything was held in, but I suspected glue, since a press fit would be a bit risky (and possibly not very water tight). After evenly heating to about 275 C to soften any glue, I was able to press everything out of the front of the watch with my fingers.

At this point, the hands were still pressed onto the shafts of the movments. Like most dials, these can be removed with a careful application of tweezers as pullers near the shaft that they are pressed onto.

Here the hands are removed, the double shaft/collar of the hour/minute hand is exposed. The hour hand rides on the outer hollow shaft, and the minute hand goes on the inside. The activity hand is much smaller and brass, while the two other hands appear to be aluminum.
With the hands removed, the movements are no longer constrained to the face of the watch. Here is the top of the activity movement, showing the output shaft. Those four silver things are actually tiny machine screws.

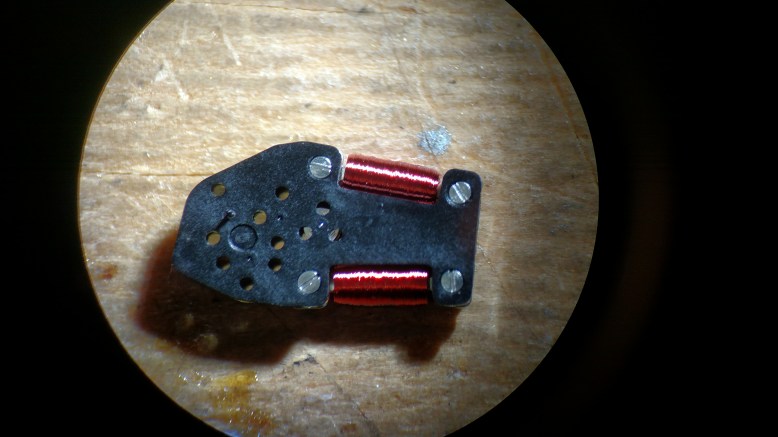
Here is the bottom of the movement. The four gold colored metal bits are threaded metal standoffs. Tiny truss head screws pull the traces on the movement into intimate contact with exposed traces on the PCB. On the reverse side of the copper-coated laminate, the two electromagnets are soldered to copper on the other side, connecting them to the PCB.
A shot from the side showing the internal gearing of the drive. The complicated stackup of fiberglass, metal, plastic and tiny gears can clearly be seen.

With the screws removed, I managed a closeup shot of the magnet that drives the mechanism.

To determine how it worked, I screwed the movement back onto the PCB and connected to the app to “set the time” which works by positioning all the hands to reference positions. This let me rotate the hand arbitrarily. By putting a very tiny dot of prussian blue on the magnet, I was able to see that it was in the same spot every other tick- in other words, the magnet rotates 180 degrees per tick.
Final Thoughts:
Most fitness trackers are a variant of a PCB in a box with some kind of typical (LCD, OLED, LED) interface. Even the iconic nike fuelband is just a cool rendition of LEDS inside of a piece of plastic. The activite is a well-crafted and very complicated departure from what I normally expect from an activity tracker. It feels a lot more sophisticated and it blends into everyday clothing compared to a colored piece of plastic with a glowing display. Since it has a primary battery, it does not even intrude in my daily thing-charging rituals. I think I understand why people would choose this over a fitbit or garmin vivo-thing.

Hi – thanks for the teardown description. I got as far as heating the case to press out the glass and face but then got stuck :(. I was hoping to remove the workings of a pop (that don’t work) and replace them with the workings of a steel (that has a broken case) thereby creating a working watch from the 2 parts of the two broken ones. Do you think this is possible?
It could be possible- the steel looks slightly larger (my coworker has one), but it would surprise me if they used a different part in there for the movement.
–A
This is a great instruction for those who need to replace the broken glass. My only question is when you said heating it up to 275 C, do you really mean 275 F? As far as I know, most solders used for PCB will melt at around 200 C so I am afraid the high temperature could damage the PCB.
I have a Activite Pop with a broken glass I intent to replace.
Hey Lejaune. The readout on my heat gun is in C, so I do mean 275C. However, this is certainly quite high, and it could damage the pcb. I can’t remember 100%, but I think the pcb was removed when I heated it up. I also don’t think the case actually reached 275C- I probably would have burned myself if that were the case. If you wanted to soak it in an oven of some kind, I’d recommend starting closer to 100C.
Good luck! Let me know how it goes.
Thanks for the quick reply. Yes, in your description, the PCB was removed prior. I do have a temperature controlled heating plate that I may use and I will start with lower temperature. I also have a watch press with various size cup attachments that can supposedly press out the glass, and in this case it would be the movement, watch face and the glass all together. I’ll put in the order for the new glass.