
The Olympus XA with several panels removed
I have been shooting the olympus XA recently, and it is a wonderful camera. It is small enough to fit in my the pocket of my jeans, but it makes nice big pictures with its fast f/2.8 lens. When shooting, all the important controls are at your fingertips. Some would say, given that it has a full-on rangefinder, that it is the poor mans leica. Having never tested a Leica, I wouldn’t know.
However, it does have a few niggling issues. There is no bulb mode, which makes taking more than 10 second exposures impossible. There is also no remote release, which means that when I put it on my pocket tripod I can still get shutter shake, and I have to run into the frame if I am taking a group shot with people. A remote release adds a lot of hackability, like triggering on motion, or at a particular time of day. It would also make it possible to use the +1.5ev setting with a timer. Some people also complain about focusing with the small rangefinder patch, but it is less of a big deal to me.
Finally, there are no filters available for it. Now I didn’t realize how important this was until I took some pictures in my suite. They are a horrible greenish color- and filters could help with this, except that there aren’t any.
In order to figure out the feasibility of hacking on some of these missing features, I found a donor camera to take apart. It seems to be plagued by the mysterious and dreaded lens fungus, so I decided that since I couldn’t sell it, it would be donating its body to science.
If you are going to attempt this, I suggest grabbing a copy of the repair manual found here. It does an ok job explaining the teardown, but real photos and notes are definitely useful. It goes without saying (but I will anyway) that if you are going to do this, you are responsible for whatever damage happens to your camera. That being said, it is an amazing piece of mechanical engineering.

The first part to go (and the last one back on) is the base plate. It is attached to the bottom by five screws- three shorter ones on the right of the picture, and two longer ones on the left. One of the longer screws is hiding under the options lever in the upper left part of the camera.

If you pull up on the bottom cover, it should come off. This is the inside of the cover. The only thing that might stick is the selection lever- but there is no firm mechanical connection there.

Here is the inside of the bottom of the camera. It already looks pretty exciting! If you are having battery/power/self check problems, this is a good way to take a really good look at the battery holder and test for (or clean out) any corrosion.
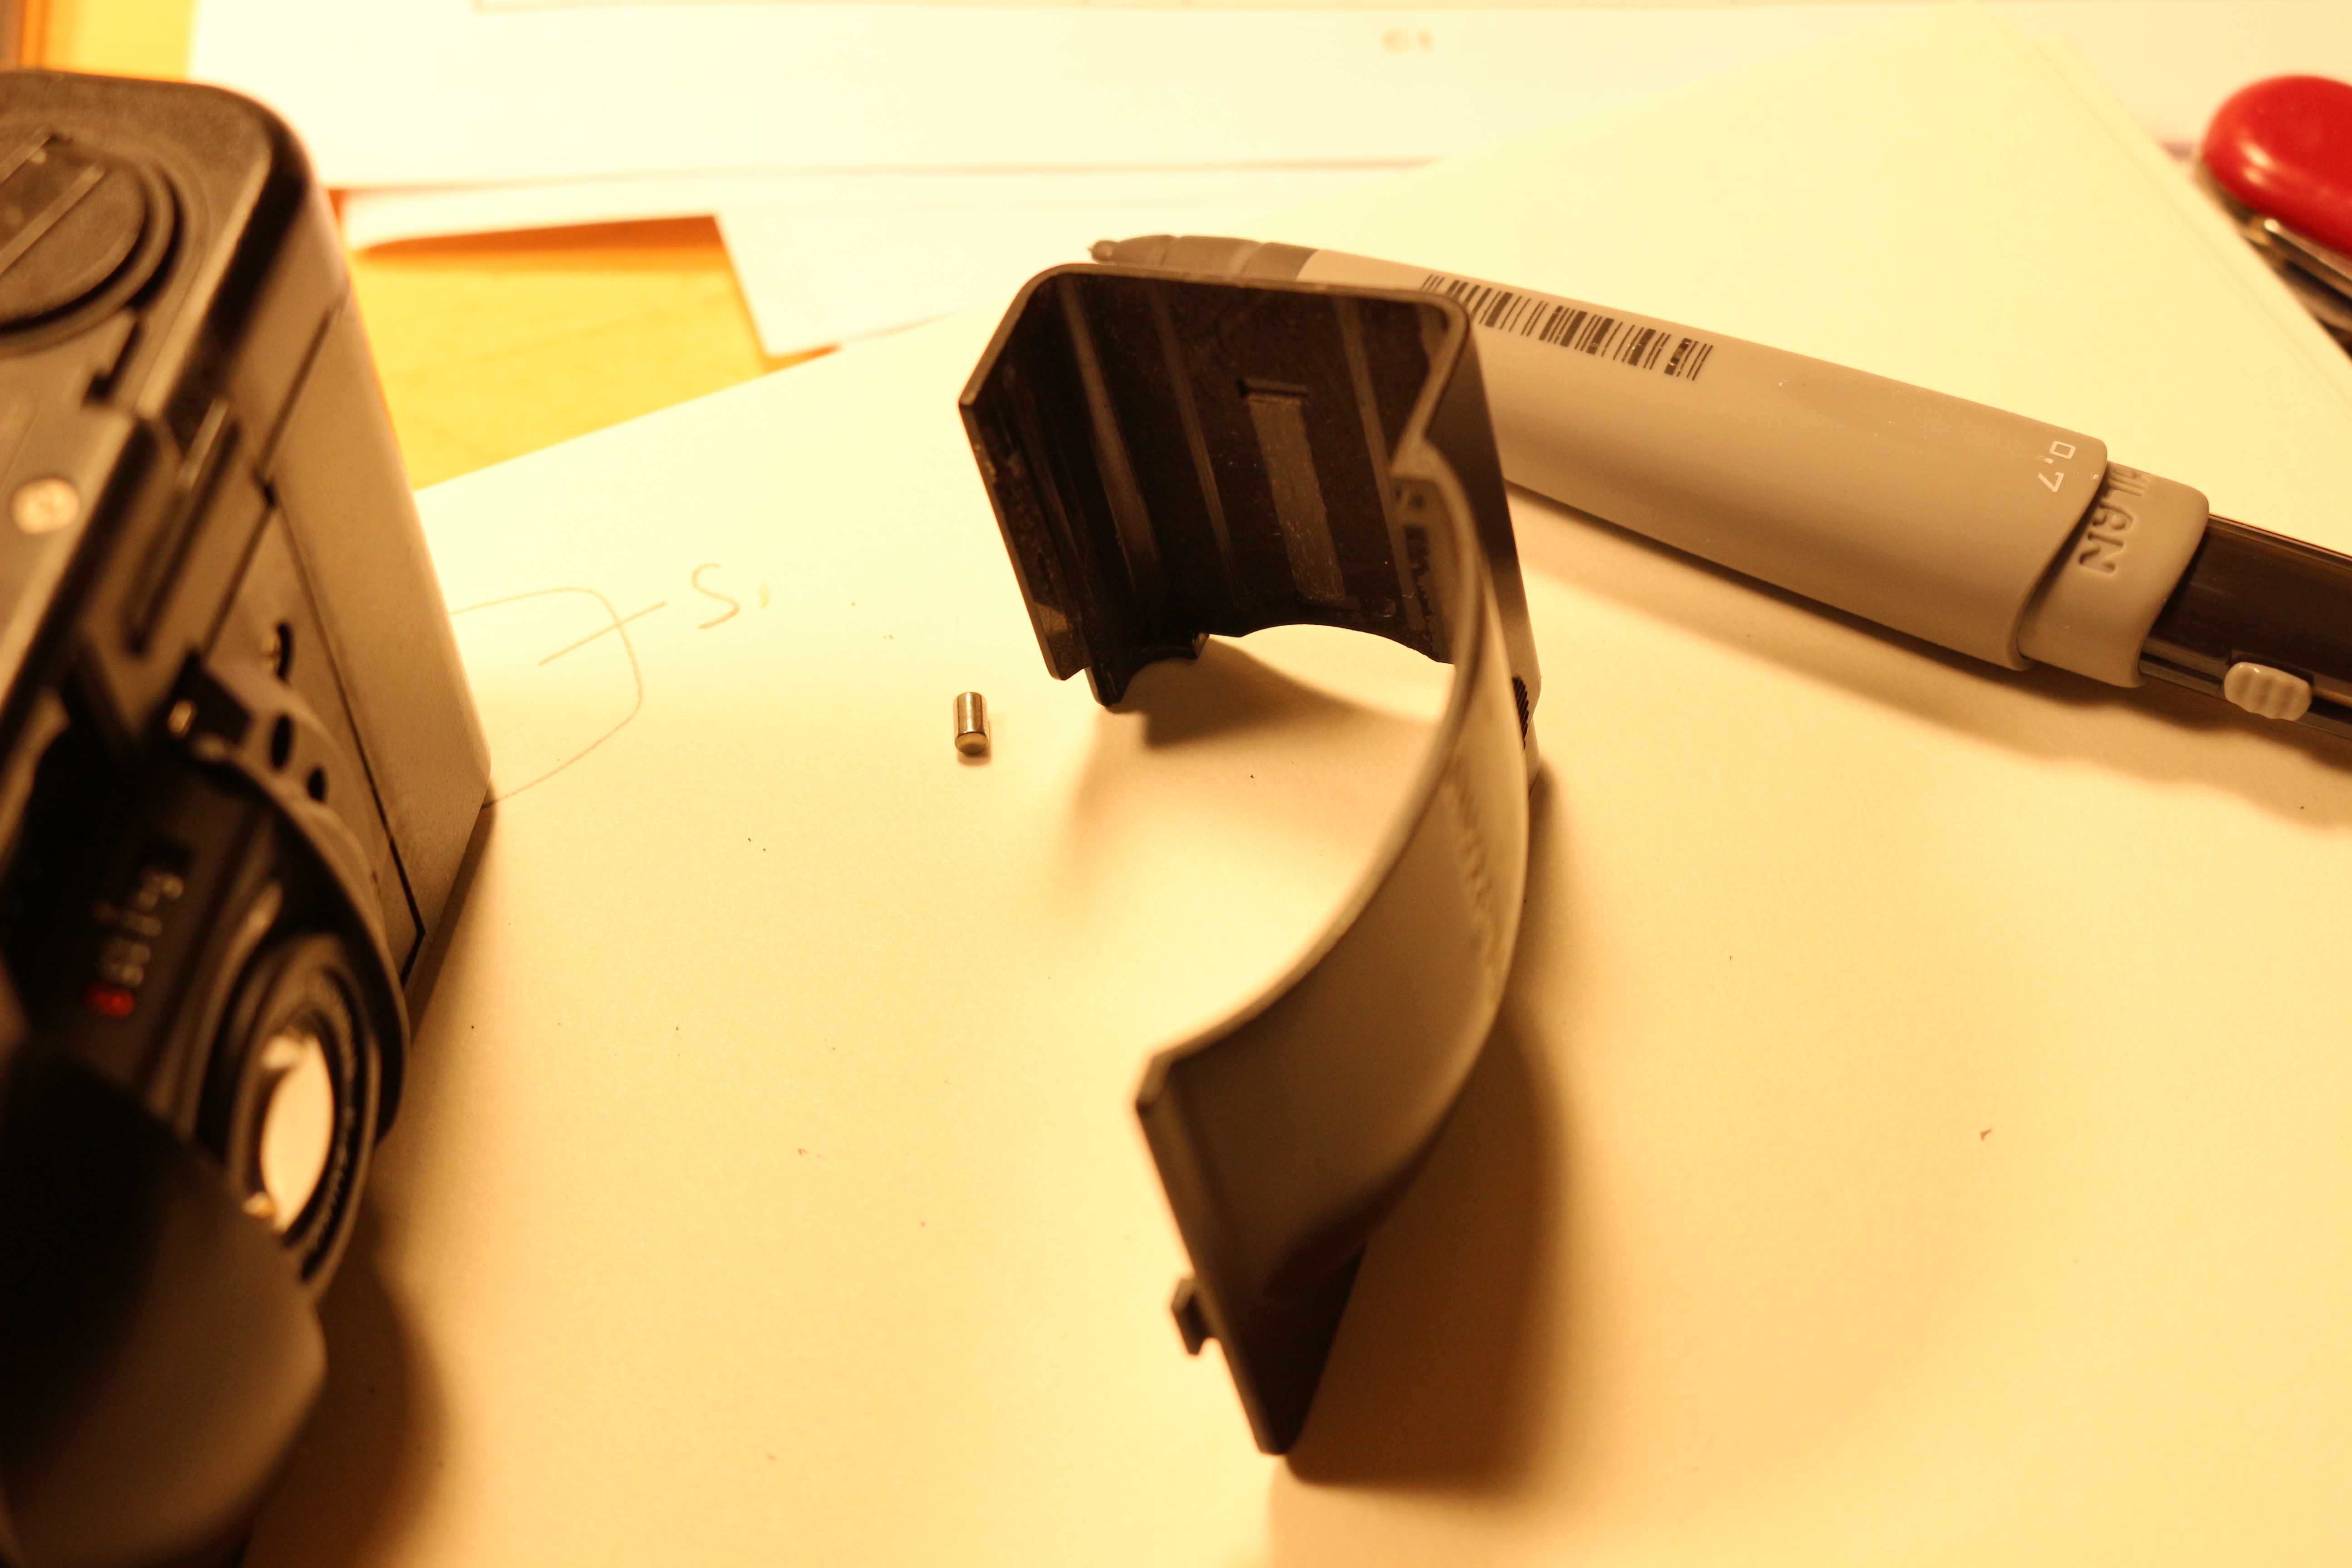
A groove in the bottom plate holds the sliding door on, via the hook you can see at the bottom of the cover in this photo. Once the bottom is gone, the sliding door can be removed by gently prying the bottom part of the door upwards. It should pop right out, but be careful not to let the tiny roller bearing escape (and it will).
The next step is to remove the rewind lever. This is pretty simple- just unscrew the bolt right in the middle.

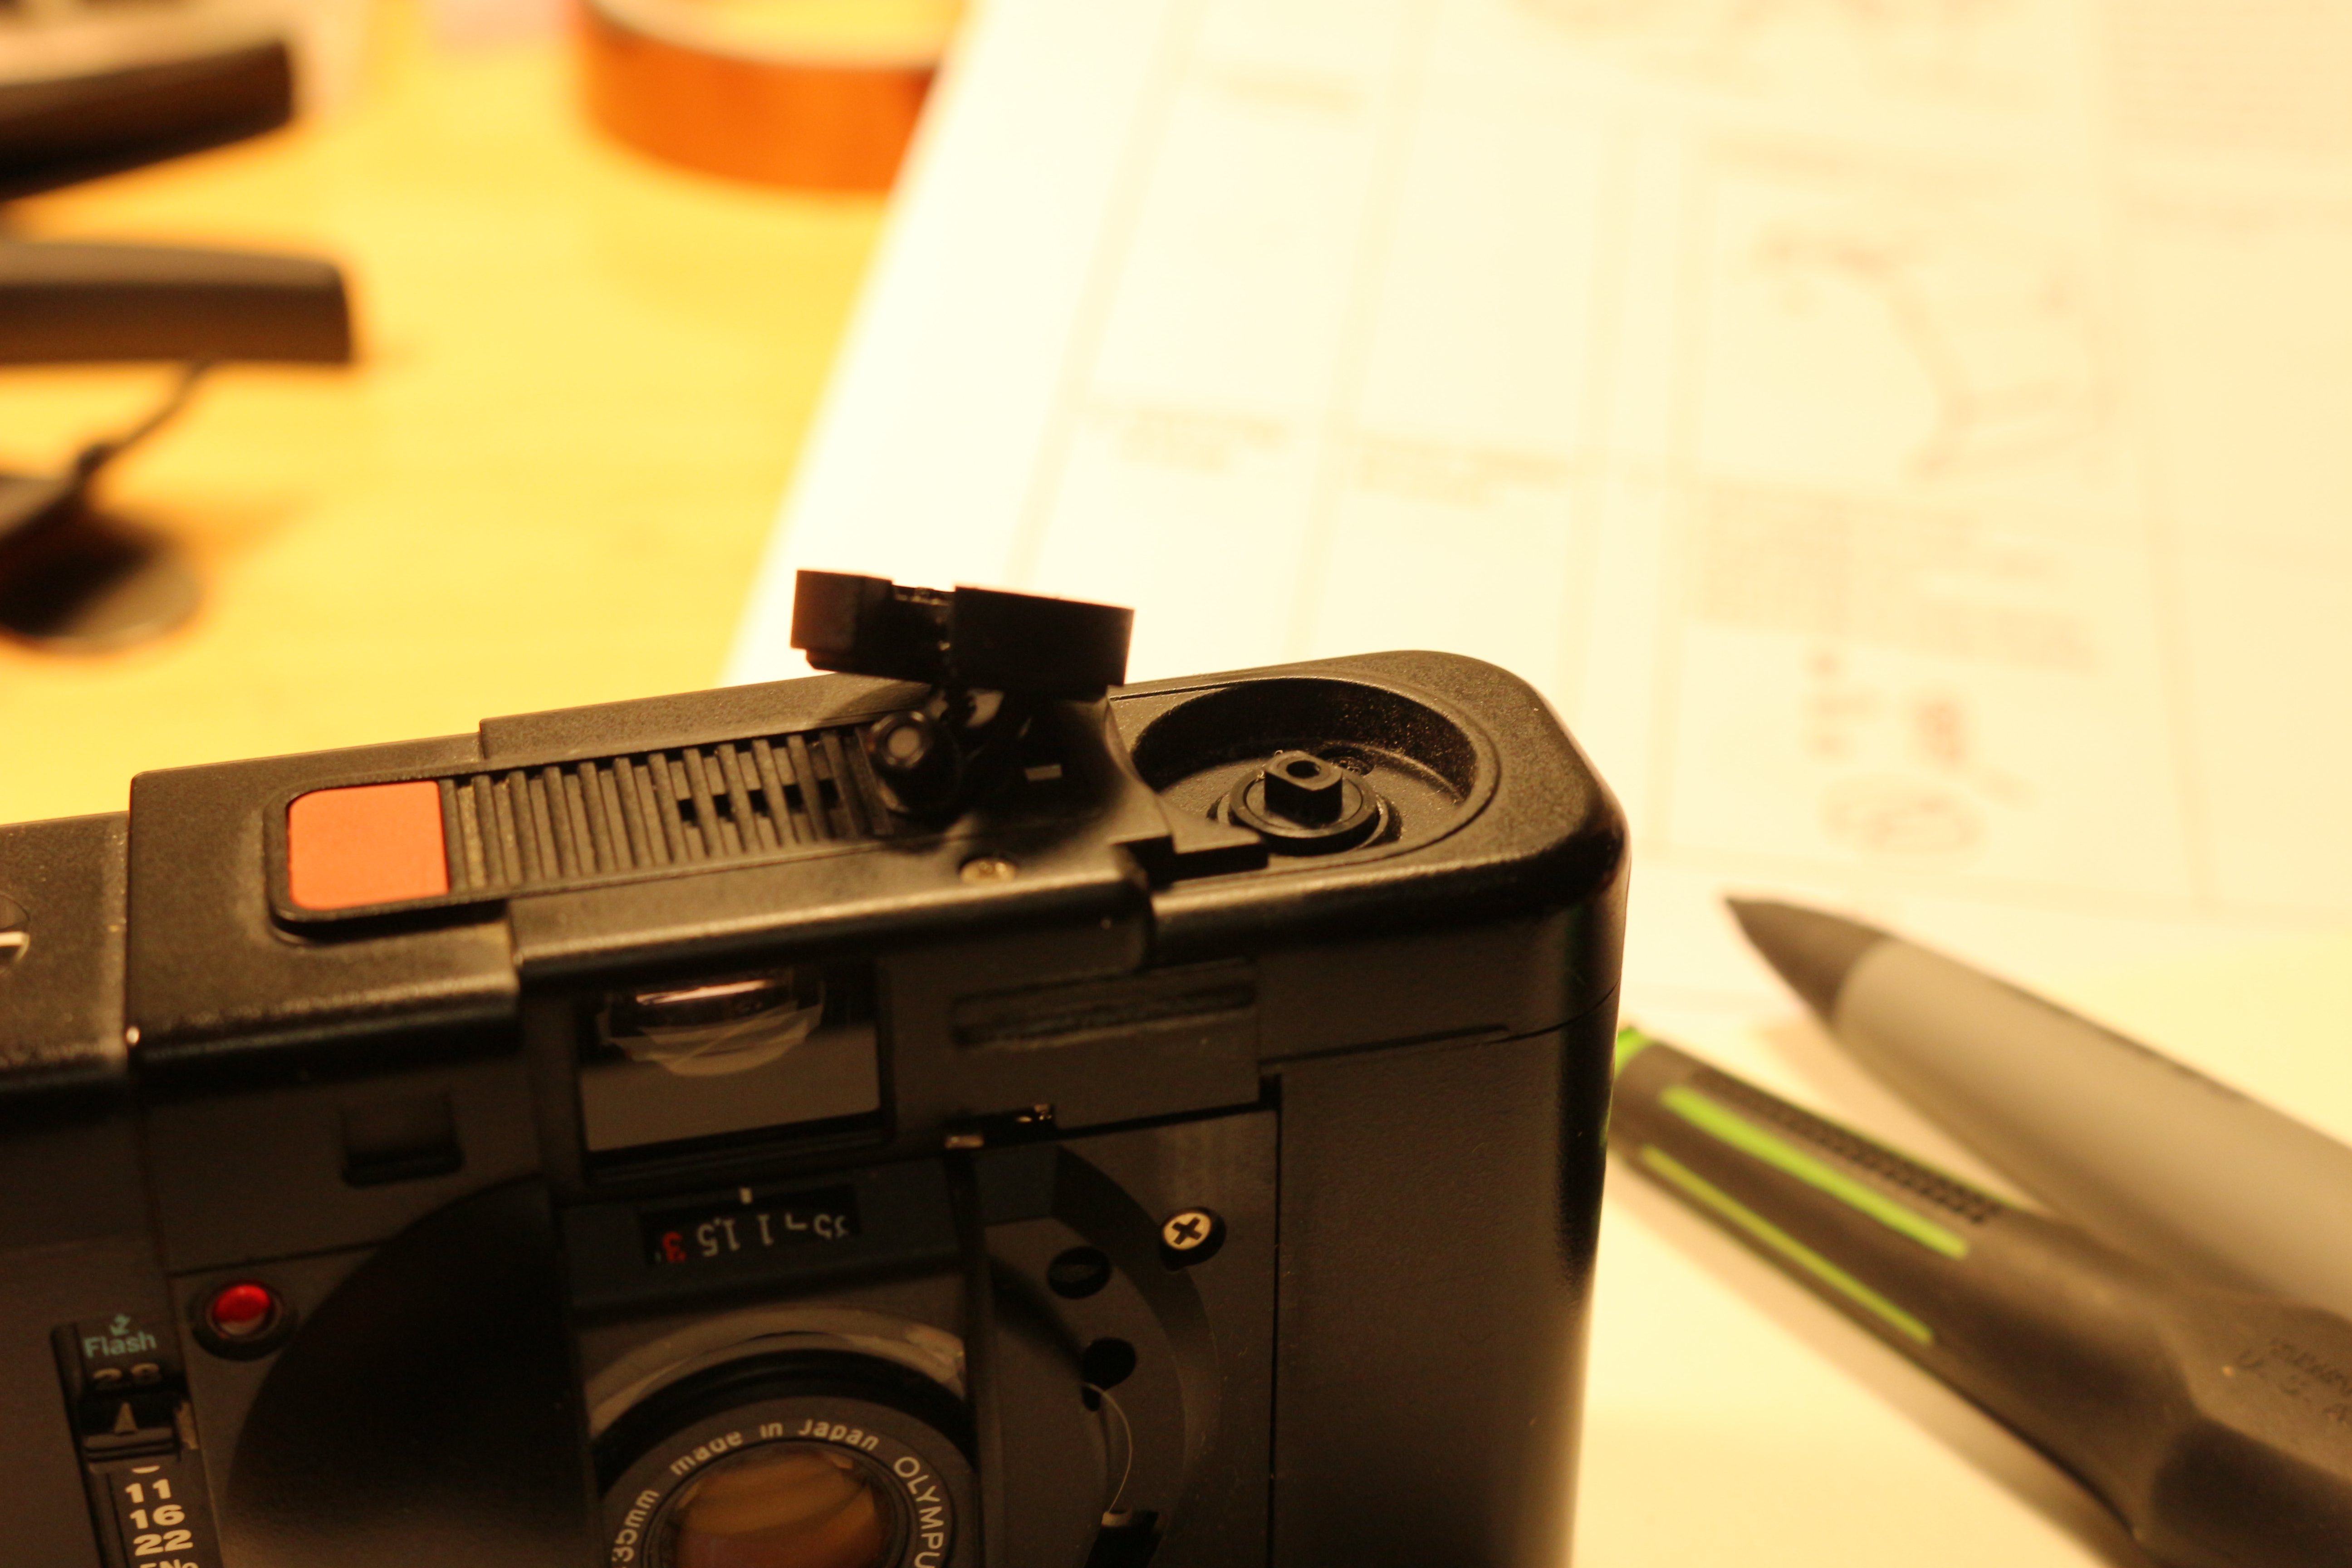
Next is the top. The first thing to do is to carefully pry up the iconic red shutter release. It is fastened to the camera via some kind of glue. With that removed, the only things keeping the top on are two more screws in the well of the rewind lever and a conspicuous screw next to the rangefinder window (on the back side of the camera).
The Olympus XA with several panels removed
The next thing to go is the front panel. A few obvious screws hold it in. This gives you access to the front of the lens and the CdS cells that control exposure, but I didn’t need to tear into it further because it turns out that the front plastic on the lens is threaded onto the brass that holds the front element! Score, if I want to add a filter. Could turn a metal adapter to replace the plastic that would mate with a filter. The only complication would be adding ev compensation to the meter, without using the 1.5 ev lever. I wouldn’t want to use the lever because then I would loose some flexibility if shooting with a filter.

Reassembly is pretty straightforward, except for the shutter release button. The shutter release it both loved and hated by the users of the camera- it is oh-so-sensitive, but it also wears out and is not very tactile- it is a lot closer to a membrane switch than a modern DSLR release. Personally, I like it, and when I took the camera apart I decided not to just superglue it in. Instead I used the large mating surface of the shutter release and the button face to put on more adhesive than was originally used, but at a lower strength. Hopefully this allows me to take the button out more easily next time.

I have been reading this page with interest and also as a guide to getting the XA shutter to work. In my case it seems that the shutter button spring is deformed and pretty useless. I have been wondering about a hack that would involve replacing the original shutter button assembly with a modern momentary electronic switch with the original XA red button simply glued on to the new switch. Just wondering? Effectively, the original XA switch is an electronic momentary switch.
You could do it, but it might mess with the shutter cover. I would also check out the XA repair manual, which has wiring diagrams.
–A
VERY interesting article! I bought my XA new in the early 80s, but haven’t used it much since entering the digital world. It still fascinates me, though. Mine still works quite well, except the rangefinder patch is very dim. Is there a way to darken or improve the contrast of the RF patch?
There sure are- the #1 way is to take off the top piece of plastic and veeerrry gently clean the RF optics, especially the window that goes to the mirror. Despite the cover, I have discovered that crud tends to build up in there and it really dims the RF image. The other thing that some folks do is put a dark dot (from a marker or something) on the main RF window above the lens- this blocks the light coming into it and makes the image from the focusing mirror look brighter. unfortunately, this means you have to use lines matching on the edges of the dot to focus.
If you use it enough, you will get good at zone focusing. I leave mine at 8′ focus and F5.6 and most everything ends up “in focus”, for some value of in focus. The dial is super handy for this. Combined with the simple “on” switch of the dust barrier, it is an awesome and hassle free camera.
–A
That was handy. I dropped mine while on holiday and had to learn how to pop the cover back on the hard way – good job I picked up the little roller bearing! After carefully putting the shutter button into a film canister I carefully threw the canister away when I got home, so if anyone has a spare XA shutter button, that would be fab (the camera works without it, but the press is awkward).
One thing, though. The bottom plate on mine has (from right to left, as in your photo) two short screws and then three long ones. Also, to get the top off I had to unscrew a little silver screw next to the shutter button, inside the shutter button housing. In your photo that seems to stay in place, so perhaps the XA was revised slightly.
And when I put the base back on, I had to twiddle the self-timer lever until it was in the same position it had been when I opened it. Otherwise the base doesn’t fit snugly. The XA1 had an ordinary shutter button, it’s one of the few things that the XA1 has going for it.
It’s odd seeing all those gears and wires. I always assumed that XA-era cameras just had a circuit board and a couple of chips, but it must have been one of the last analogue-mechanical compacts (the Stylus has a big PCB).
One thing worth adding is that one of the screws for the front plate is actually inside the film compartment, behind the takeup spool.
Excellent description and photos, a very good help. However, before I start, exactly where does the small roller you mentioned belong if it does fall out. Mine also has problem with advance lever not moving and shutter button not operating. Have repaired many cameras, but this is my first XA-2
The roller lives under the sliding cover (aka dust barrier). Good luck! Let me know how it turns out!
I’d love to get some advice regarding my XA , which seems to have jambed right after I pushed the shutter release when there w e no batteries in it. Is there someone who knows about these things I can caonnect with?
Ian
I don’t know anyone, best of luck getting it fixed!
For a shutter release for longer exposures, have you considered trying a rubberband with a bead on it? You can just push the bead over the button and then hands off. (I have not tired this myself on the XA as mine does not work. (yet)
I had not thought of it! I am not sure if it would work, but my guess is that it is unlikely- the xa has auto exposure, even if you hold the shutter down. One way to trick it into a longer exposure is to shade or cover the light sensor located above the lens. You can do this with your hand/sunglasses/filter.
Hey mister. Thanks for the article.
What do you know about film door replacement? The door on one of my XAs is dented to to an automobile accident(!) which we both survived, and now it puts undue pressure on film transport and leaks light slightly.
I have a parts XA1 here, and the rear door appears to be identical, but I can figure out if I can somehow tap out the hinge pin (and hopefully without a comprehensive teardown), or if the hinge pin is attached to the film door.
Any ideas?
Hey Jonathan, I just took a look at my XA and it looks like if you take off the bottom plate the pin in the hinge might come out. Glad to hear you and your camera are OK!
My XA has a focusing problem. It appears the fork that moves the focus ring has popped off to the side. How do you get the front panel off? It moves around freely but will not disconnect from the left side (facing the camera).
Any idea how to unbugger the frame counter? I took the top off with these helpful instructions and was able to retrieve what I think are the parts that go beneath the roller latch (mine is gone, after an earlier investigation (not me)). But now the frame counter doesn’t reset to S or advance at all. I have another XA2 I could cannabalize but it’s actually in better nick than this one, as all it has is the stuck frame counter (on S). My XA has that same problem so I fix it on this, I may attempt the same on the XA.
I’m really not sure- I recommend taking a look and seeing if you can find some kind of catch or something on one of the gear things stuck to the counter wheel. It might be related to the door open button on the bottom or possibly a plunger inside the door.
Sounds like the right idea. But it will wait until my reserves of patience are refilled. I need to be more wary of springs, for sure. I bet that’s what gone wrong here. There are good exploded view manuals available (I can’t get to the one our host shared above, for some reason) so that should help. Failing that, I can send it off to one of few remaining repair shops.
I came across this most instructional piece purely by chance. Nothing wrong with my much-loved, very sentimental Olympus XA, purchased in April of 1982 and still working. It was my very first camera stepping up from a Kodak 127 Instamatic. Never been dropped. Never been exposed to nasties (sea water, rain, sand, high humidity). Looks cute sitting beside an evern older Pentax 67!!
You mention that the XA has no Bulb Mode. Actually, it does have one. To get the “Bulb” setting: Set the Option switch to “Check” depress shutter button. Shutter remains open until you close the Option switch.