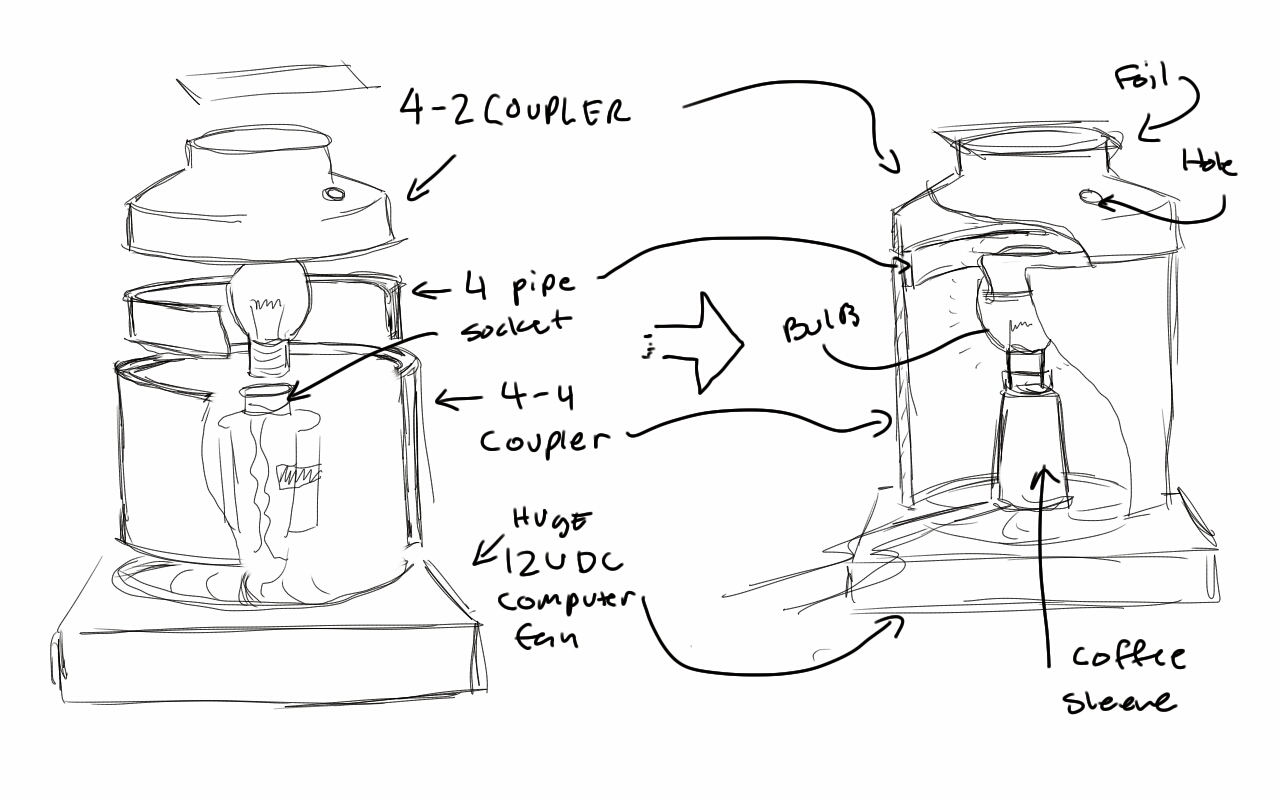
Exploded/Cross sectioned view of Lightbulb PCR Machine
If you really really want to use the lightbulb PCR machine, here are a few tips:
Note the plug
It is a good idea to add a small ball of wax or a drop (20ul) of mineral oil to your reaction. This will form a plug/barrier so that your reaction cant evaporate and condense all over your tube. There is no heated lid here! Watch out if you use oil because it will solidify into a plug in your tube if you don’t pipette the sample out withing a minute or so of the final extension.
It is a good idea to add a few (10-20) seconds to each PCR step to allow your sample tube to get to the same temperature as the sensor. The reaction is almost definitely larger in thermal mass than the sensor, so it will take longer to get to the correct temperature. To help this, use the smaller .5ml thin-walled tubes.

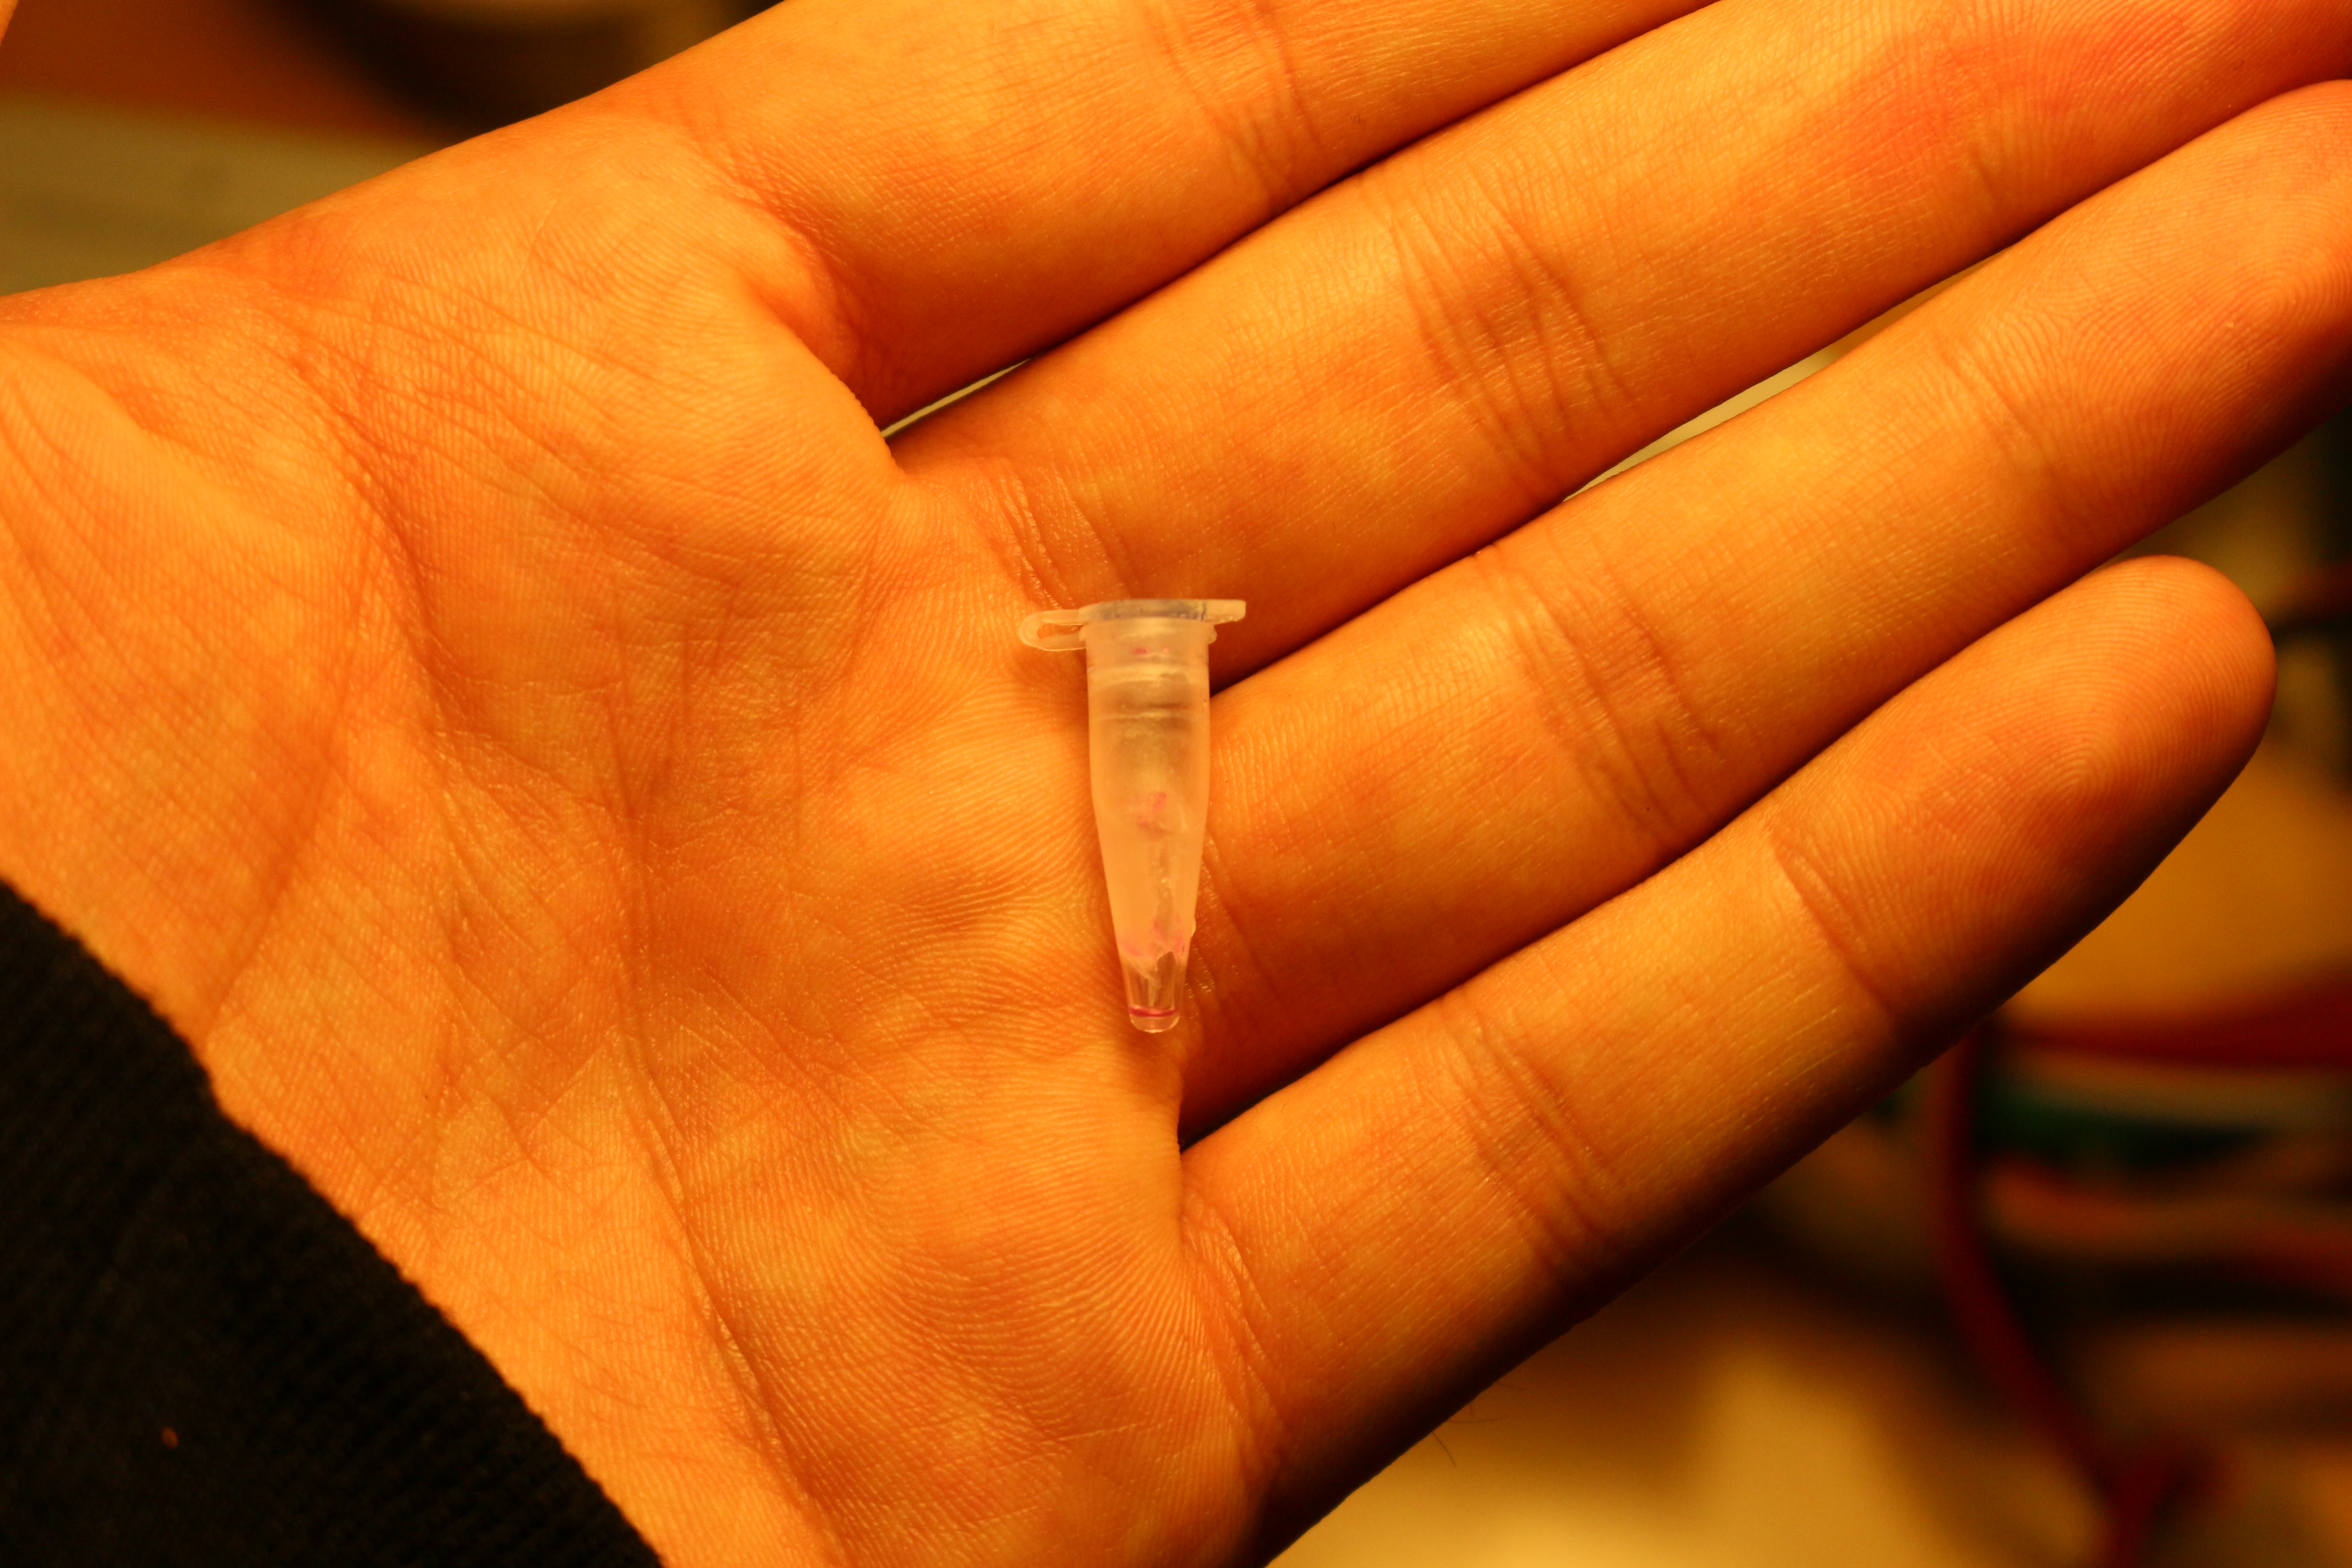
The proper way to mount samples is by taping them inside the taper of the 2-4 coupler, as seen here. The sensor should be taped nearby.
And dont forget to modify the parameters of your reaction per the instructions in the code section of the documentation (previous post)!
