GelIS Design Thoughts: Cutting Costs

Right now I estimate that the cost breakdown of the box looks something like this:

  • $50 electronics
  • $7 in 1/8″ plastic
  • $4.75 in 1/2″ plastic
  • $10 nuts bolts etc
  • $24 for 12 minutes of laser time, which is currently $2 a minute

This comes out to a total cost, not including my time, of about $100.  This is Kind Of A Bad Thing.  I want to reduce cost, and in to do this, I am going to break the items up into three ways to cut costs.  First are things that can be sourced better, like finding cheaper electronics, or finding a cheaper plastic vendor. The design might have to take into account slightly differently shaped parts, but there is not much I can do to the design to reduce cost here.  The second category are things that can be reduced- using less of something or packing it in on a cut sheet tighter (using sheets of plastic more efficiently) reduces cost.  The third category is reduced labor and time cost, particularly laser time.  A forth category are things I am not willing to compromise on, so I didn’t include it in the enumeration of things I can do.  An example of this are the nylon fasteners in the design- I love them, and they are not going anywhere.

The first category is pretty handily fixed by doing an extensive web search.  I have already started this endeavor and I have ordered a few parts to see if they are high enough quality to use in the box.  If I am successful, I can halve the electronics cost, bringing it down to about $25.

The second and third categories are really important to me, as a designer.  It is my responsibility to reduce the amount of stuff that is used in the box, and make sure it packs nice and tight on the cutsheet.  This means I need to take a hard look at what parts can be made to “stack” better on the cutsheet, and how to cut material out of the box.  However, With the current design it is almost impossible to take anything more out.  Most of the usage of plastic is in the walls, which can’t change in size- they have to fit the power supplies, the meters, and the gel box, and if it was made any smaller it wouldn’t do that.  I have thought of alternate packing configurations, but most of them are somewhat sketchy.

That leaves the cost cutting to reducing manufacturing costs, specifically at the laser cutter.  The thing that needs to be changed is the gel box itself.  If you look at the breakdown of laser time, it looks like this:

  • 5.5 minutes for the tray wall and floor, sometimes requiring a second pass of at least1 minute
  • 1 minute for the transluminator
  • 5.5 minutes for the box parts
  • .5 minutes for the dams

That means in plastic cost, the WHOLE BOX including laser time is about $17.  Just the gel tray costs $15.5.  The gel tray also requires a post-processing step that has to be done on a drill press, which is a no-go if I want to make more than one or two (or 10.  I could drill 10) of these.  Given that the box itself is pretty much maxed out, it looks like I am going to have to milk the gel tray for some savings.
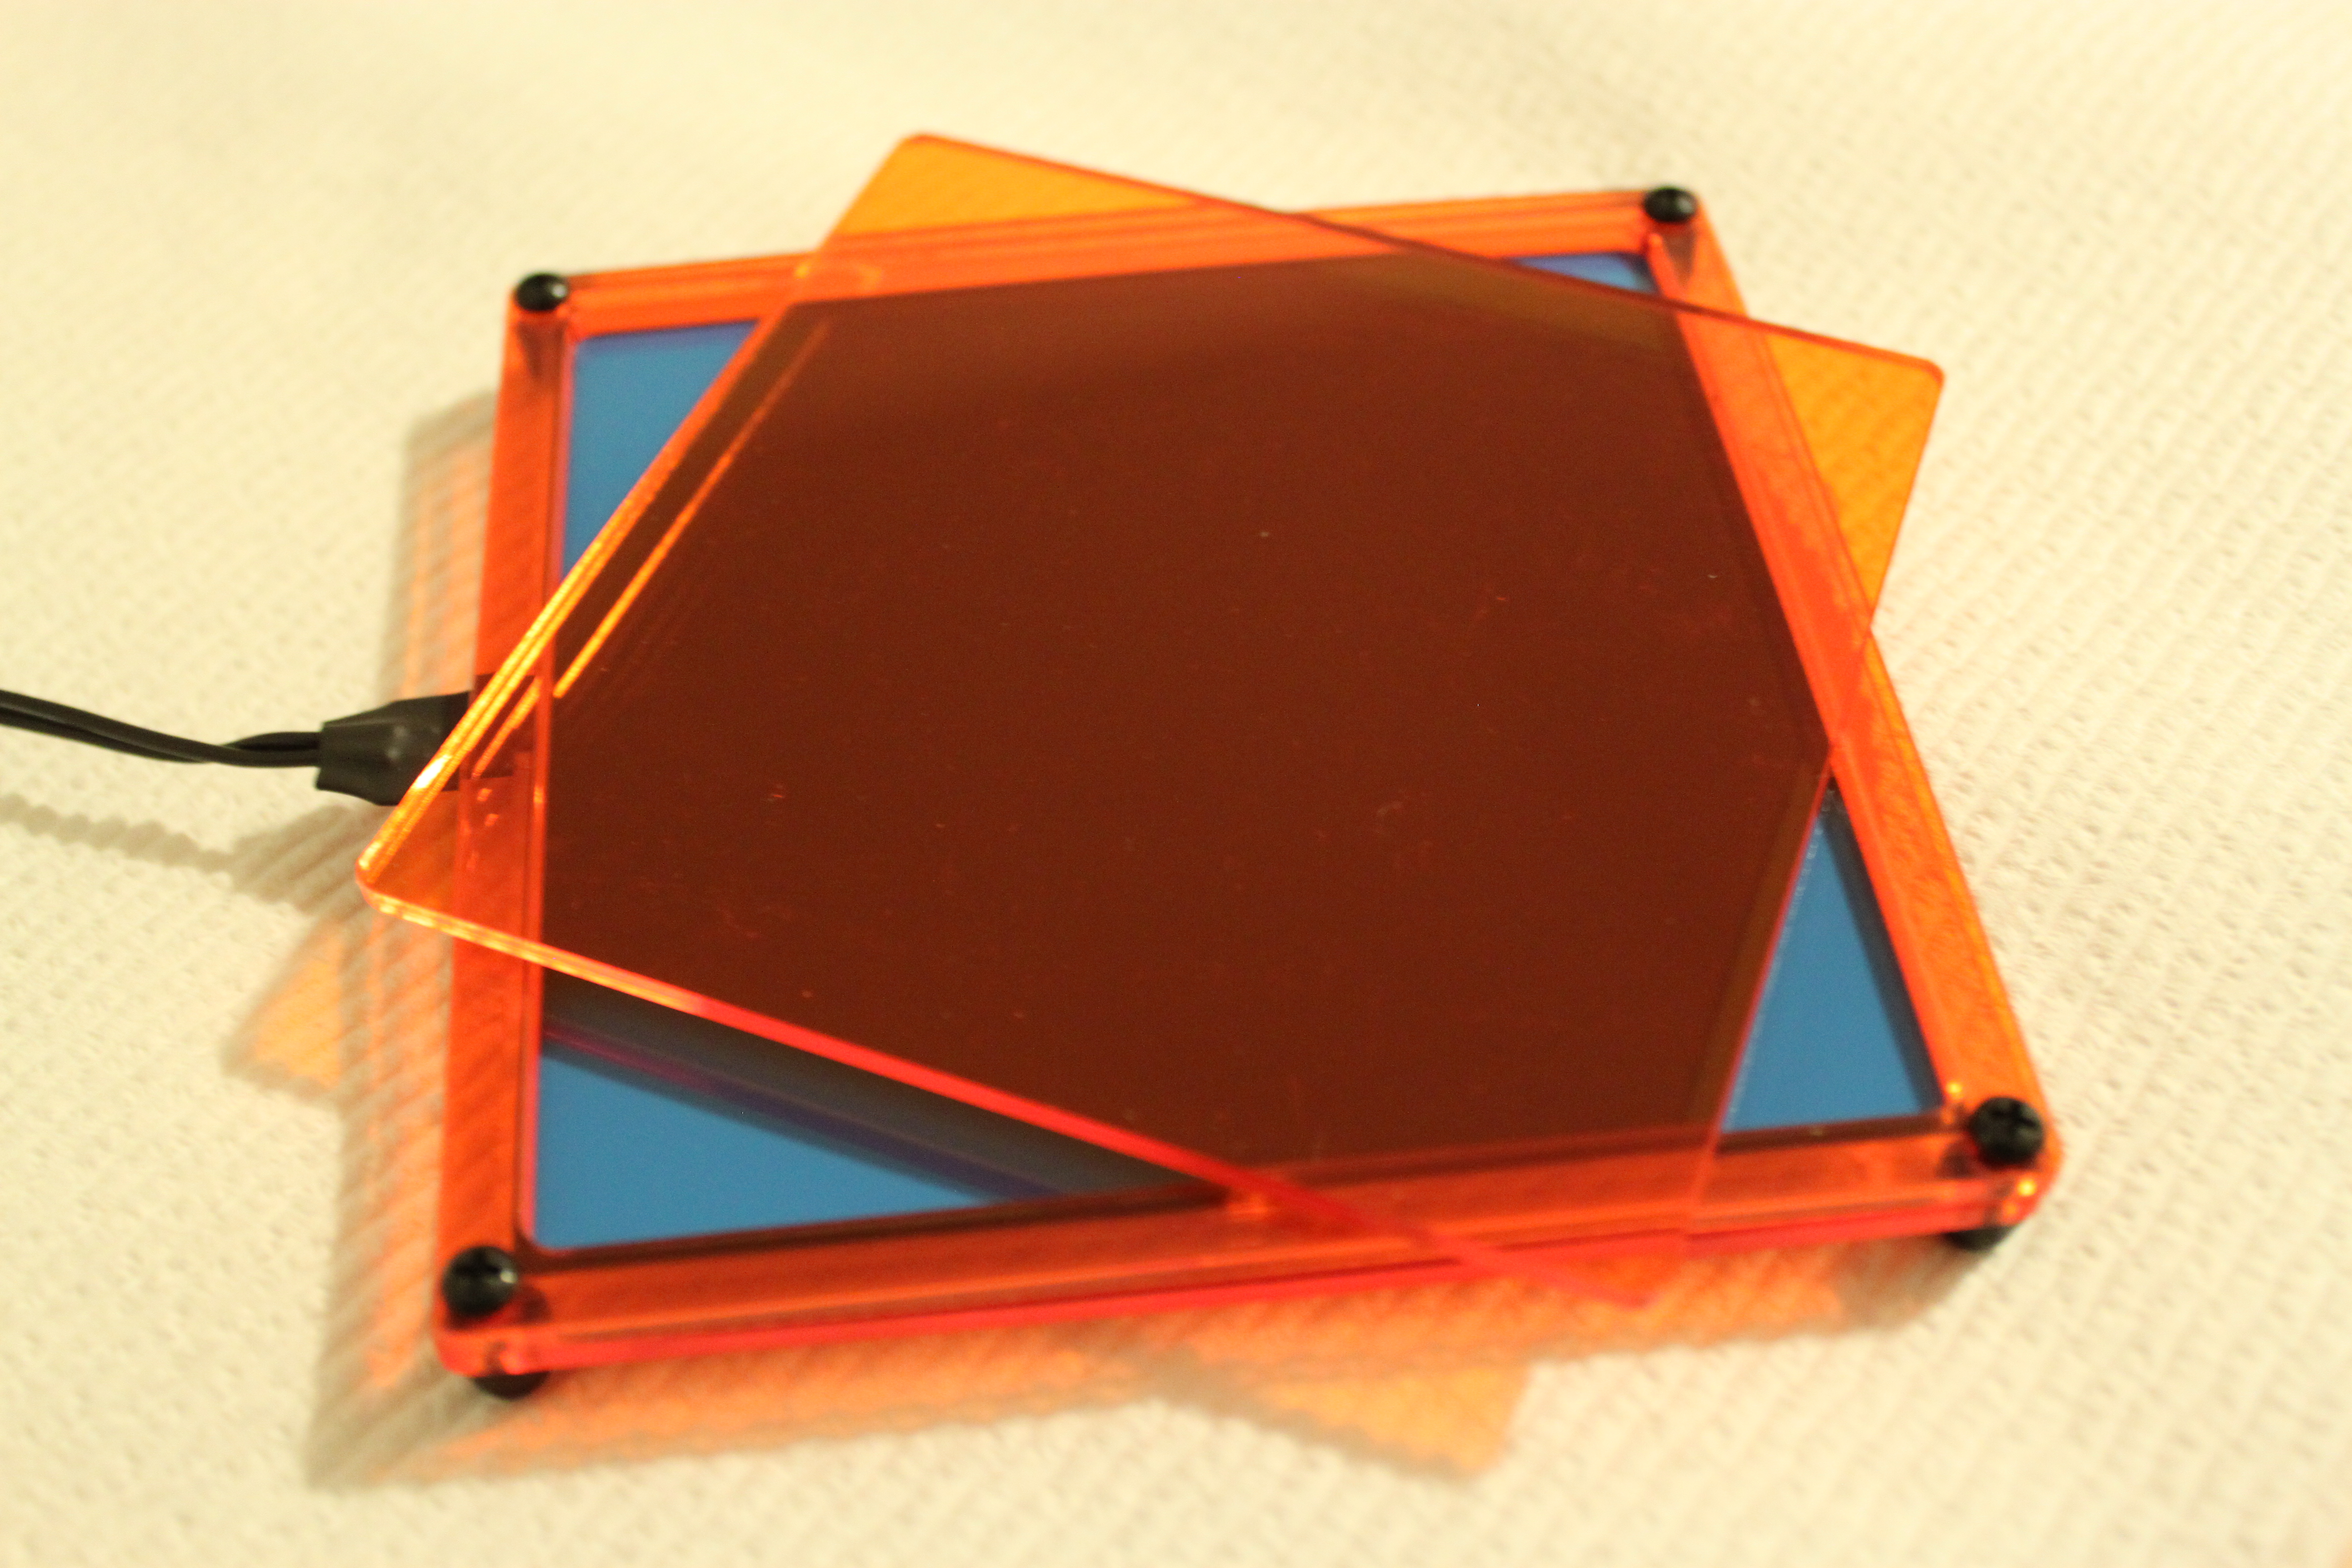
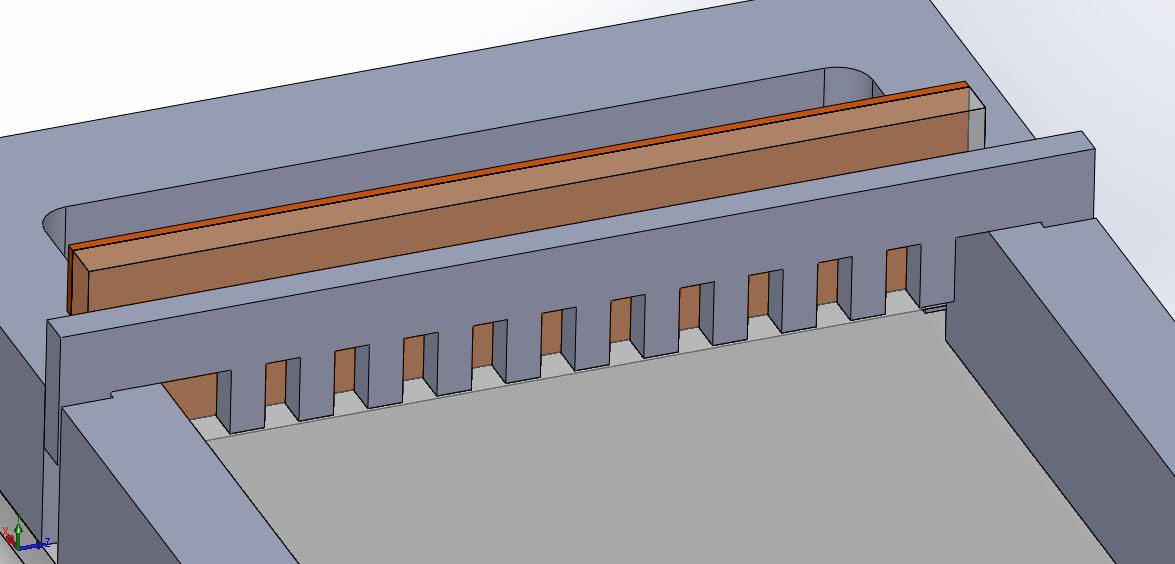
#forgotthecombatthelab? the box, and two dams for pouring the gel.

The gel tray

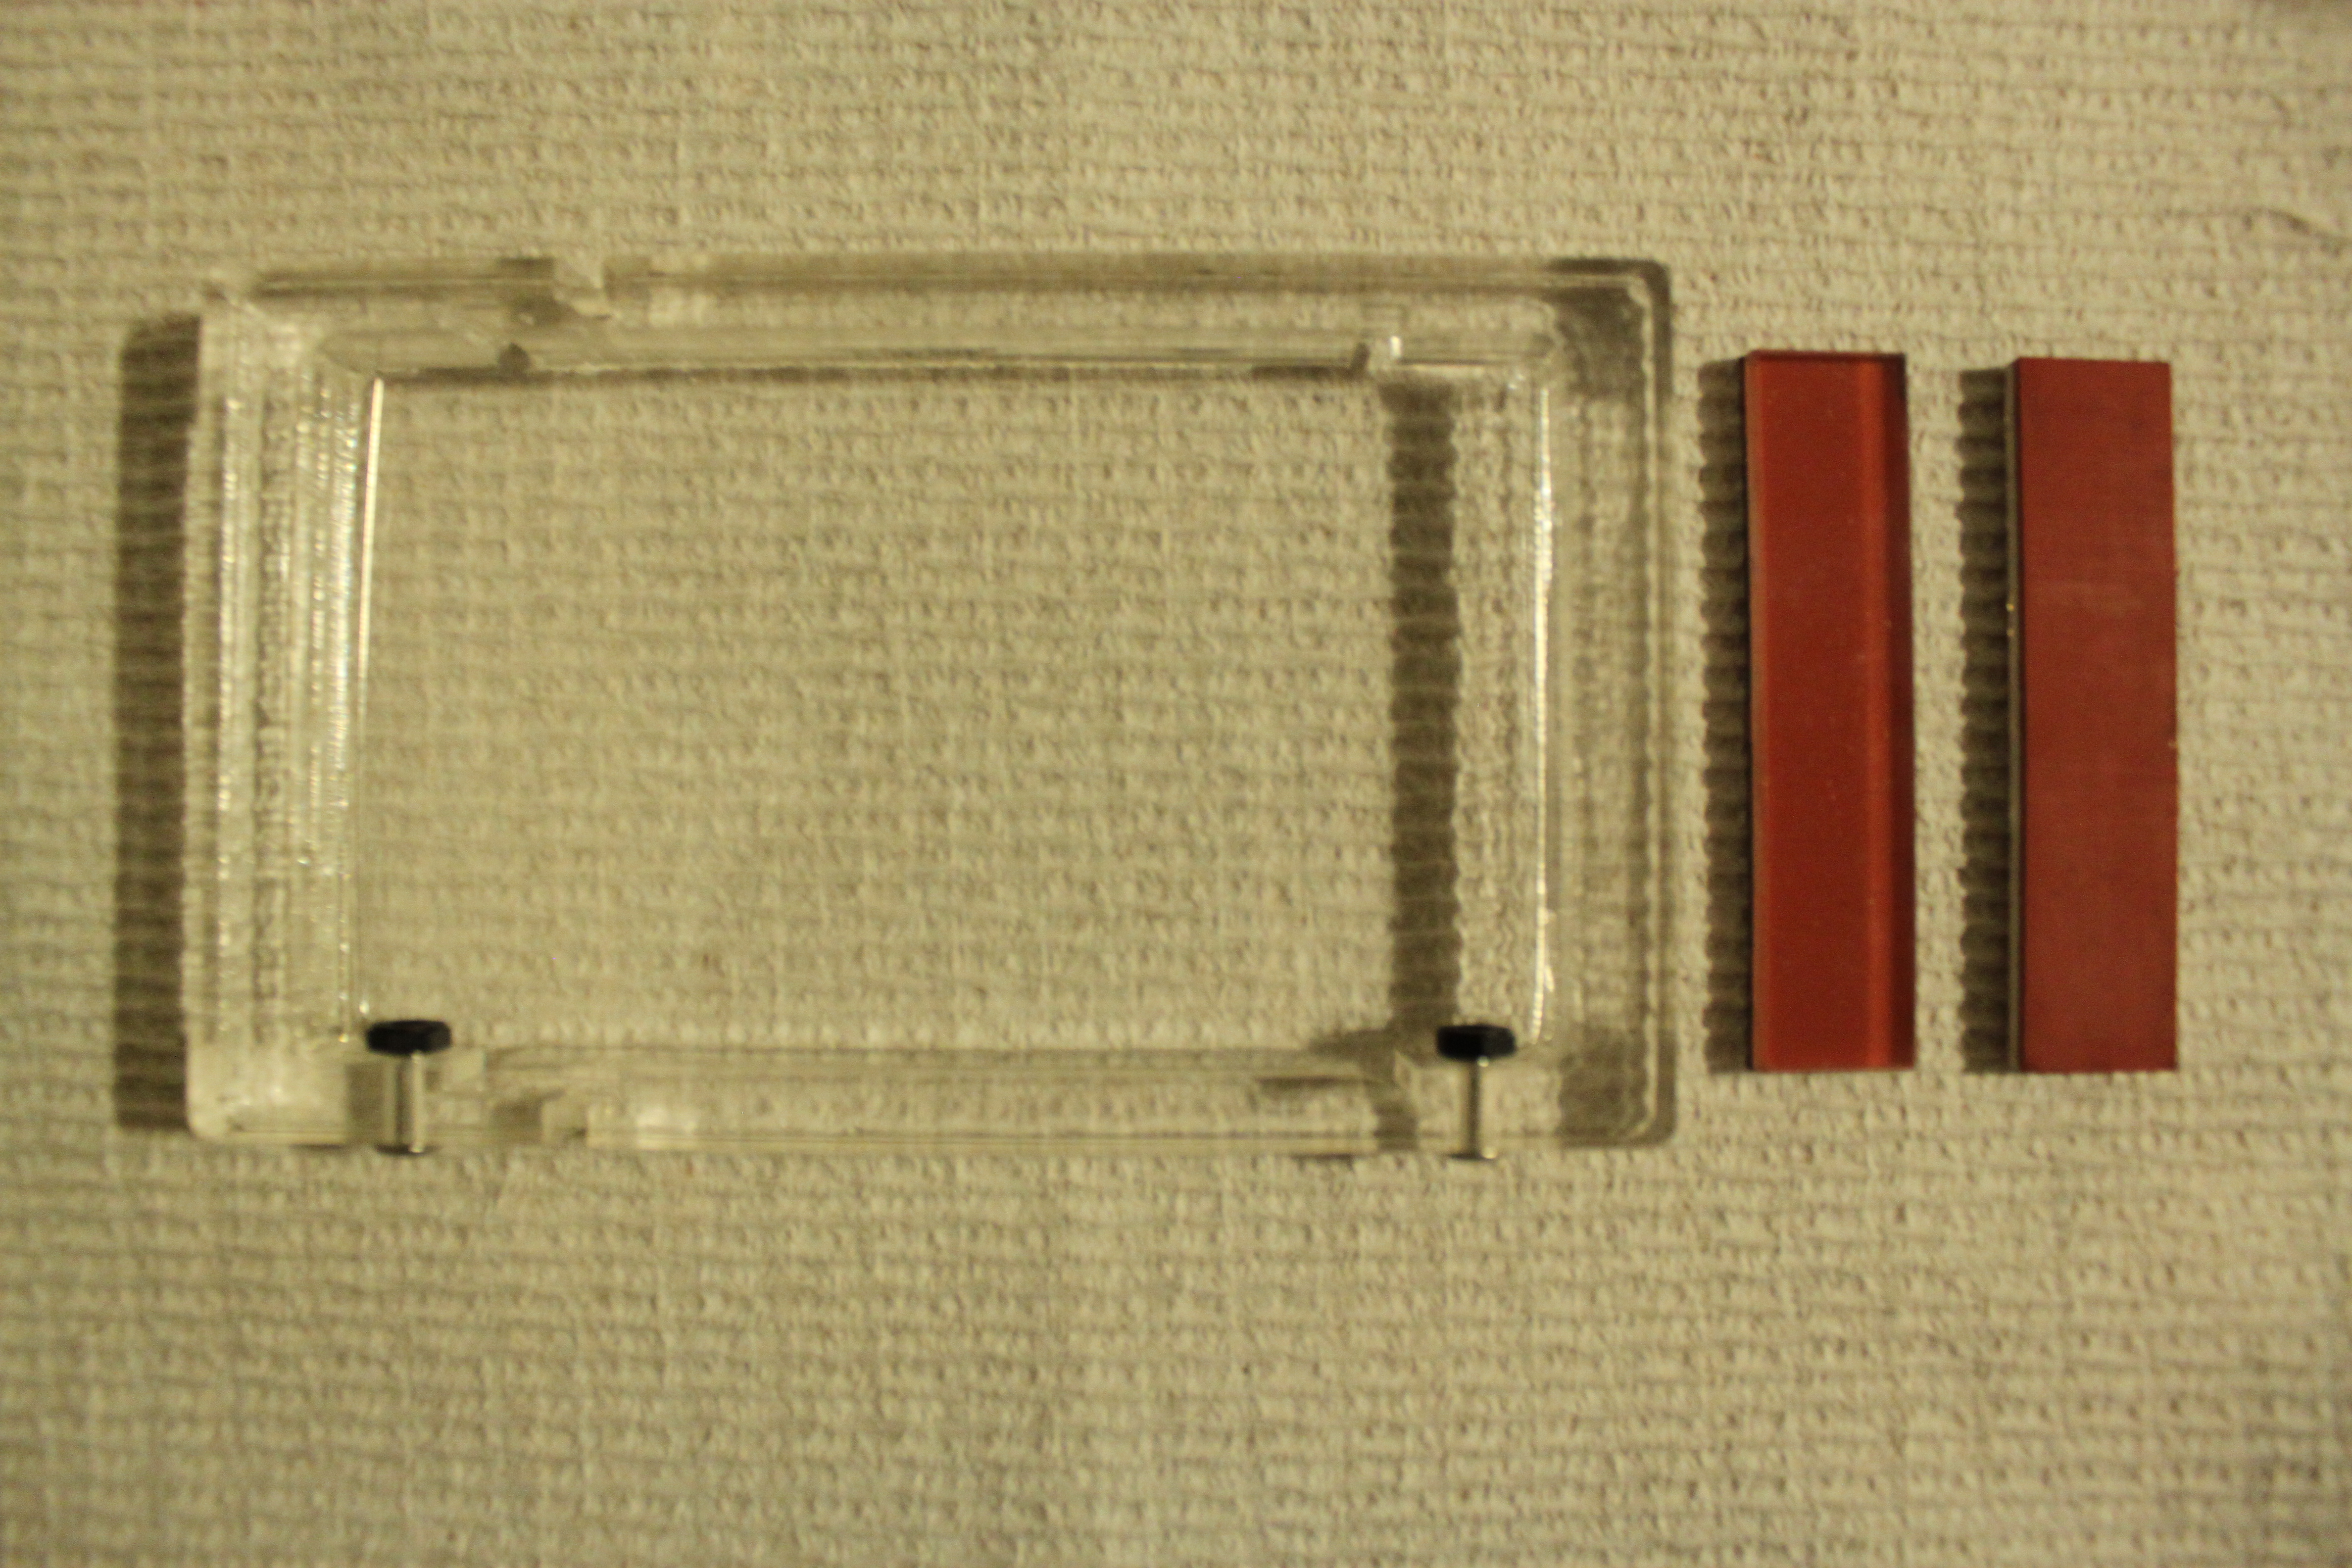
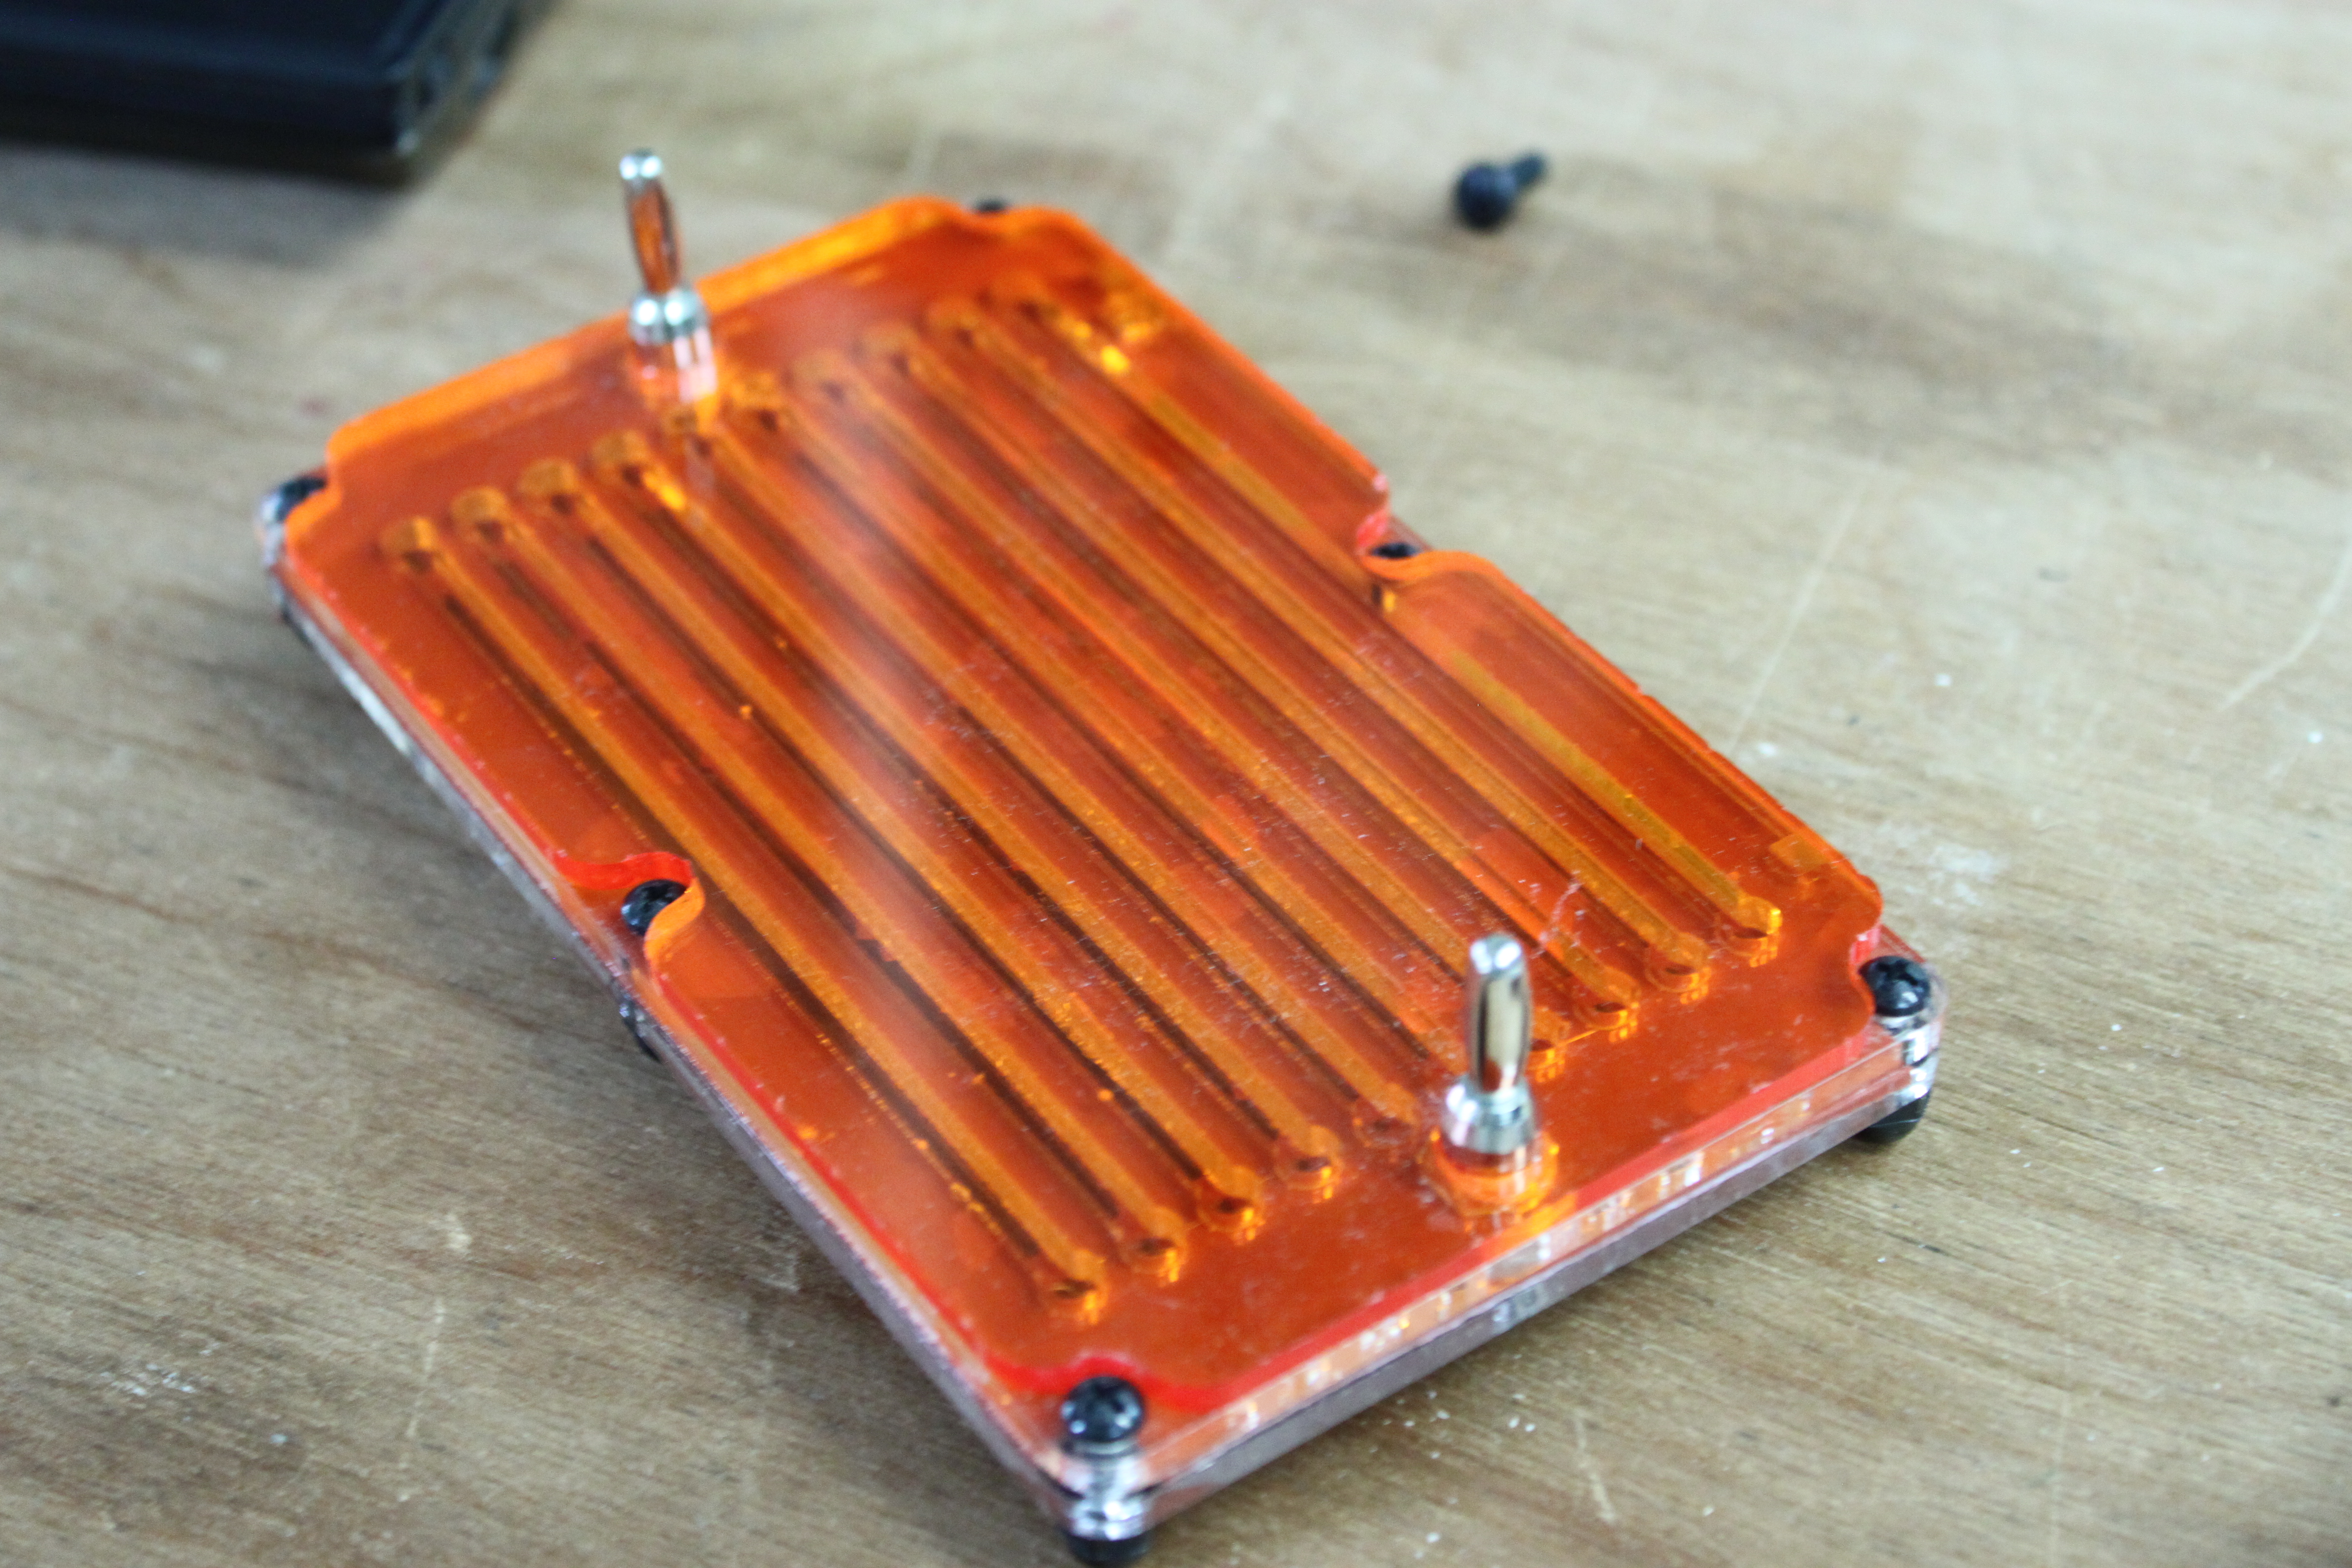
As I mentioned, there are some things that can’t go, like the electrodes or the dams.  Some things need to go, like the holes that the screws go through in this picture.  I think the answer is to look back at a past prototype.

Prototype 0

Prototype #0

This is version 0 of the gel box.  There was actually a version -1, but that was so long ago I didn’t count it.  This box used approximately 10ml of gel in 10 lanes, and used maybe 2ml of buffer.  The goal here was to reduce the amount of material that needed to go into the gel, and make it so you could select how many lanes to run.  It worked ok for things like food dye, and I even ran DNA in it once. However, there was a major problem with this box, which was the electrode choice.  It was too thin (~.003″), which made it difficult to rout, and even then the rubber couldn’t seal around it, so there was really no upside.  Also, bubbles would form on it, and in the thin channels, this would block the buffer from reaching the electrodes, which made the gel run unevenly.

However, it shows that you can have a really thin gel that still works.  Those gels were less than .118″ thick.  There have been papers published on ultra-thin gels(as thin as .01x.1×7 mm in size!, G.T. Matioli, H.B. Niewisch, Science, 150 (1965), p. 1824)), so maybe I can make it cheaper by thinning the portion that holds the gel.  But to do that, I need to eliminate the holes on the side of the box (which I will be happy to do!).

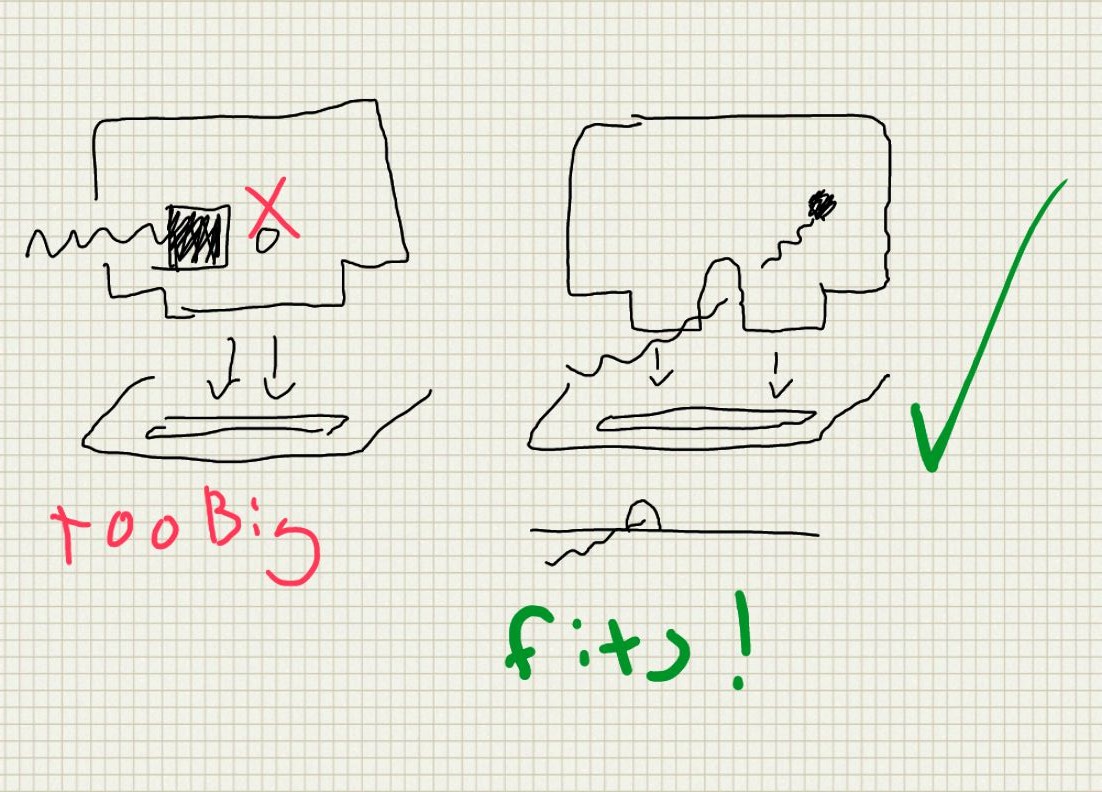
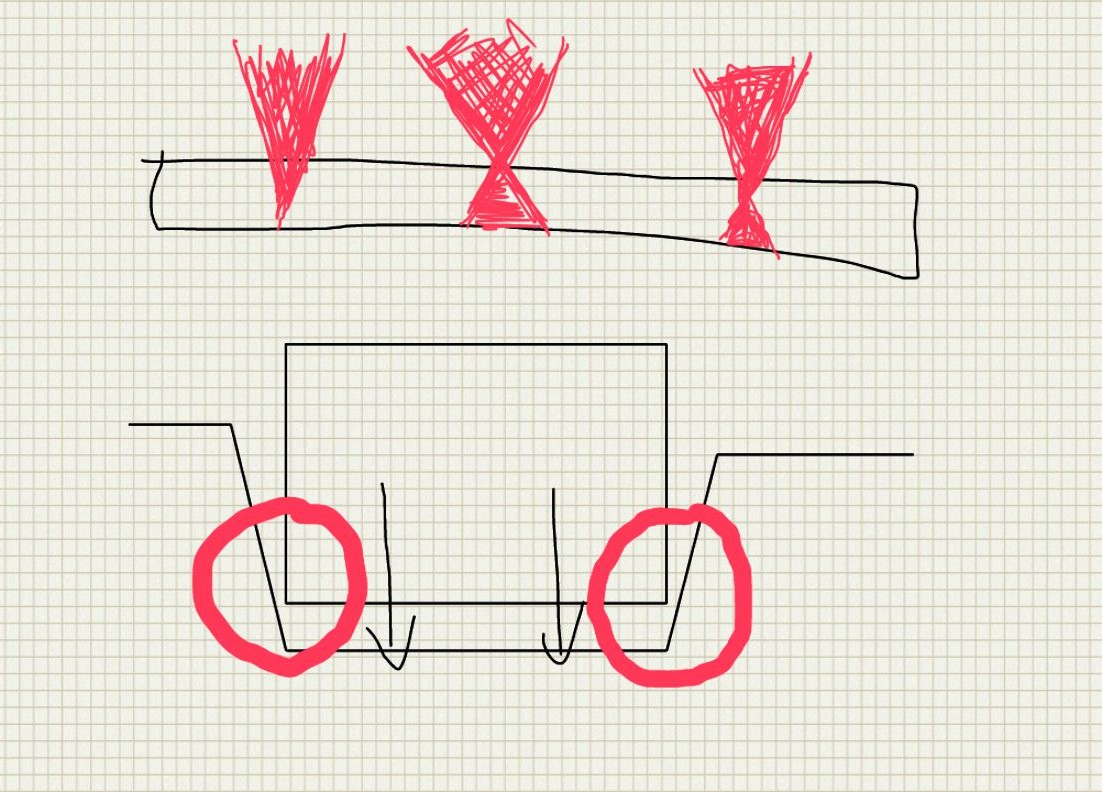
So I want to try something like box 0, in that it is shallow, and like box 2, in that it is functional.  To get rid of the holes in the side, I am going to add in-cut plane holes for bolts, just like in box 0 for the banana plugs.  These will go to metal screws that will probably go through the box, into one of my favorite fasteners of all time, the 6/6 nylon 4-40 acorn nut.  These acorn nuts will slip into holes in the bottom of the gel tray so you know the tray is in the right place and they will help keep it there.  Of course, there will be a small grove on the top and bottom of the box (the part that holds the tray) so you can grab the side of the tray out, but the fit will be tight so there is little chance of electrocution (as small as you can expect with a regular gel box).

Even if this only cuts the cost of the tray in half laser time-wise, it is still a simpler, better way to build the gel tray, and the plastic to build it is more readily available and much cheaper.  Since it is cheaper/better, it will make it cheaper to have more trays, which means you can save your gels/precast your gels, and not have to worry!  Look for this in prototype #3!

GelIS Illuminator

Huge transluminator

Huge transluminator

I am pretty sold on this design.  It is elegant in many ways, and it provides quality illumination.  Lets look at the features it has for the user:

  • Extremely easy to assemble.  It should take maybe 5 minutes.
  • Very thin, which makes it easy to store. Maybe 1/2″ tall
  • Large illuminated area, 4″x4″ (10cmx10cm for you metric folks).
  • Gel filter stows inside of transluminator, and protects EL panel.
  • EL panel illumination is very even, which makes it easy to pick out bands
  • Lost cost and high value compared to other options

Now, lets look at this from the viewpoint of me as a manufacturer:

  • Uses off-the-shelf components for anything that requires tricky assembly (EL inverter)
  • Low parts count -> low cost and easy to pack
  • Almost zero material is unused.  the Negative space becomes the filter!
  • Small size makes it cheap to ship
  • High value added in the parts I fab

These things make me happy, because I can provide a lot of value by selling the kit to people, and it should make people happy because they have a simple to build and beautiful transluminator that they can use for a long long time.

Transluminator...ASSEMBLE!

Transluminator…ASSEMBLE!

This is an animated gif of the assembly process.  The illuminator is a laminated design, held together with screws.  Assembly takes only a few minutes, or maybe a bit longer if you are a super-perfectionist.

2nd GelIS Prototype

The second prototype!  Fingers crossed, should be done in one more revision.

The second prototype! Fingers crossed, should be done in one more revision.

Gel Boxes should be beautiful.  Actually, all lab equipment should look awesome.  Here is the second revision of the plastic hardware.  It is almost correct.  Some of the cutouts for the electronics are too small and caused cracking.  I also got confused and made a “revision” with some cutters that I regretted- the part was actually made correctly, but I freaked out and cut it.  I need to revise the holes for the cables, and make the roof taller as well.  Right now it is not fully wired, up but the really key thing is making sure the laser cut portions are spot on- I have validated the sketchier functions on the first prototype.

Here is a top view

Here is a top view

Alright, lets talk electronics first.  Crammed into the back portion of the box are brains and brawn of GelIS.  That thing with the heatsinks on the left is a 12V to 30-90V boost converter.  That means that 12 DC goes in, and something between 30-90V comes out.  If you look carefully, it is actually in backwards (rotated 180) from what makes sense, because those screw terminals should be on the side of the box.  This was a fabrication snafu.

This shape brought to you by cartoon mouse doors.

This shape brought to you by cartoon mouse doors.

In the middle is the power supply for the EL panel illuminator.  It is also powered off 12V, and the cable to the illuminator comes out the back.  Right now there is a circular hole for the connector, which totally doesn’t work.  This prototype helped me figure out how to run that cable, which has a bulky connector on one end from inside to outside of the box, which is summarized in the above sketch.

Finally, on the right are a voltmeter and ammeter.  You need these if you are going to run a gel, and I haven’t seen many DIY kits that include them.  “hook a multimeter up” is a bad option because you need both voltage and current, which means two multimeter, and probably some sketchy connections.  This shows both, simultaneously.  The sketchy source of these suggests that they refresh “at about 200hz” which is plenty fast for us.  Unfortunately, they also make the box look kind of like a cartoon of a bomb.  Better put this in the checked luggage.

#forgotthecombatthelab? the box, and two dams for pouring the gel.

#forgotthecombatthelab?
the box, and two dams for pouring the gel.

Here is the gel tray you see sliding out of the system on top.  The electrodes are an incredibly tough alloy of stainless steel (316VLM. .016 diameter*  Read my footnote on it).  To the right are two dams for pouring the gel.  One side is acrylic, and the other is somewhat soft silicone rubber with an adhesive backing.  They are cut at as a laminate at the same time on the laser cutter to ensure that the parts are exactly the same size.  I haven’t tested them, but I am optimistic, especially because of the laser taper, illustrated below.

laser taper is caused by the beam spreading after focusing

laser taper is caused by the beam spreading after focusing

This taper should help wedge the dam in.  I would talk about the comb more, but I forgot the comb at the lab.  It is pretty unremarkable.  The image of the model below pretty much sums up how it works:

The least exciting part

The least exciting part

I also finished the transluminator, which I think I will stick with for the kit.  It is elegant in a lot of ways that I want to talk about, so it is getting its own post.

*You might be asking, stainless steel?  Don’t we need PLATINUM electrodes?  The answer appears to be no.  Several people have had success with 314 stainless seizing wire (a boat/marine item), but according to aerospacemetals:

“Type 316 is known to be more resistant to atmospheric and chemical corrosion than any other grade of the stainless steels. Maximum corrosion resistance may be obtained by fully anneal­ing this alloy. If the application calls for welding, Type 316L should be used as it is highly resistant to carbide precipitation and intergranular corrosion.  Which usually occurs at high temperatures.”

Plus this wire is vacuum arc remelted, so it should be even tougher.  I will have to do a proper stress test sometime.

Nice Pictures of Electrophoresis Gels

Have you ever struggled to take a picture of a gel?  Probably not if you dropped a couple k on a gel documentation system.  But for those of us who to take photos of gels and keep our money, you might look like this:

Image

In this photo, I am trying to hold my gel illumination (a couple of LEDS) in one hand, and hold my amber filter, focus, and take a picture with my other hand.  In low light, my phone camera can’t focus either!  Thankfully, my camera can take voice commands, so I did manage to take a picture.  I have a Samsung galaxy note II, (at the time of writing, this is a recently released, top of the line phone) which has a fixed aperture and TINY sensor.  Here is an example of the quality it produces:

20130715_193243

This is barely usable, but maybe ok for just a quick note.  however, you really have to know where the bands are to see them.  For reference, that is 200ng of DNA.  Notice the greenish tint around the bands, and the lack of definition in the gel wells.

What you really need is a camera with manual focus, and a small piece of plastic.  You want manual focus, because no matter what you do, there won’t be a lot of light coming through the lens.  This makes it difficult for the camera to autofocus, which can be frustrating.  Manual focus lets you use your superior eyes and brain to focus.  Here is the device:

Gel Photography Device

Gel Photography Device

So there ya go.  Thats a UV (clear) filter with a piece of amber plastic in it.  I only bought the filter because I wanted it to be convenient to screw on and off.  Any plastic that is this color will work for blue light- there is no mystery there.  Here is what the world looks like through this lens:

Woah man, it's like instagram

Woah man, it’s like Instagram

Now lets take another look at that gel.  In fact, I will put both here so you can swap between them:

This slideshow requires JavaScript.

Which one looks better?  Definitely the one with the filter.  It has a few things going for it:

  • No confusing green tint around the illuminated area.  This is confusing, since the bands are also green
  • No high-ISO noise in the non illuminated area.  More even illumination.
  • Slightly better focused image (Ok, I am to blame, I did not focus very well)

It was also WAY easier to take the picture.  Just point, focus, and click!  If I had a better illuminator, I wouldn’t even have to hold the LEDS!  There is also a difference in pixel count, but that is mostly irrelevant, for the quality of image.  Commercial gel docs use sensors that are much under 2 MP.  By pixels, my phone camera should be 4x better!

What really matters more is the size of the sensor.  As a rule, larger sensors are better, but I don’t need to explain that- you can read Ken Rockwell’s excellent posts on the megapixel myth and look at comparisons at high isos here.  Use the drop downs to look at side-by side comparisons of different cameras at high-ISO (what happens in low light, like with a gel).  Check out the below, which compares the canon rebel xs (10 MP, 419 square mm square APS-C sensor, 185 on ebay, WITH lens), the canon 510 HS (12.1 MP, 28 square mm sensor, on ebay, 12.1 MP) and the Sony CyberShot DSC HX20V (18.2 MP, 28 square mm sensor, 260 on ebay, 18.2 MP).  These are buy it now prices.

Winner is the XS 1000, as you can see the difference in the dark colors!

Winner is the XS 1000, as you can see the difference in the dark colors!

This is a picture of a test swatch, with very similar colors next to each other.  As you can see, the cheapest camera, with the smallest number of megapixels, but the largest sensor has the best color differentiation, and low noise at a relatively high ISO 1600 (for reference, 400 ISO is the most common speed for “general use”).  The XS 1000 also has manual focus!  My conclusion is that if you want to take a picture of a gel, use an older, cheaper APS-C sensor camera, and get a filter for it.  You will thank yourself for it later when you have nice pictures.

GelGreen: As Good As Advertised

Check out the bands on the right! Its a DNA ladder. Its pretty smiley because I was running at high amperage just to test the new stain.

I ordered some GelGreen from Phenix research the other day, because they sell it in .1 ml quantities, unlike the other suppliers in the US, and because they will just take my money and ship me things without a probing questionnaire or having to call or email them (again, unlike the other US distributors).  The .1 ml quantity also sells at the same cost/unit as the .5 ml quantity!  Combined with my ability to illuminate it with some cheepo blue LEDs from ebay, incredibly low toxicity and cell permeability, and stability at room temperature in water, I would recommend it as an alternative to Carolina’s “Carolina Blu” DNA stain, which is awful.  It also makes a fine alternative to ethidium bromide if you don’t want to have hazardous chemicals around, or if you don’t want to have to buy expensive UV gel documentation equipment.
I guess my only question for Biotum is…why the heck is it called GelGreen?  Nothing about it is green, as far as I can tell.  Its Fluorescence is really more of a yellowy color, according to the datasheet.

Click here to find out more about GelGreen

And Here to buy GelGreen from Phenix Research