The GRID-EYE. What a name!
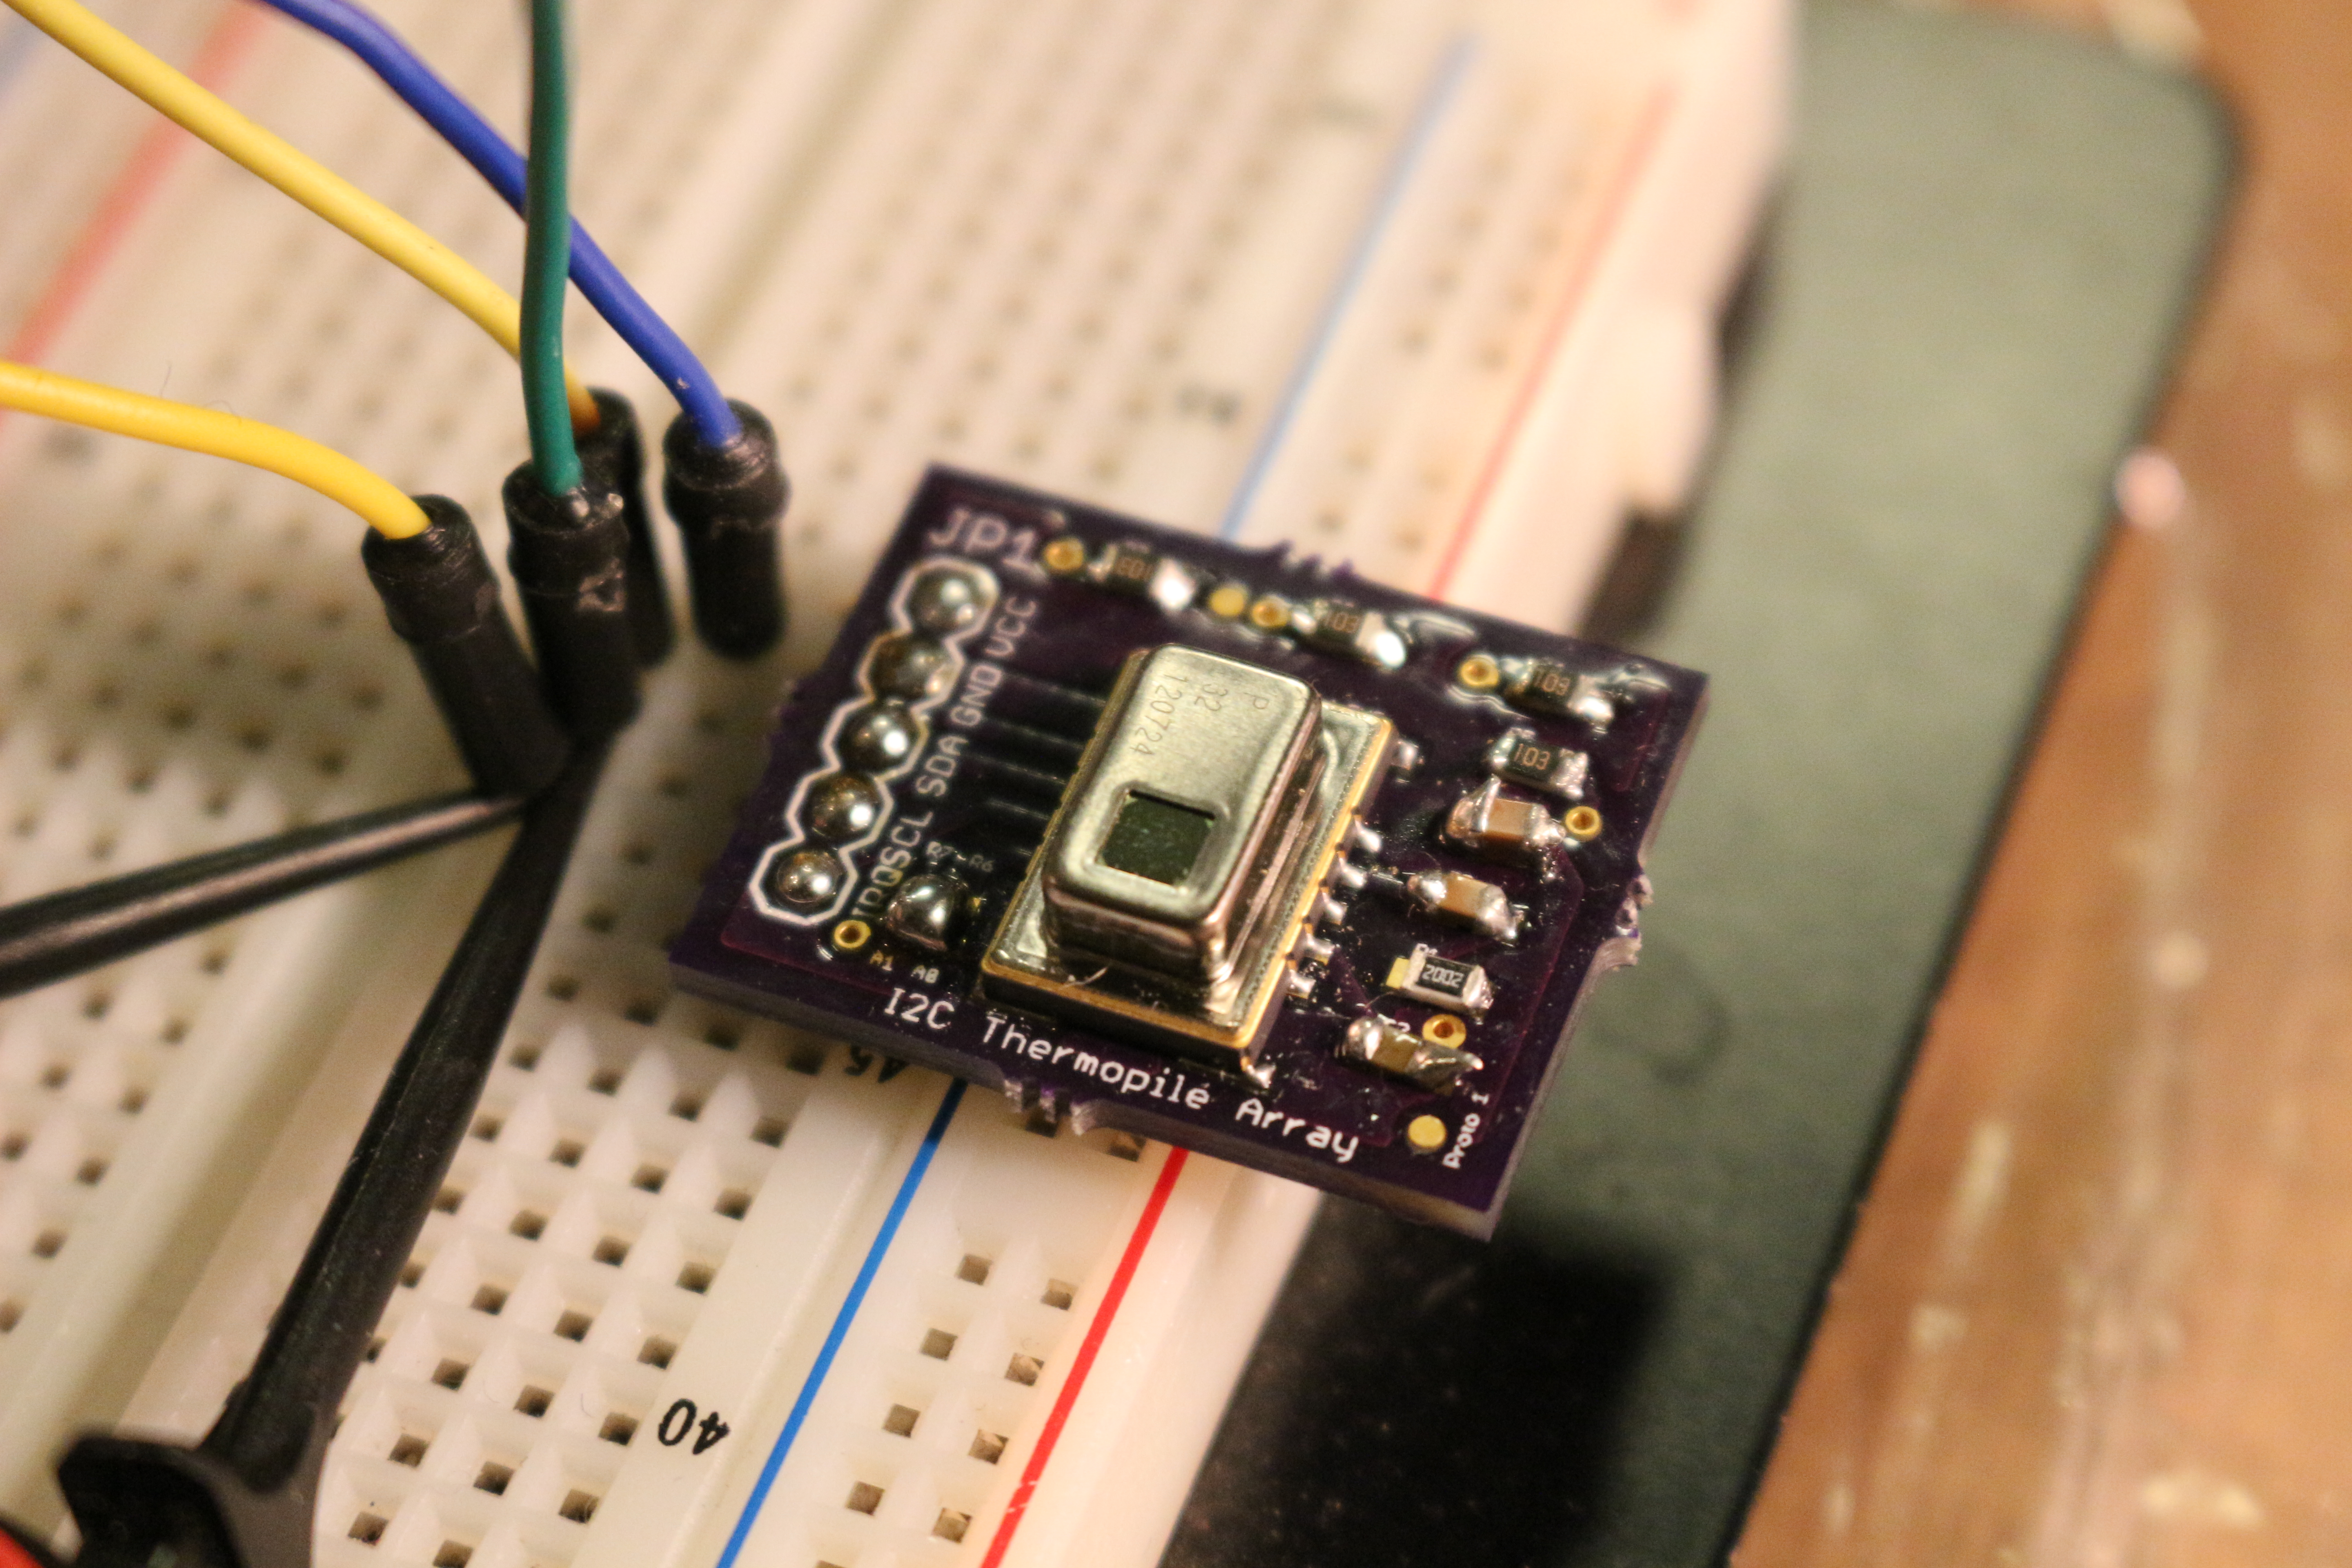
A few months ago, I bought an AMG8852 “Grid-eye” sensor from digikey. It is an 8×8 thermopile array, which is one way of saying it is a low resolution thermal camera, which is totally worthy if its terrifying and vaguely sci-fi name. I soldered it down to a breakout board from osh park, tested it with some arduino code (provided at that link), and then threw it in a parts pile for a while. I knew its future would be as the input to an 8×8 LED array, but I didn’t have time to work on it back then, so it hid in my logic analyzer case for a while. This weekend I pulled it out to work on.
The grid-eye datasheet on digikey is pretty garbage, but there are some good resources online that actually describe what all registers are and what bytes are r, w, r/w. Turns out most of the settings are already what I want them to be, but knowing that is better than leaving it up to chance.
I decided that this project would be done in assembly, since I haven’t used it in a while. The first task was to choose a development environment. The last time I wrote pure assembly was a while ago, and I wanted to see what was out there. I tried avr-as, avra, and atmel studio 6 (in windows). Atmel studio 6 won out since it has all the up-to-date XXXXXdec.inc files, and it has a nice interface for setting and checking fuses.
I chose an atmega328p as my controller since I have about 10 of them rolling around in my bag-o-microcontrollers, and they are extremely common. I didn’t want a repeat of when I ordered attiny20s only to find that they could barely be programmed in assembly (not supported by avr-gcc). One of my other options was an attiny 25/45/85, but they don’t have real I2C peripherals (UART instead) and don’t have much in the way of pins, so they got passed over. I could have also used an atxmega32a4u or an atmega32u4, but that seemed like overkill.
Here are a few sketches of enclosures or usage ideas. There are two main ideas here- a lipstick/lytro shaped camera, and a “twin lens reflex” camera.
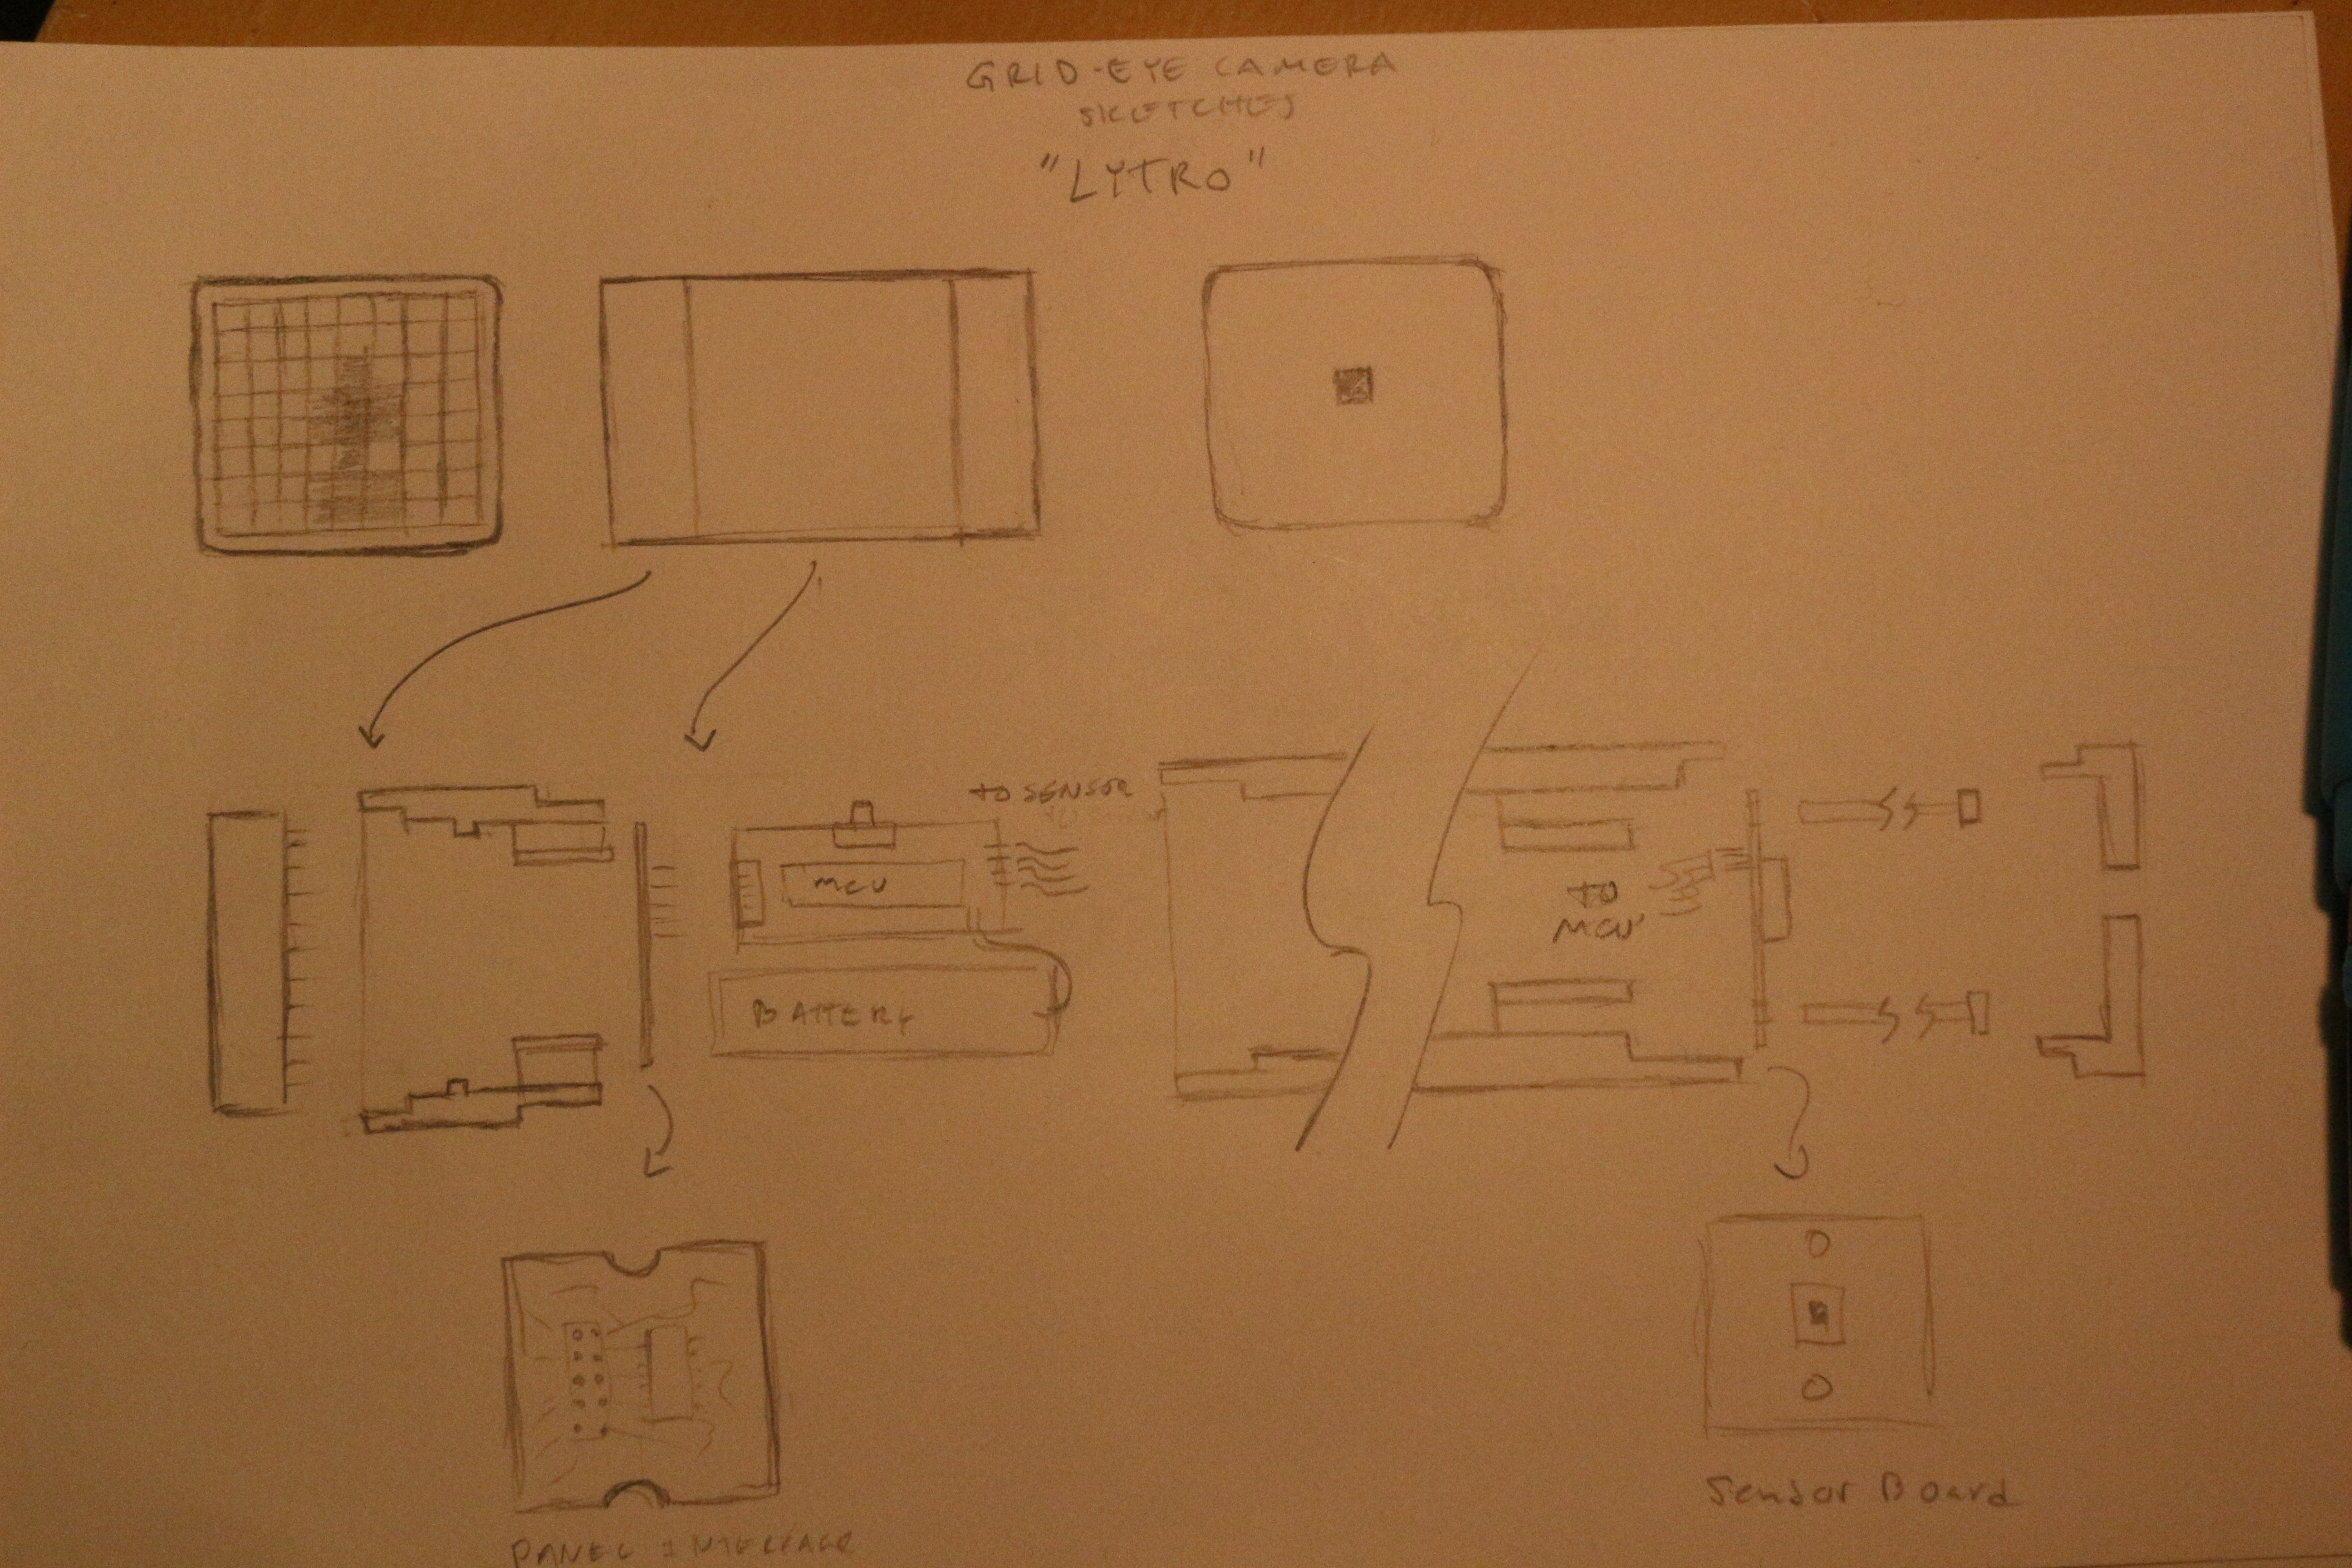
Lipstick/Lytro design
This design is supposed to be small and easy to stuff in a bag or toolbox and to be easy to hold in one hand. The use case here is producing a “live” thermal image, that you can use to find hot/cold spots in a project or space. The case could be striped black/orange/black to give it a cool color scheme. The case prototype would be 3d printed.
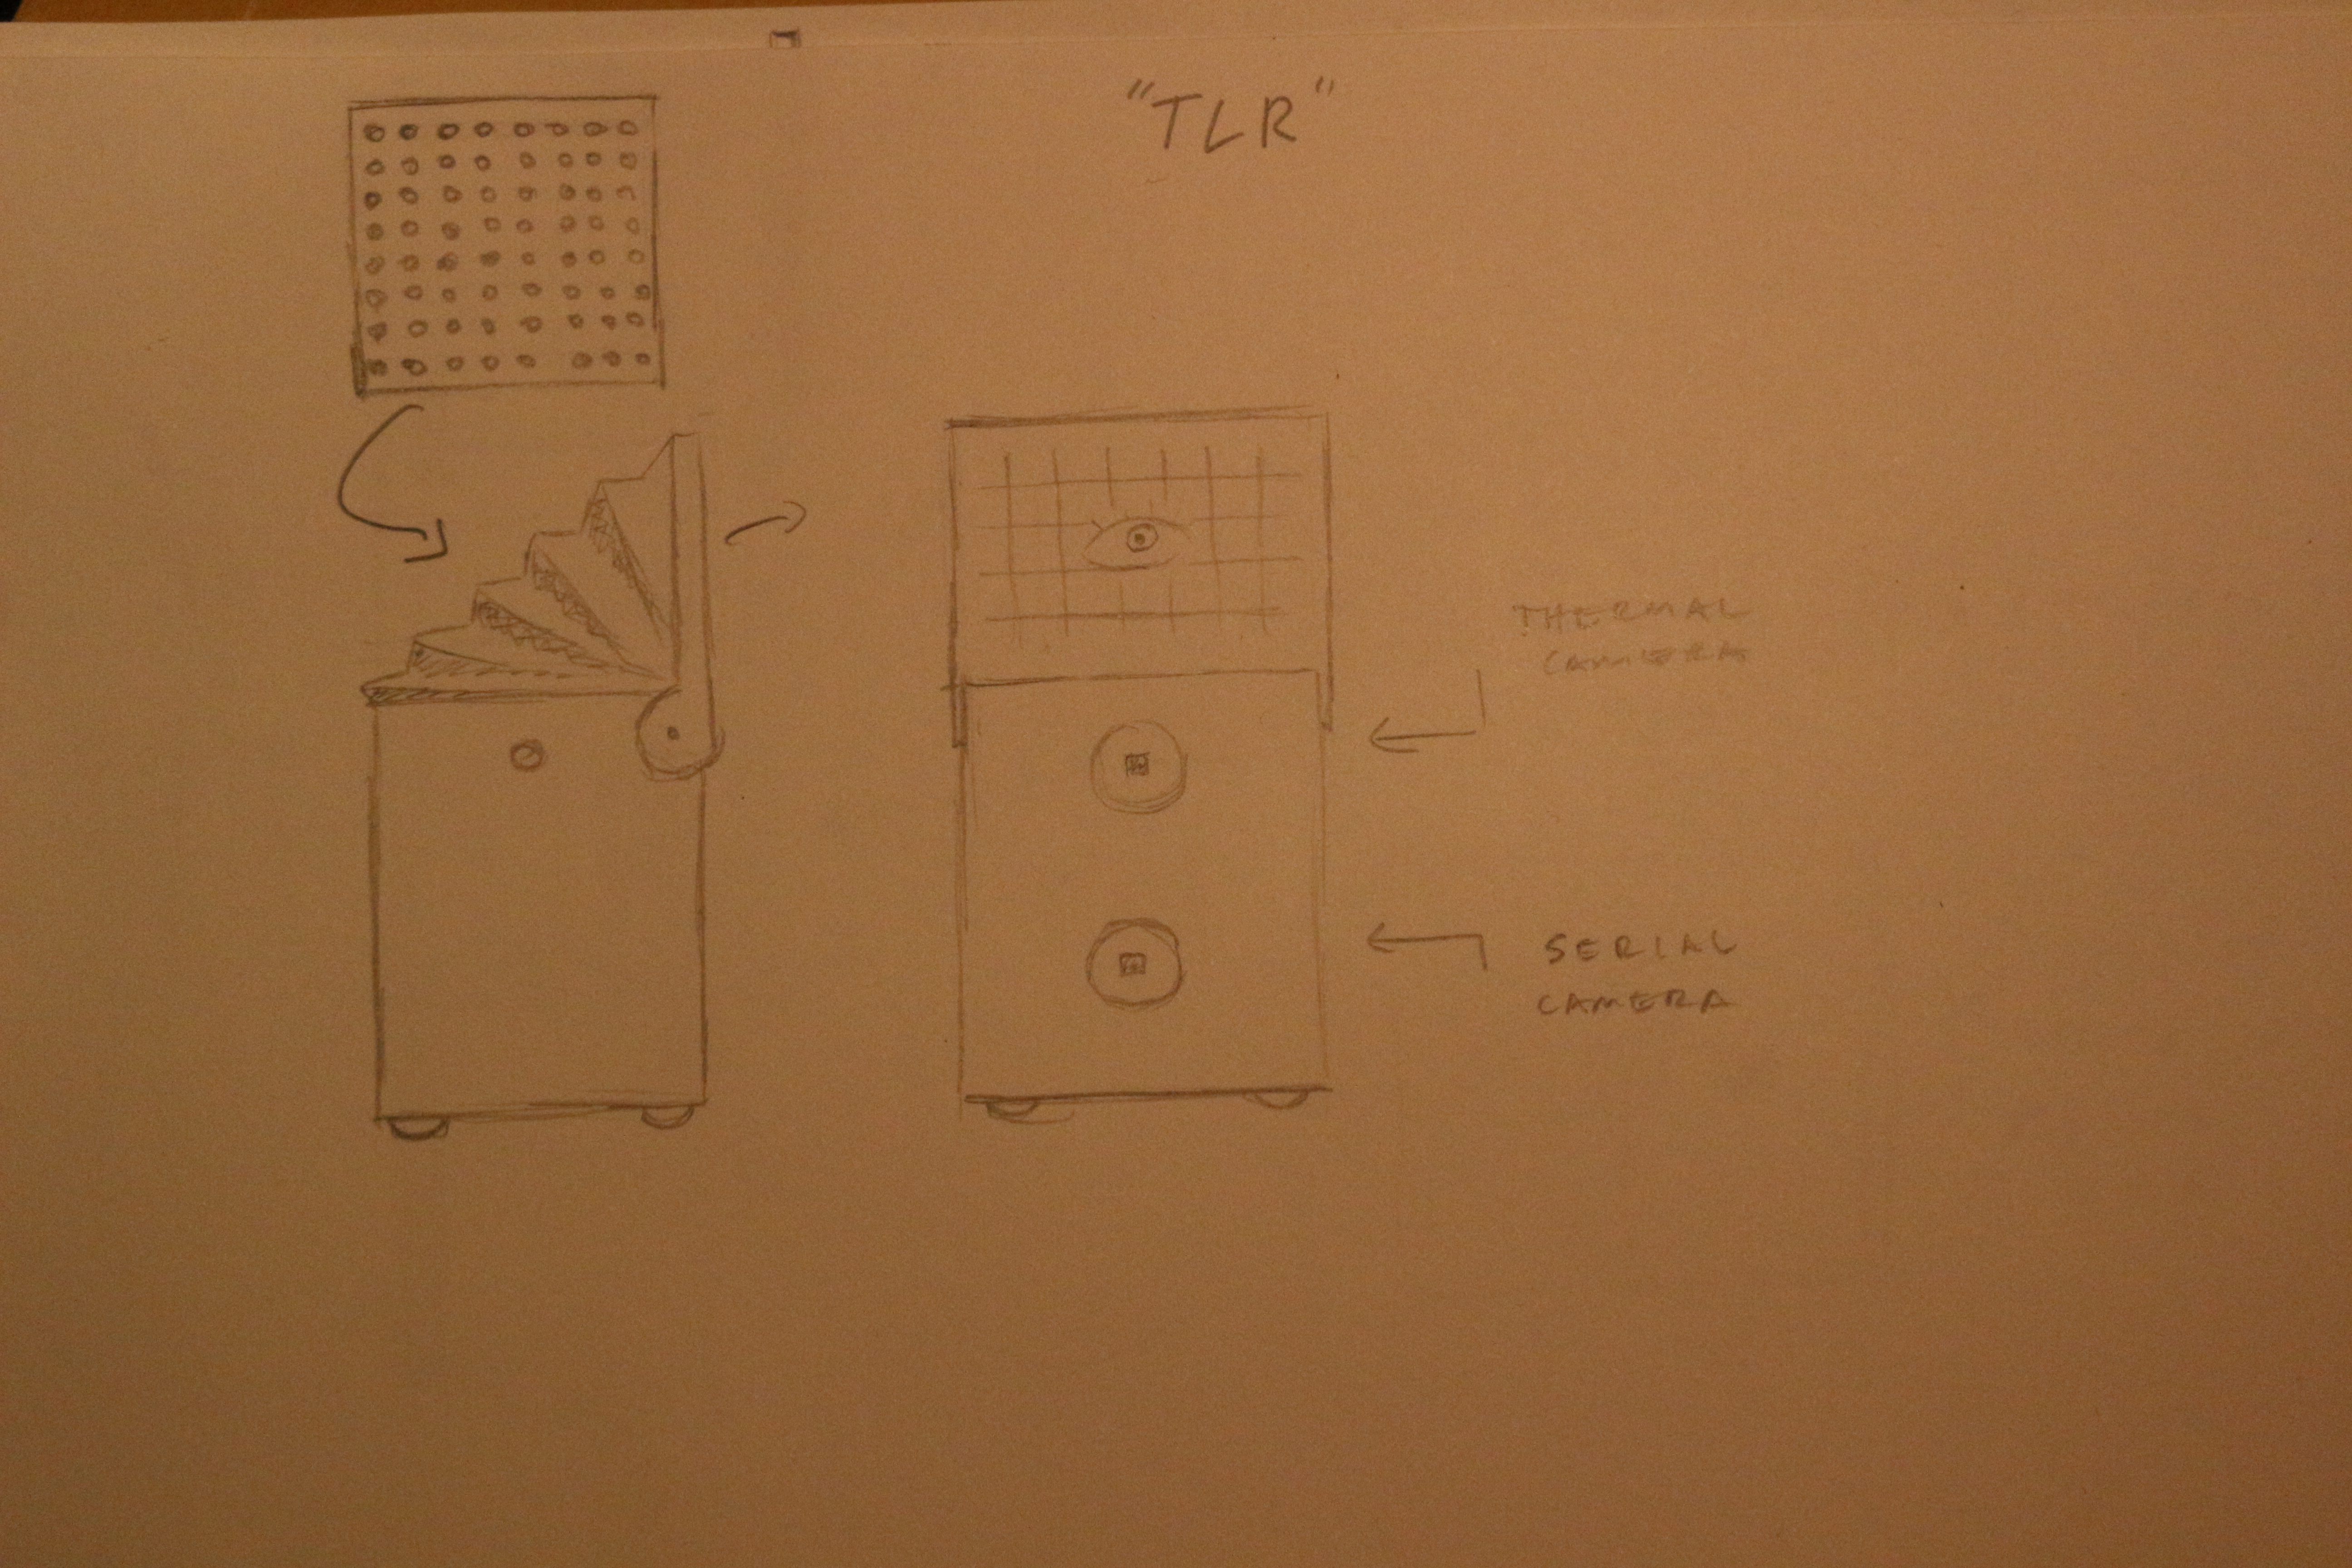
Twin lens reflex idea
A TLR is an old kind of camera that had one lens for viewing the image, and one lens for capturing the image. In this case, the thermal image would be the one you would use to sight the camera, and in addition to the thermal camera there would be a static serial camera on board. This could have some cool applications in sensing wildlife or people as they approach the camera. The saved image would include the thermal profile tacked on, so you could do a temperature overlay of the final image.
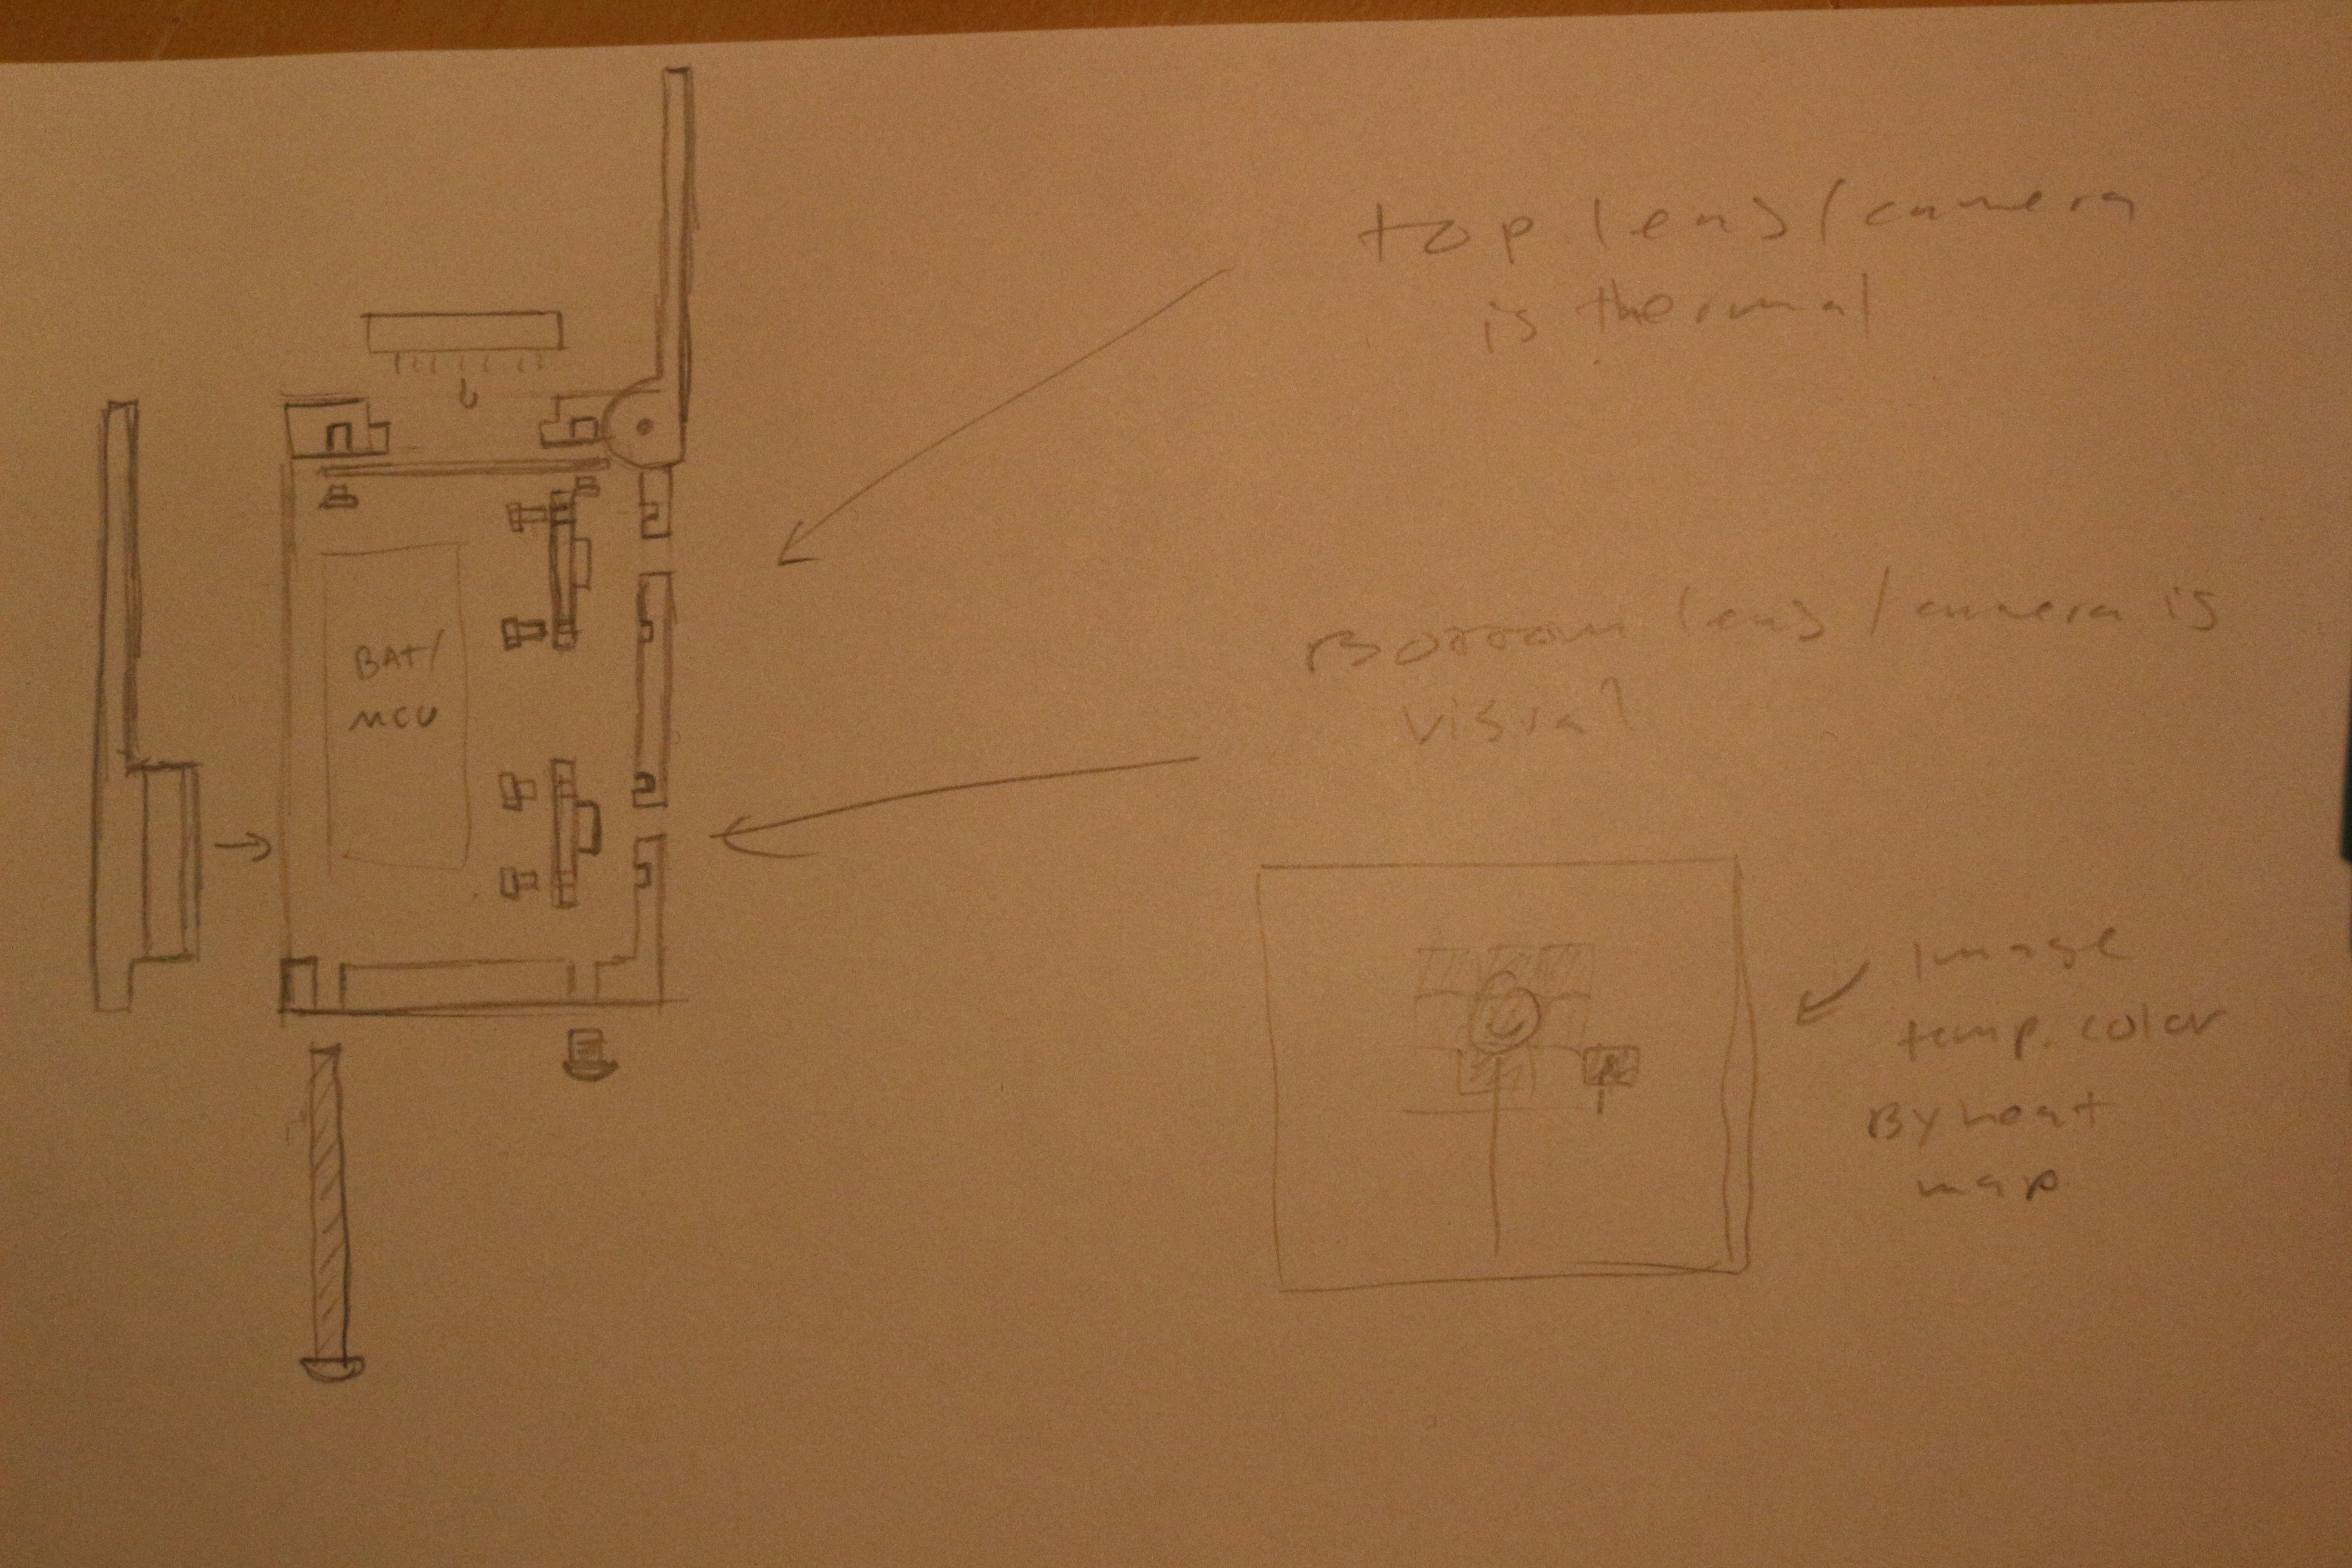
TLR idea detail.
This is another image of the camera body. I am excited by this idea, but it is more complicated than the simpler thermal imager. The simple version could be a stepping stone to the more exciting version.

One thought on “Thermal Camera Project”