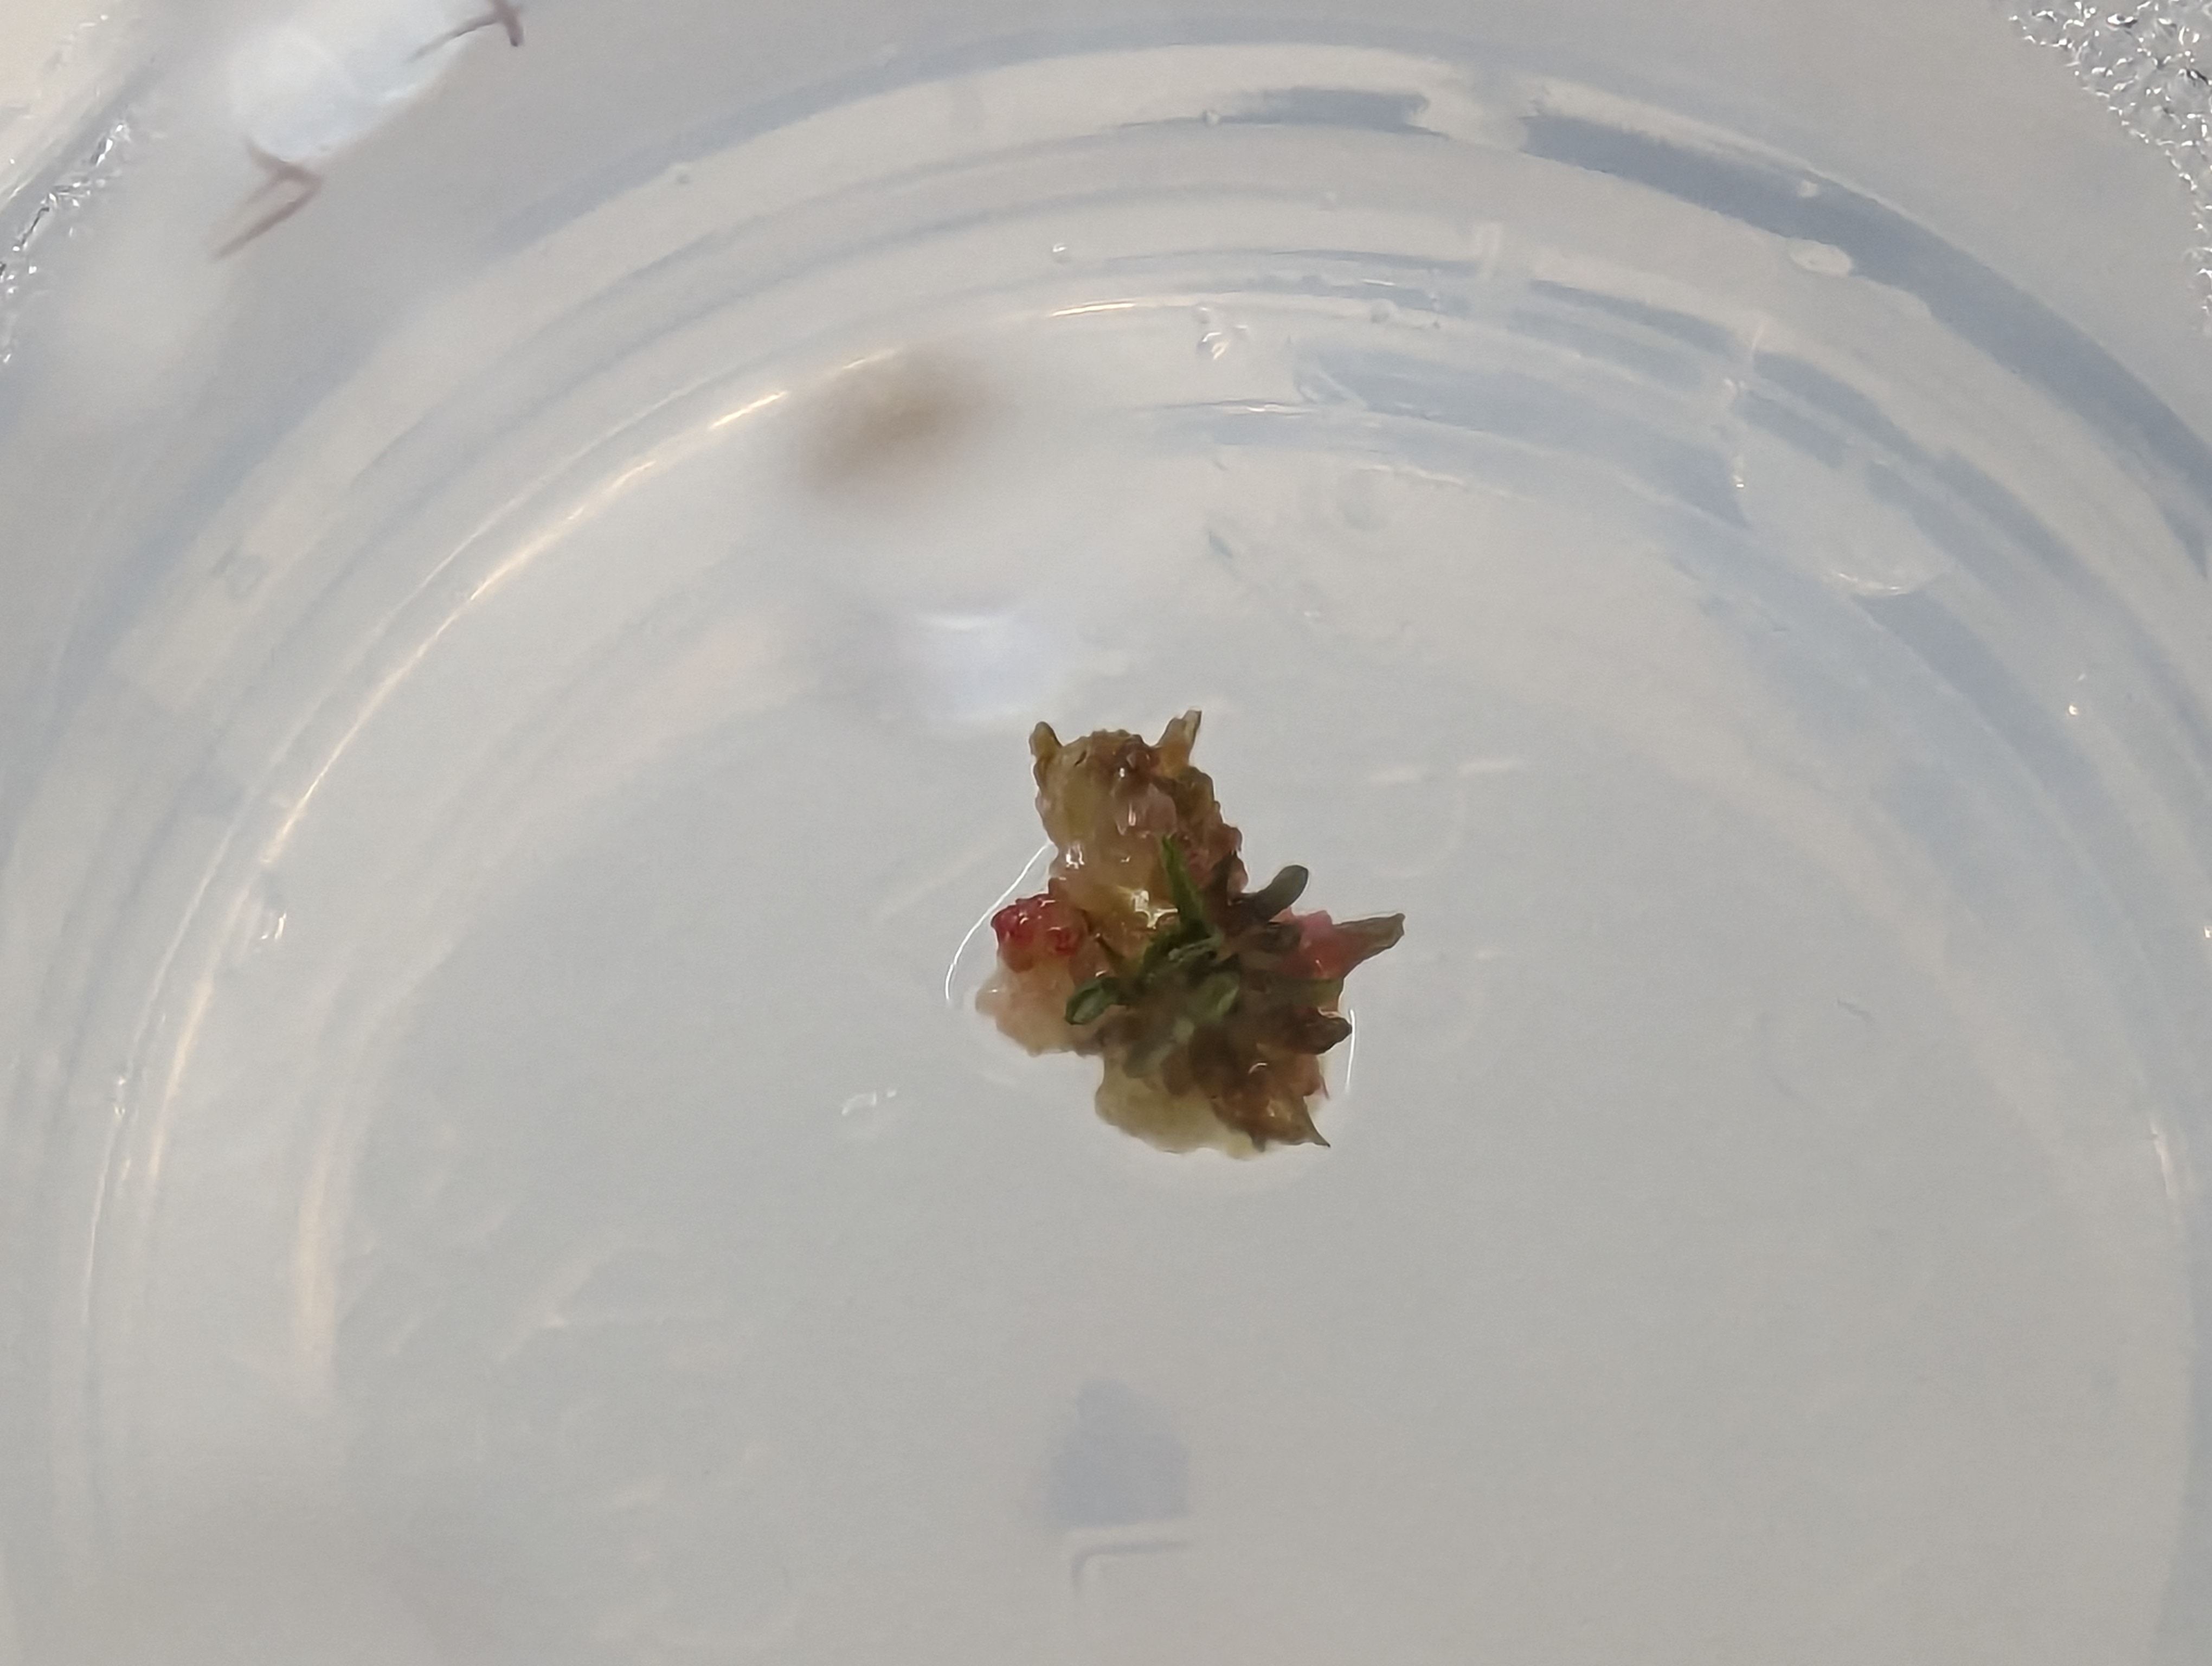
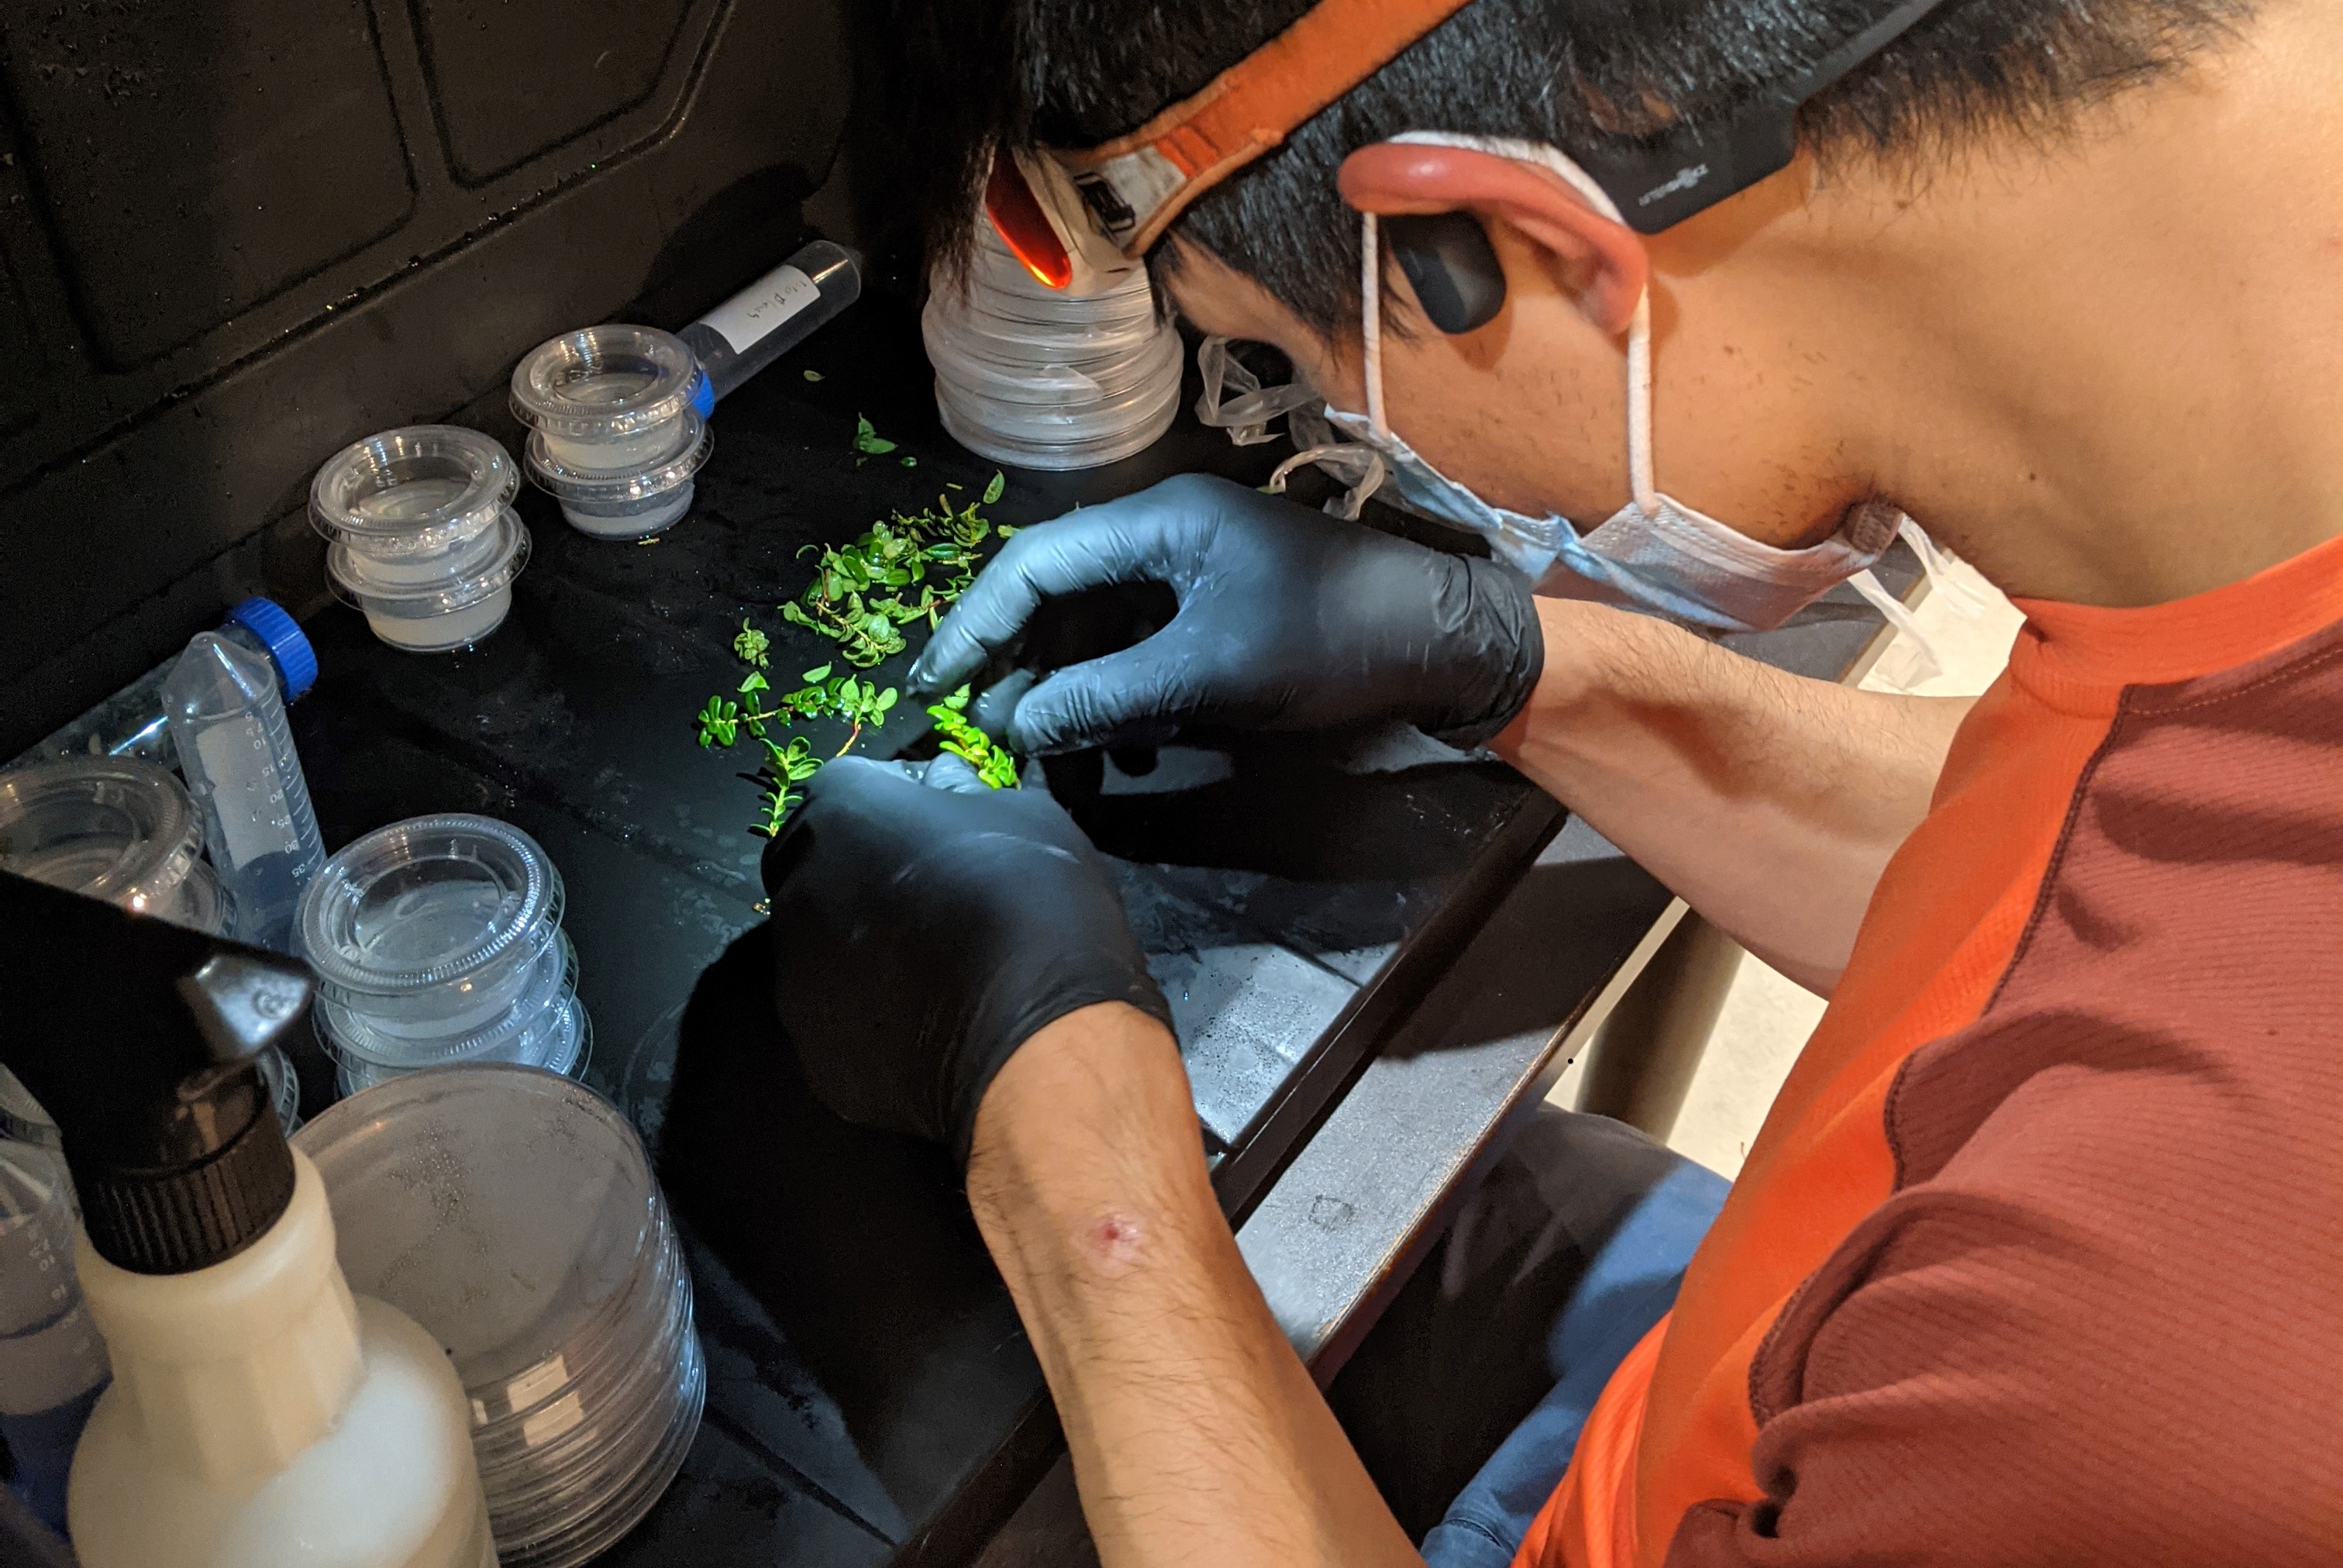
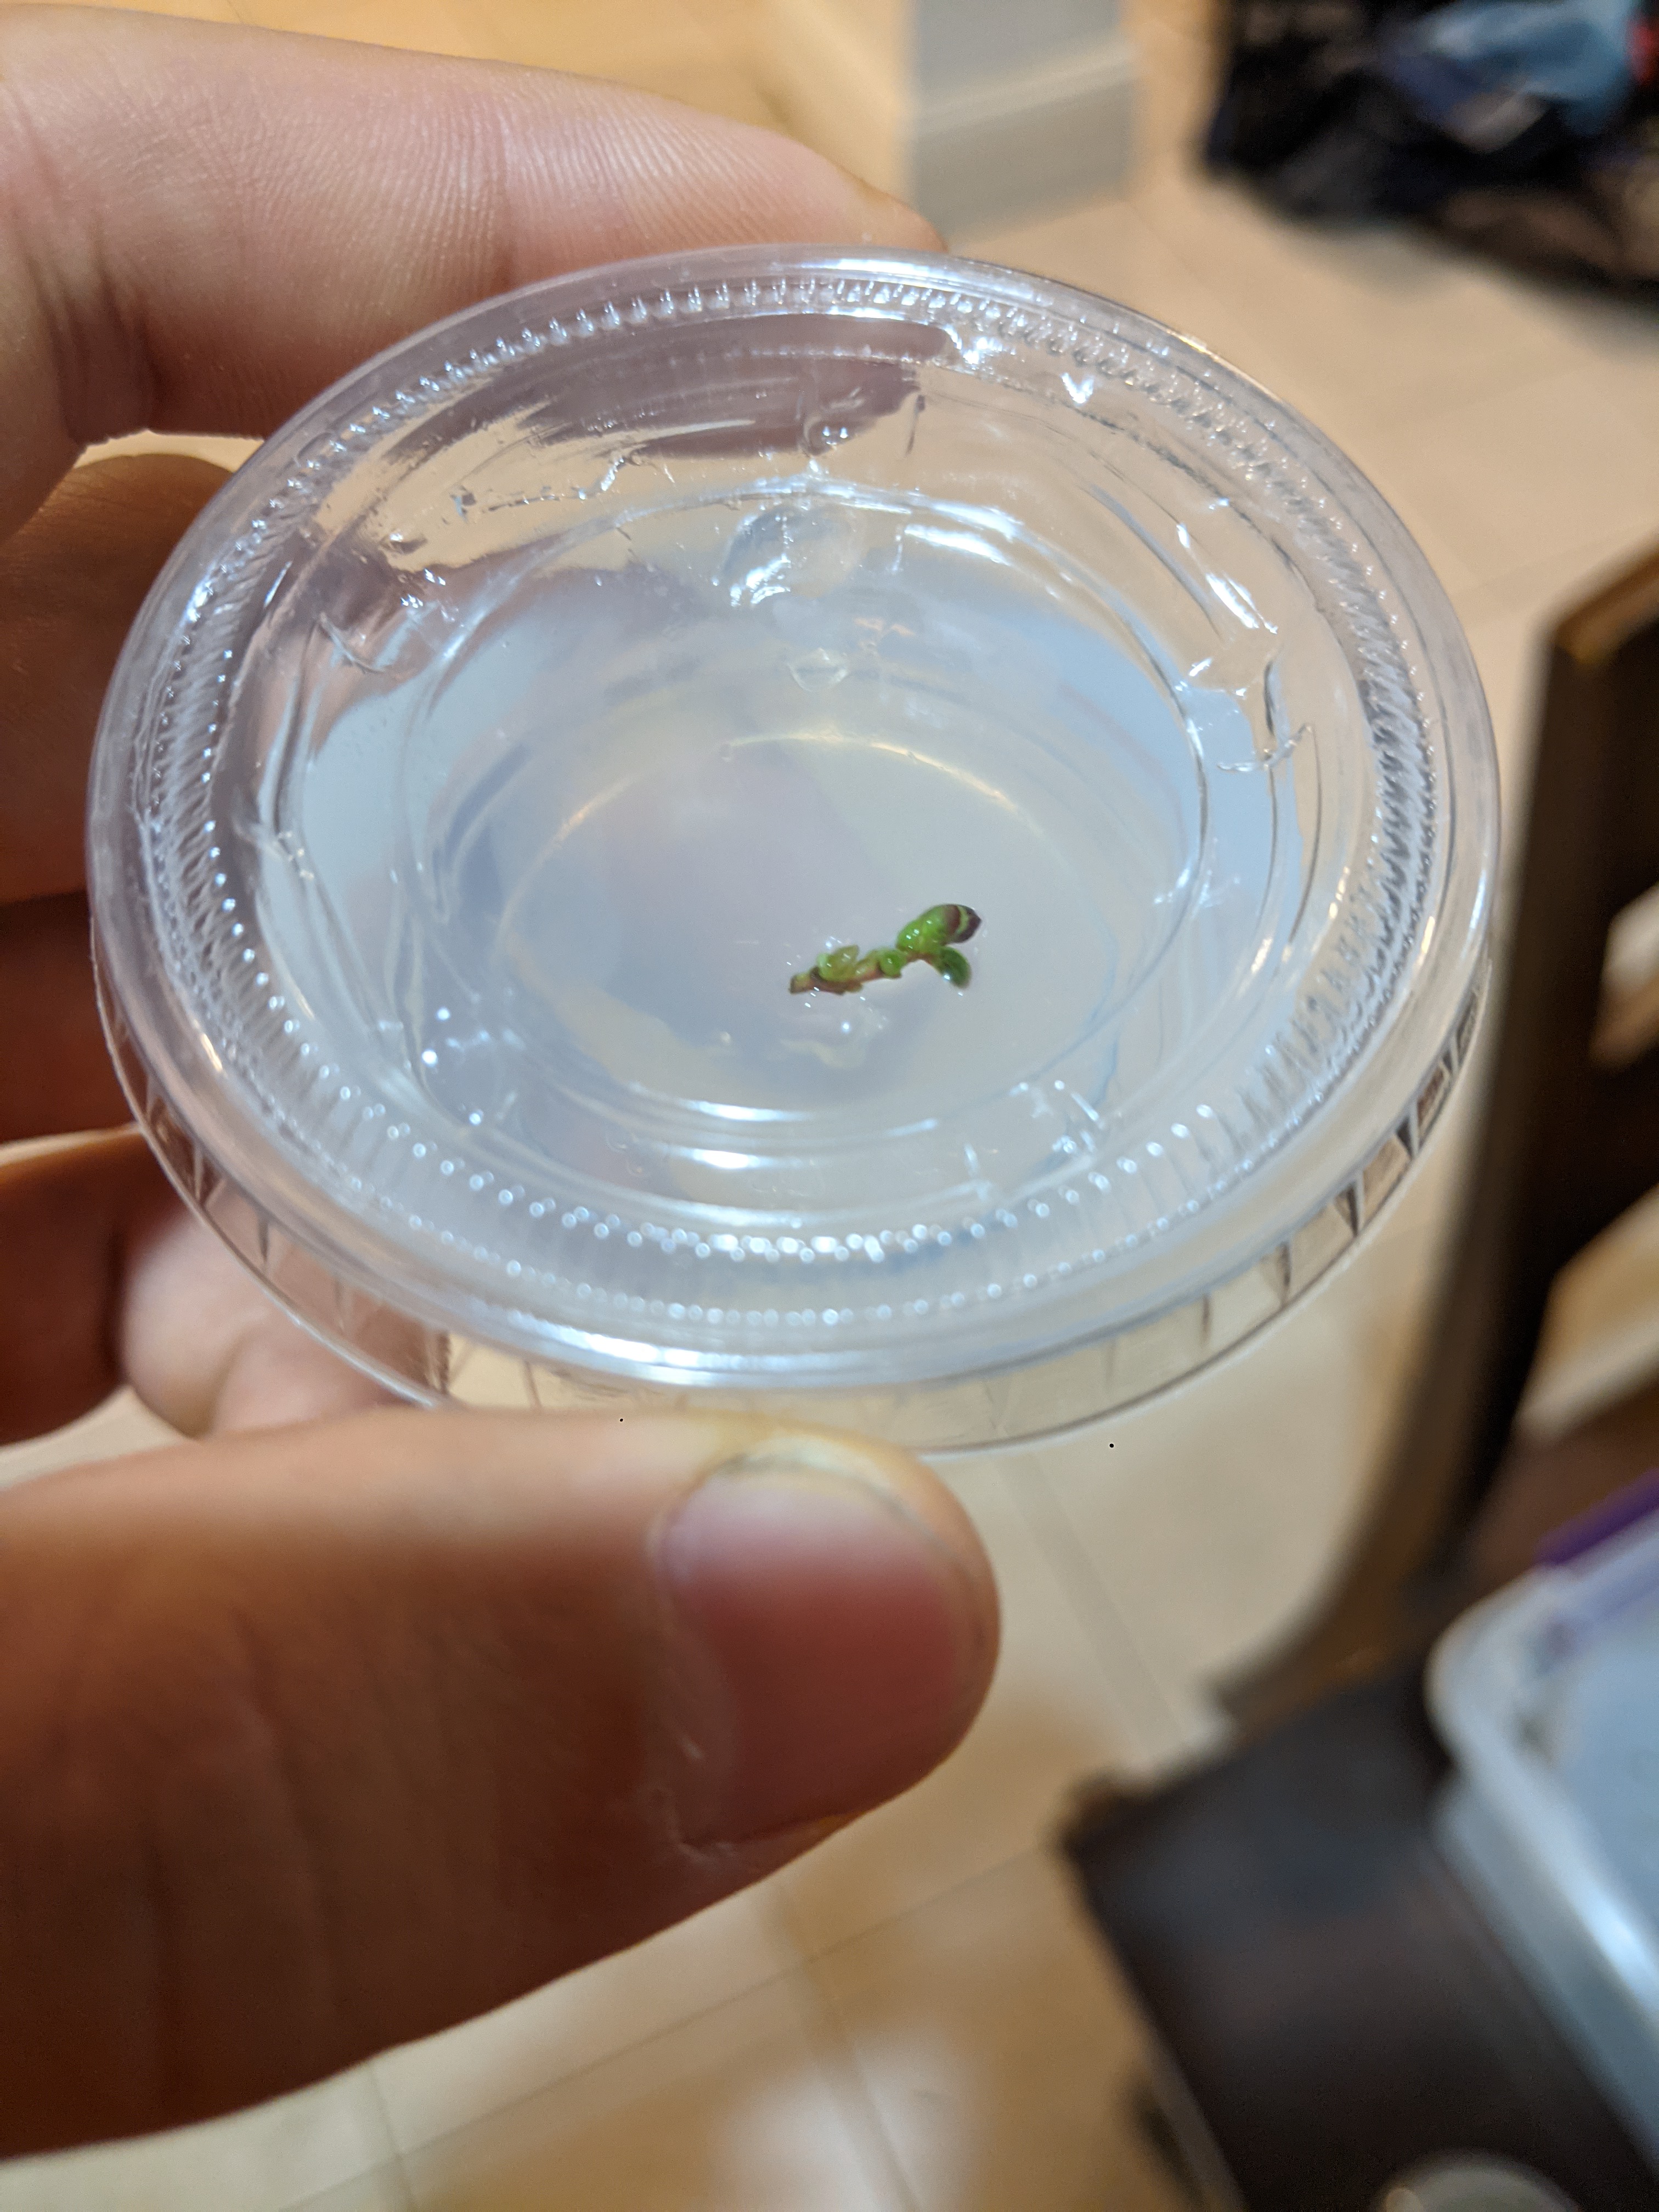
UnbeLEAFable! This is a tiny leaf growing from a callus culture, produced from a tiny cutting harvested from the wild. This is exactly what I expected (and hoped) would happen with this project. In a few more months, I hope to have rooted plantlets that I can transfer to normal soil media for hardening! Once the plants are rooted in soil, I will write up a detailed procedure on the whole process.
I have reached the point where I have enough lingonberry cell mass to try rooting a few of them. This is done on different media, and since I want to have these develop into plants with leaves and roots, I can’t do it in a petri dish!
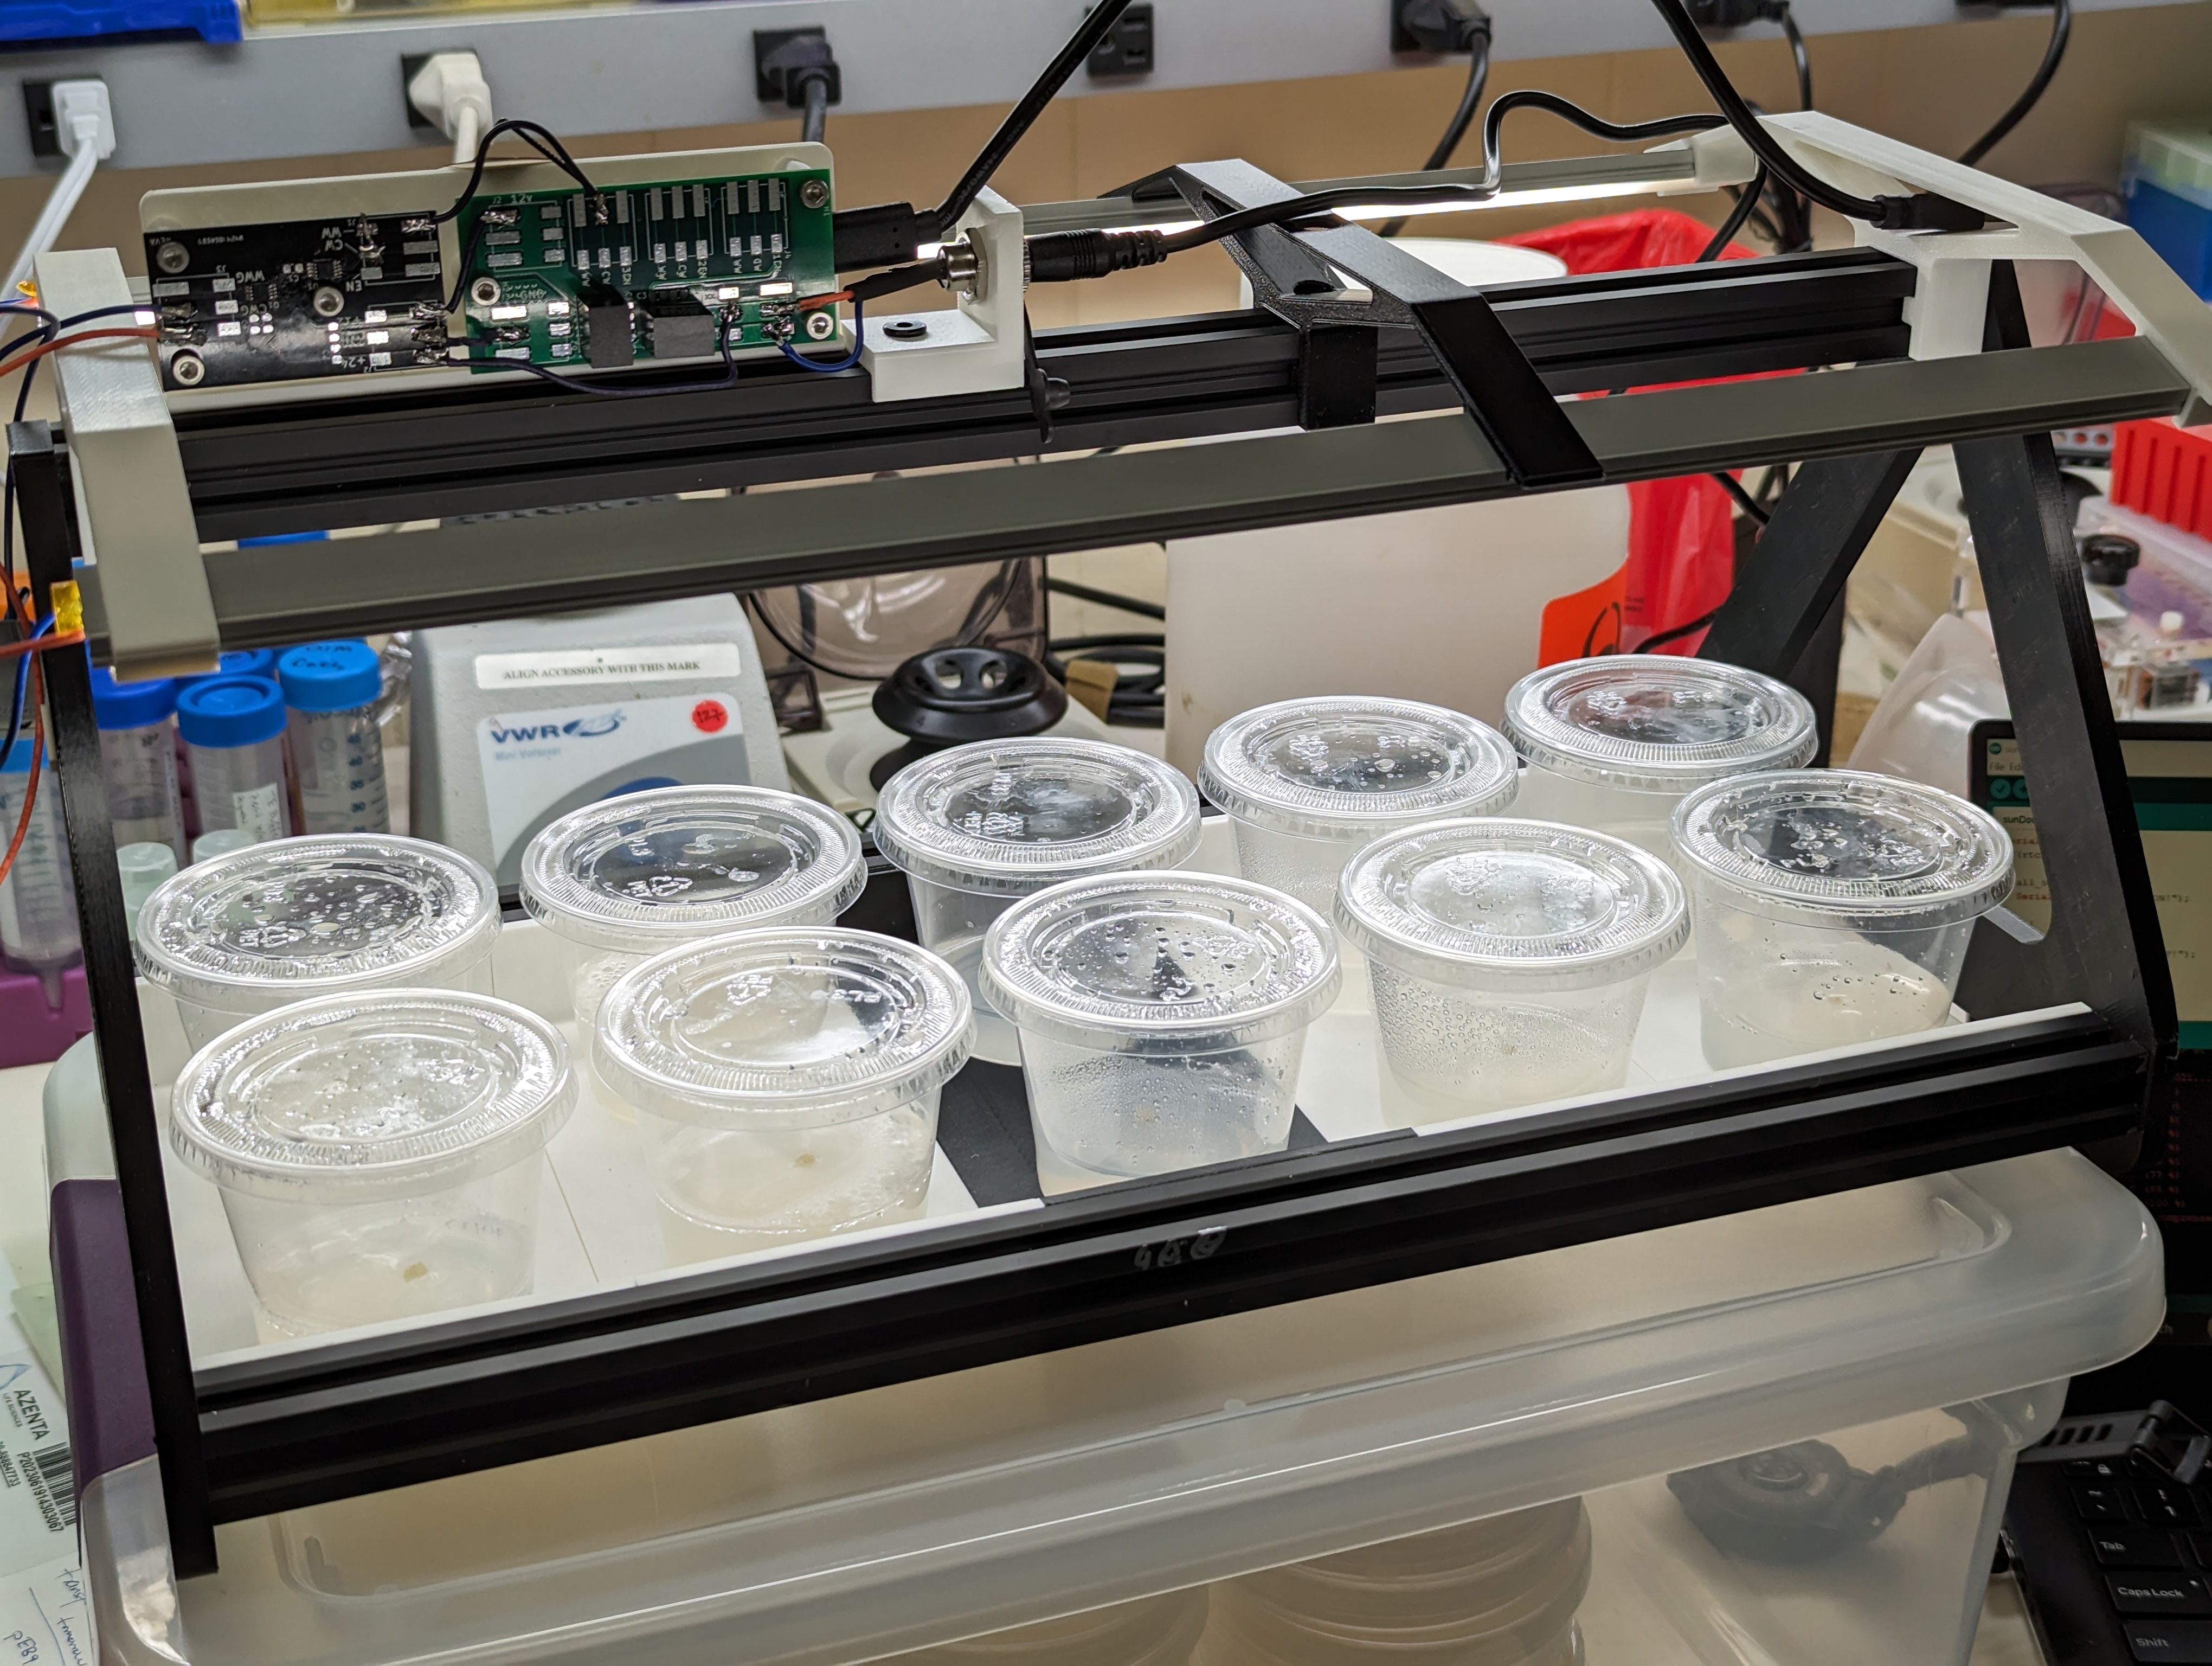
Instead of using a purpose-made plant growing container, or even a polypropylene takeout container, I am using some condiment containers I have left over from the original cell culture experiments I did a few years ago. These are half polypropylene, which is autoclavable, and half polystyrene, which is not. To use these, I autoclave the bottom half and soak the other half in bleach while the autoclave is running- when the parts come out, I pour media and fish a lid out of the bleach. it seems to work well enough against contamination.
The media is woody plant media with MS vitamins and zeatin, per the recipe in Plants from Test Tubes. I poured a few CM into each cup (these are large condiment cups, not the tiny ones).
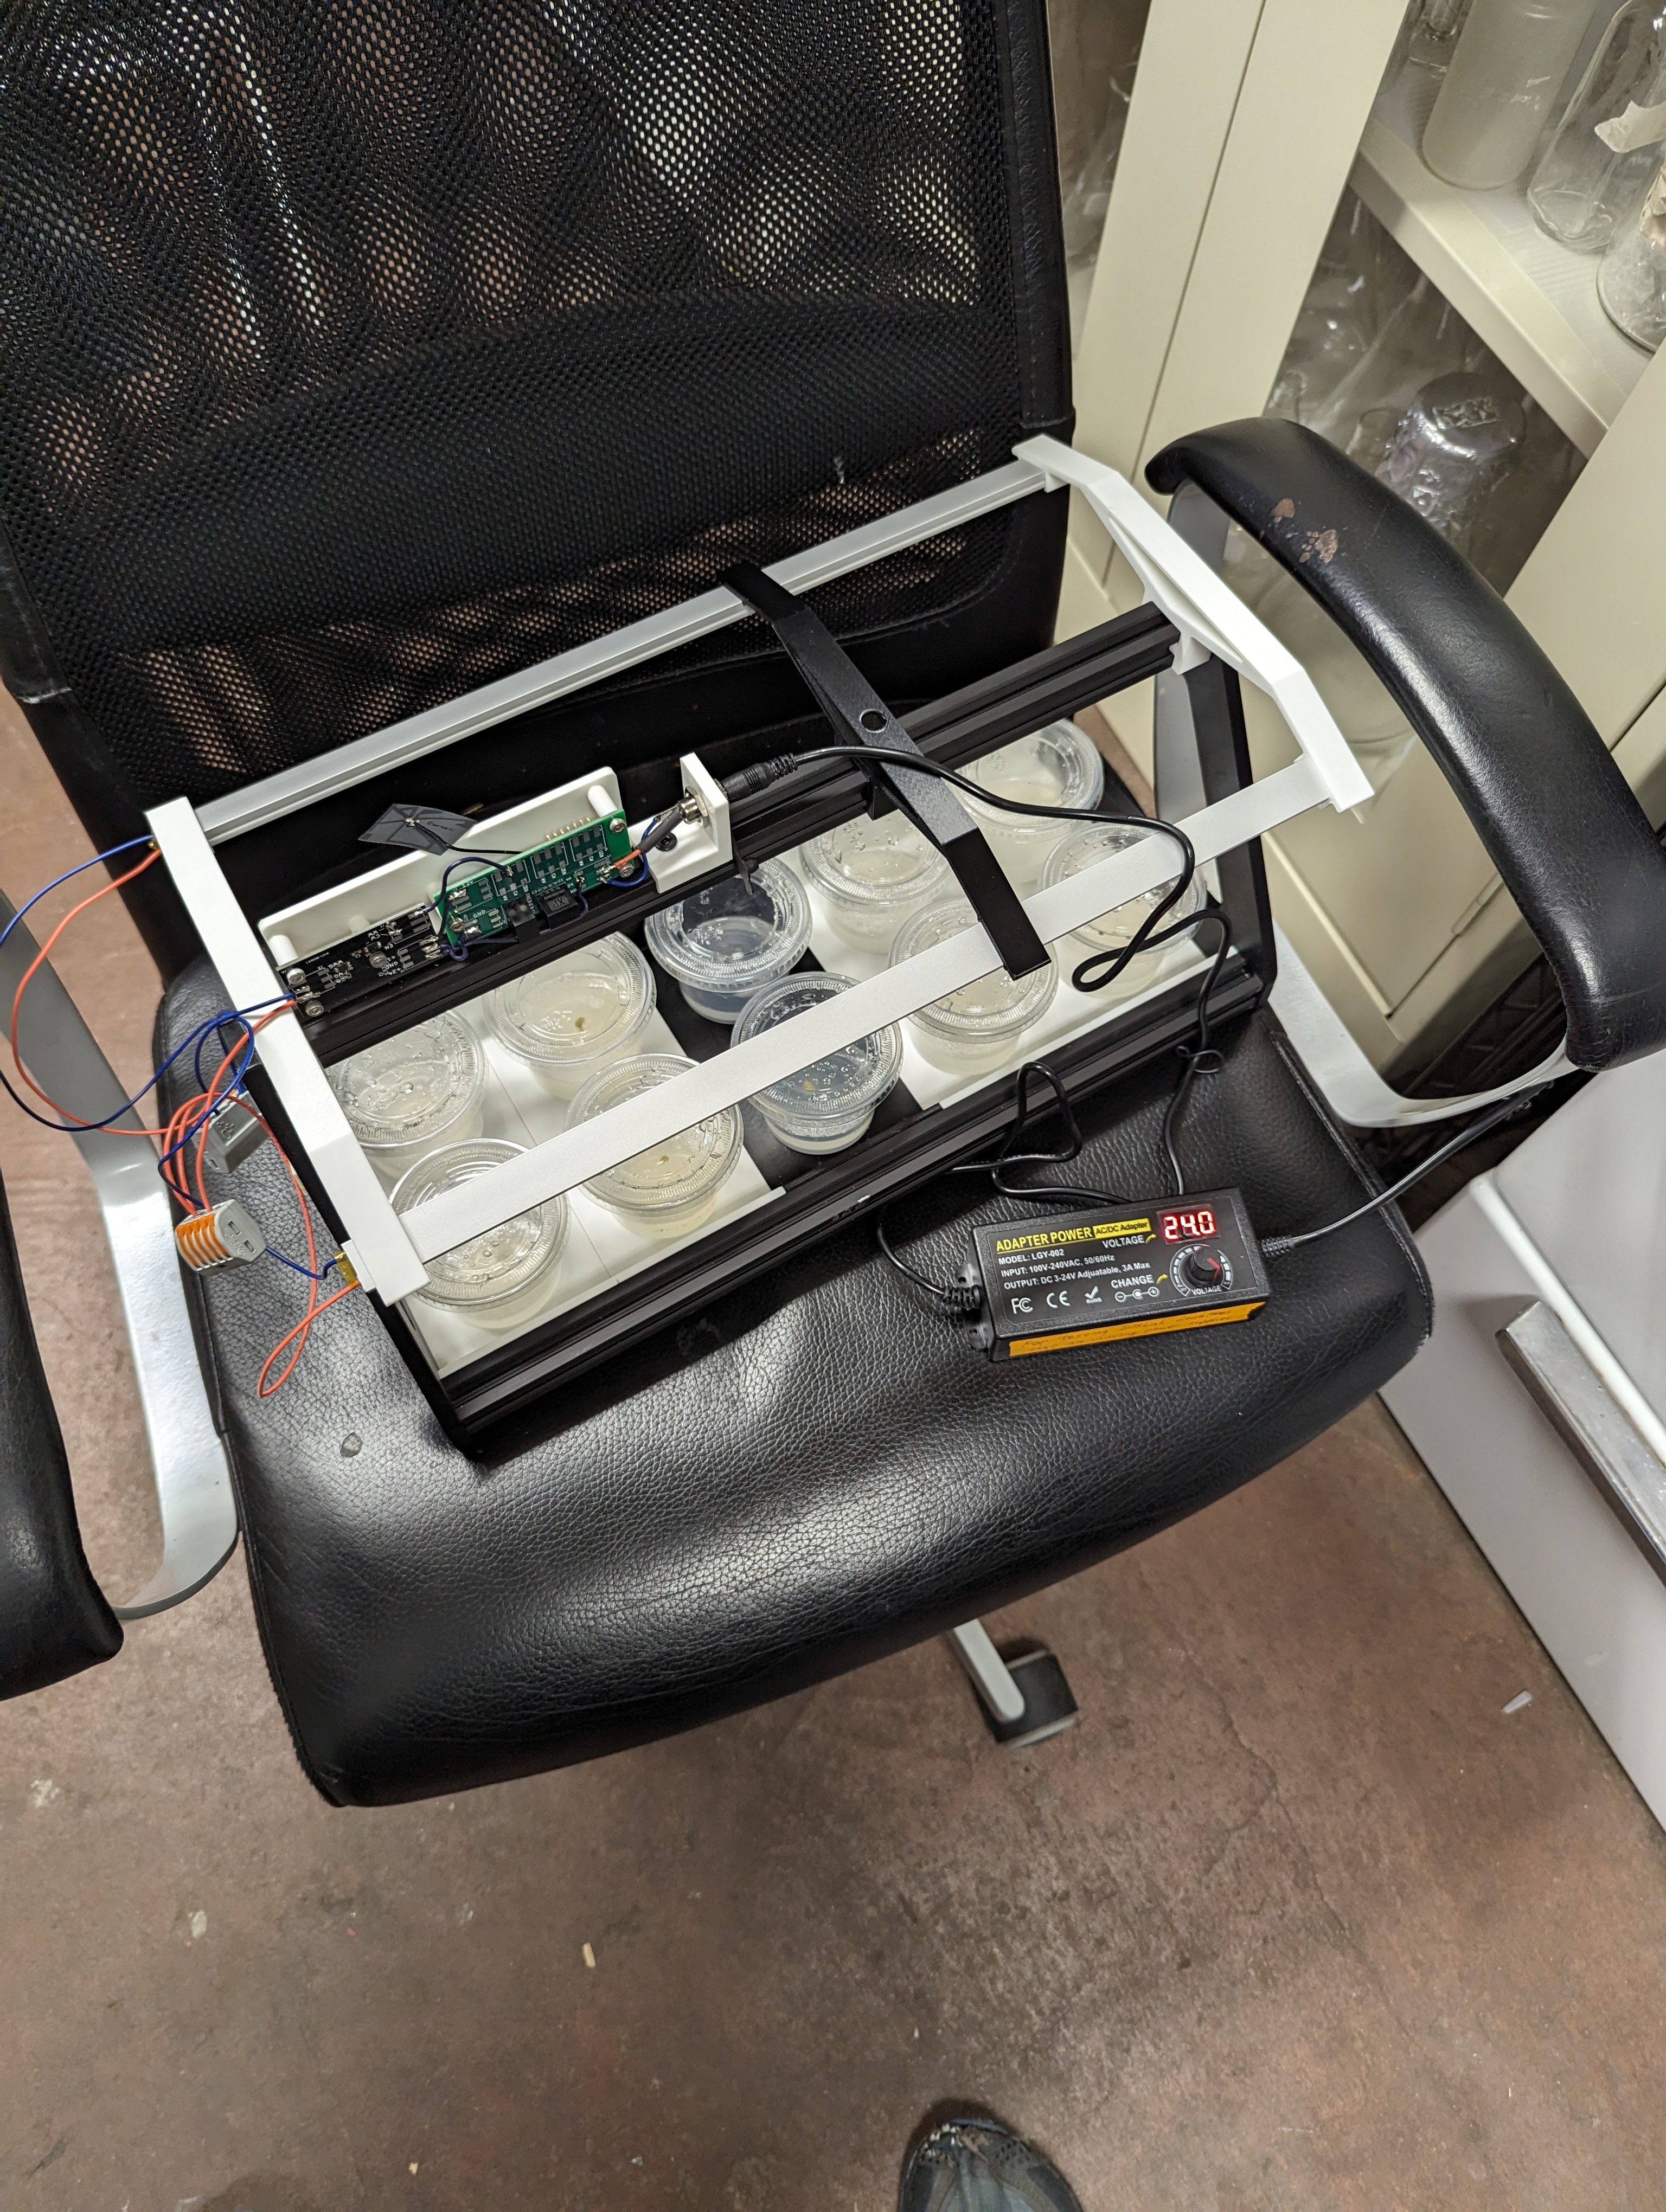
The basement chair of rooting
During rooting, it seems important to have a source of light so that the plants can start making their own sugars. These are growing in a basement, which is roughly “room temperature”, but there is not much light down there. I built a rooting tray with overhead lighting for the plants. It is mostly built off of the hardware for the “SunDown” lamp that I built. The hardware is a little overkill, but modular enough to be recycled into future lighting projects.
I was curious to see what the lingonberry plants looked like up on Franconia ridge. To this end, I took a high speed nature walk up the falling waters trail to middle haystack, over to Lafayette, and then back down to the parking lot.
This trail is an interesting slice of biomes in the notch, and it is (rightfully) one of the most popular trails, coming in at about 8+ miles and around 4k of gain, with good parking, it’s also very accessible.
The falling water trail zig zags up to middle haystack, crossing a stream/waterfall several times. This area is always wet, and due to the recent high rainfall, some of the crossings were a little harder to navigate.
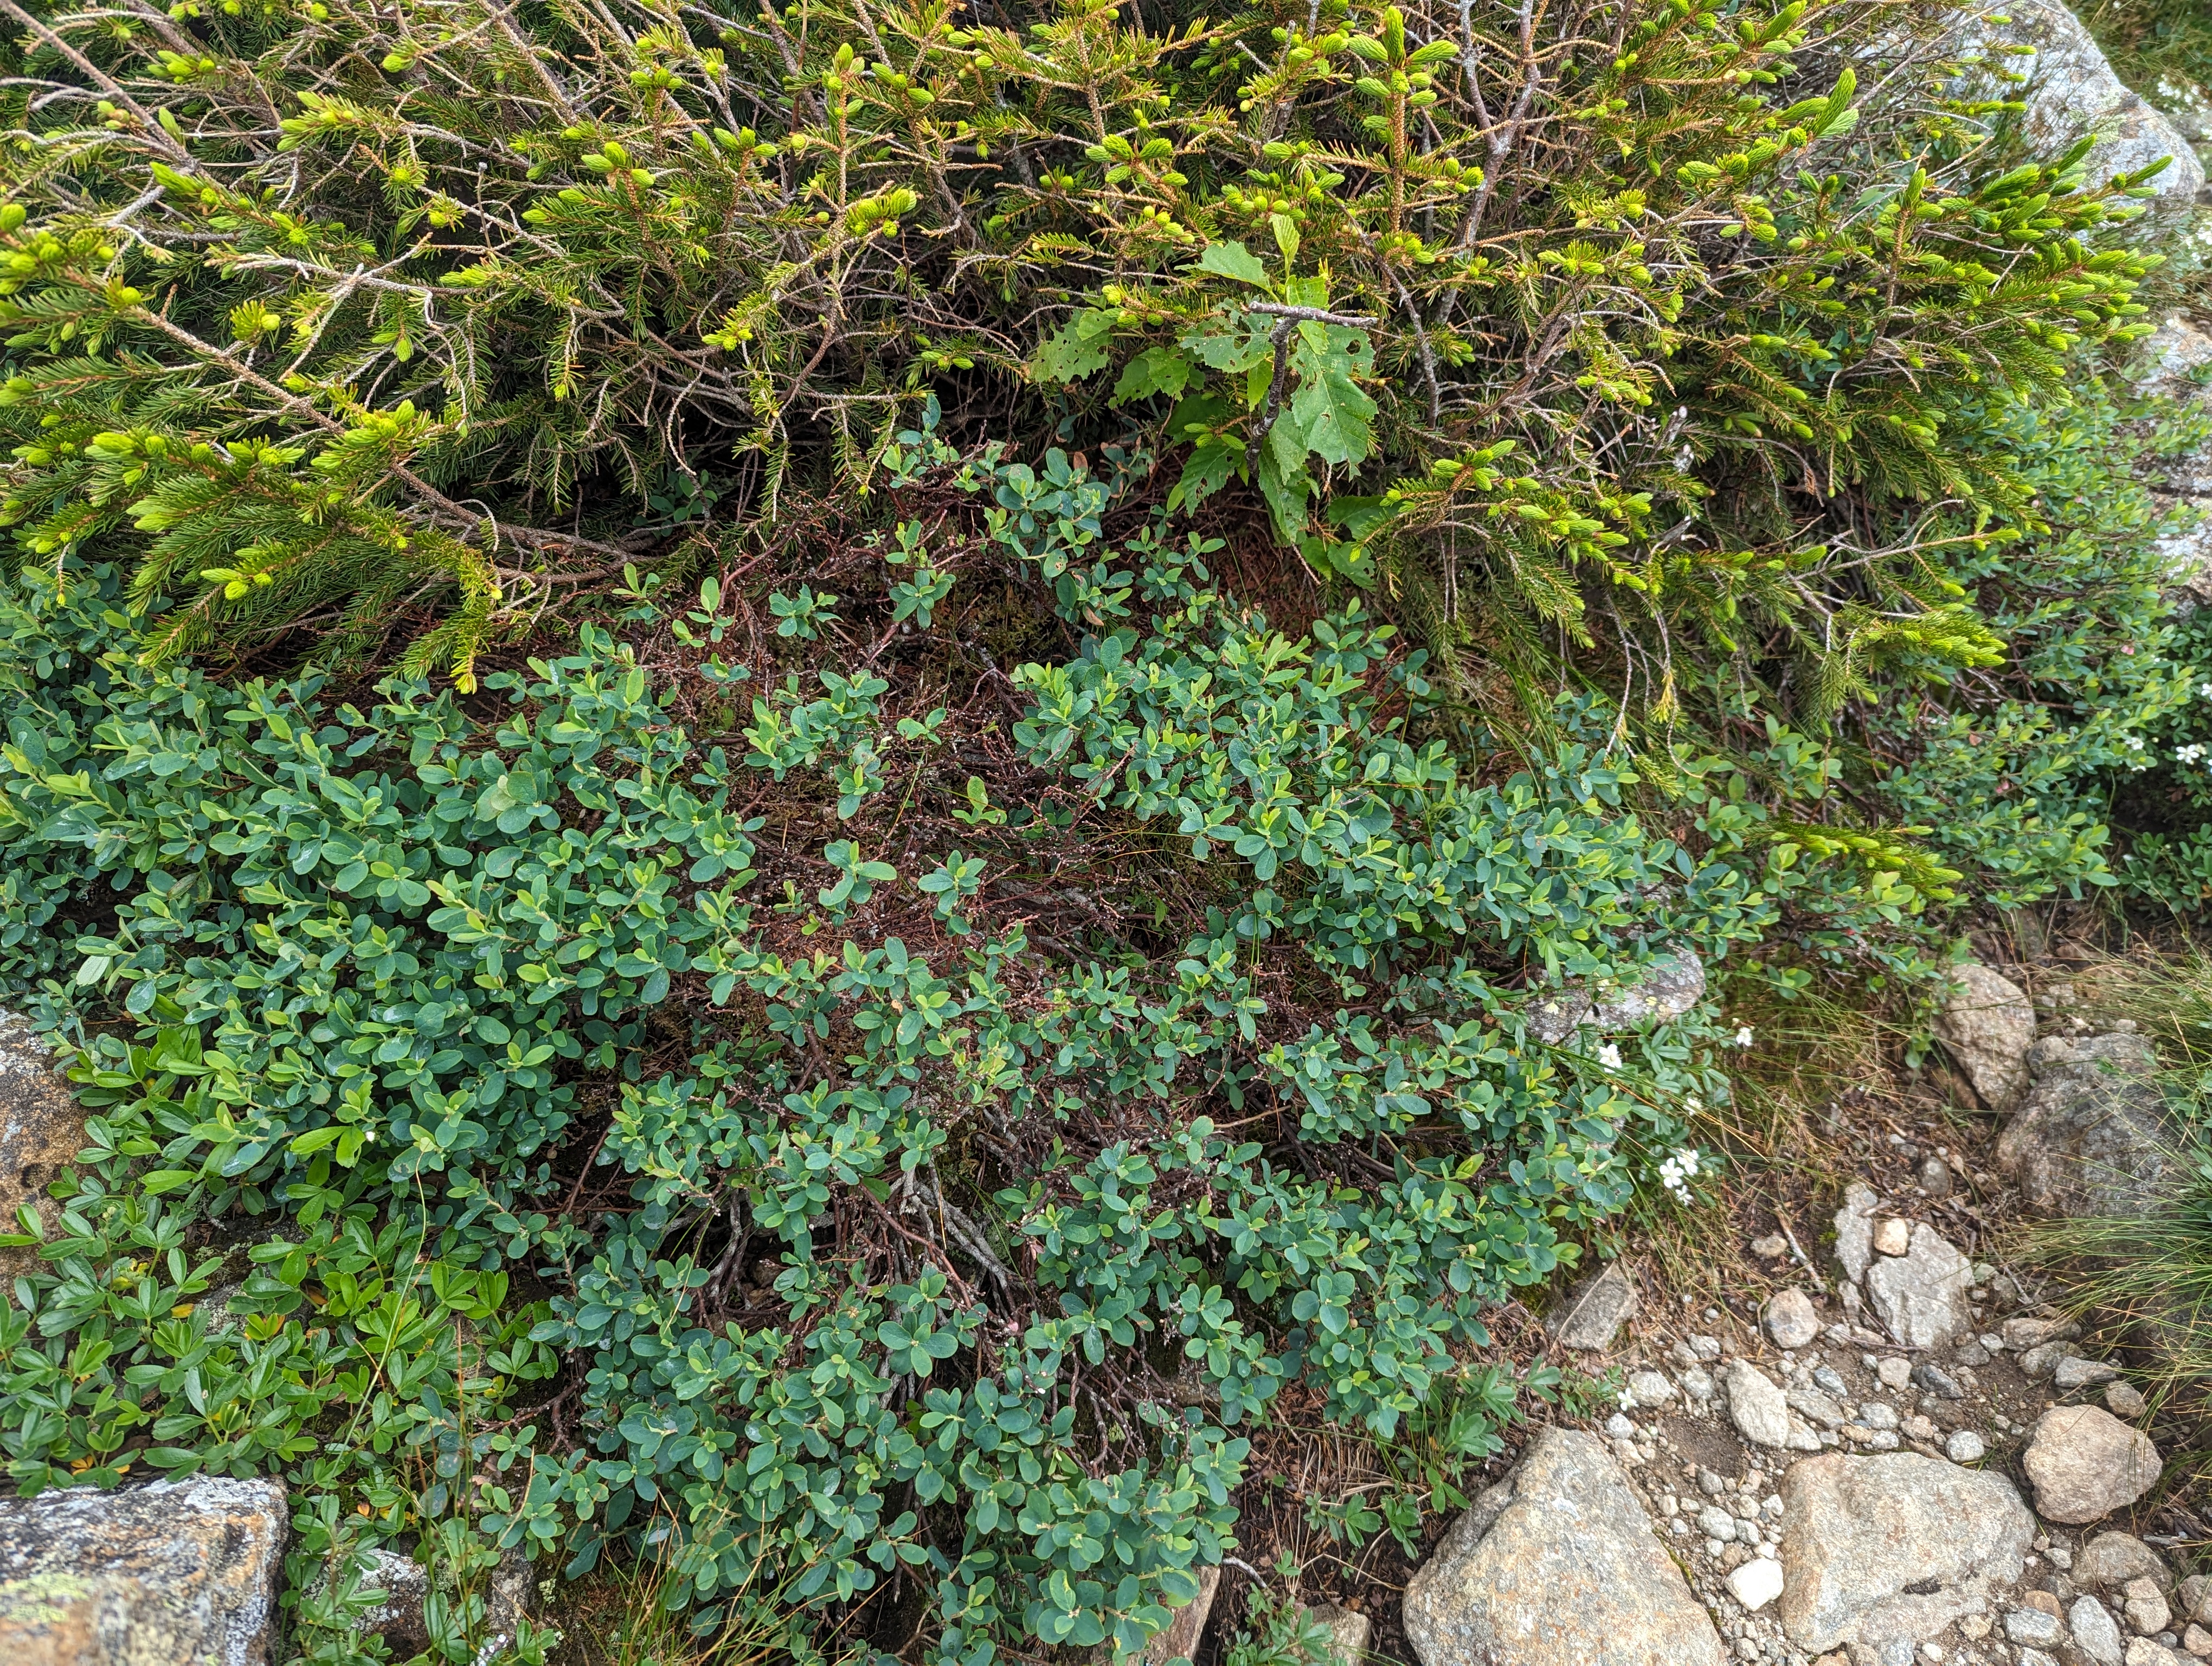
Once gaining the ridge proper, the forest drops away and you are in the alpine of the northeast! The soil is sparse and rocky, well drained and likely acidic. This supports two plants that I am interested in: Lingonberries and Blueberries.
Nature Notes from the ridge
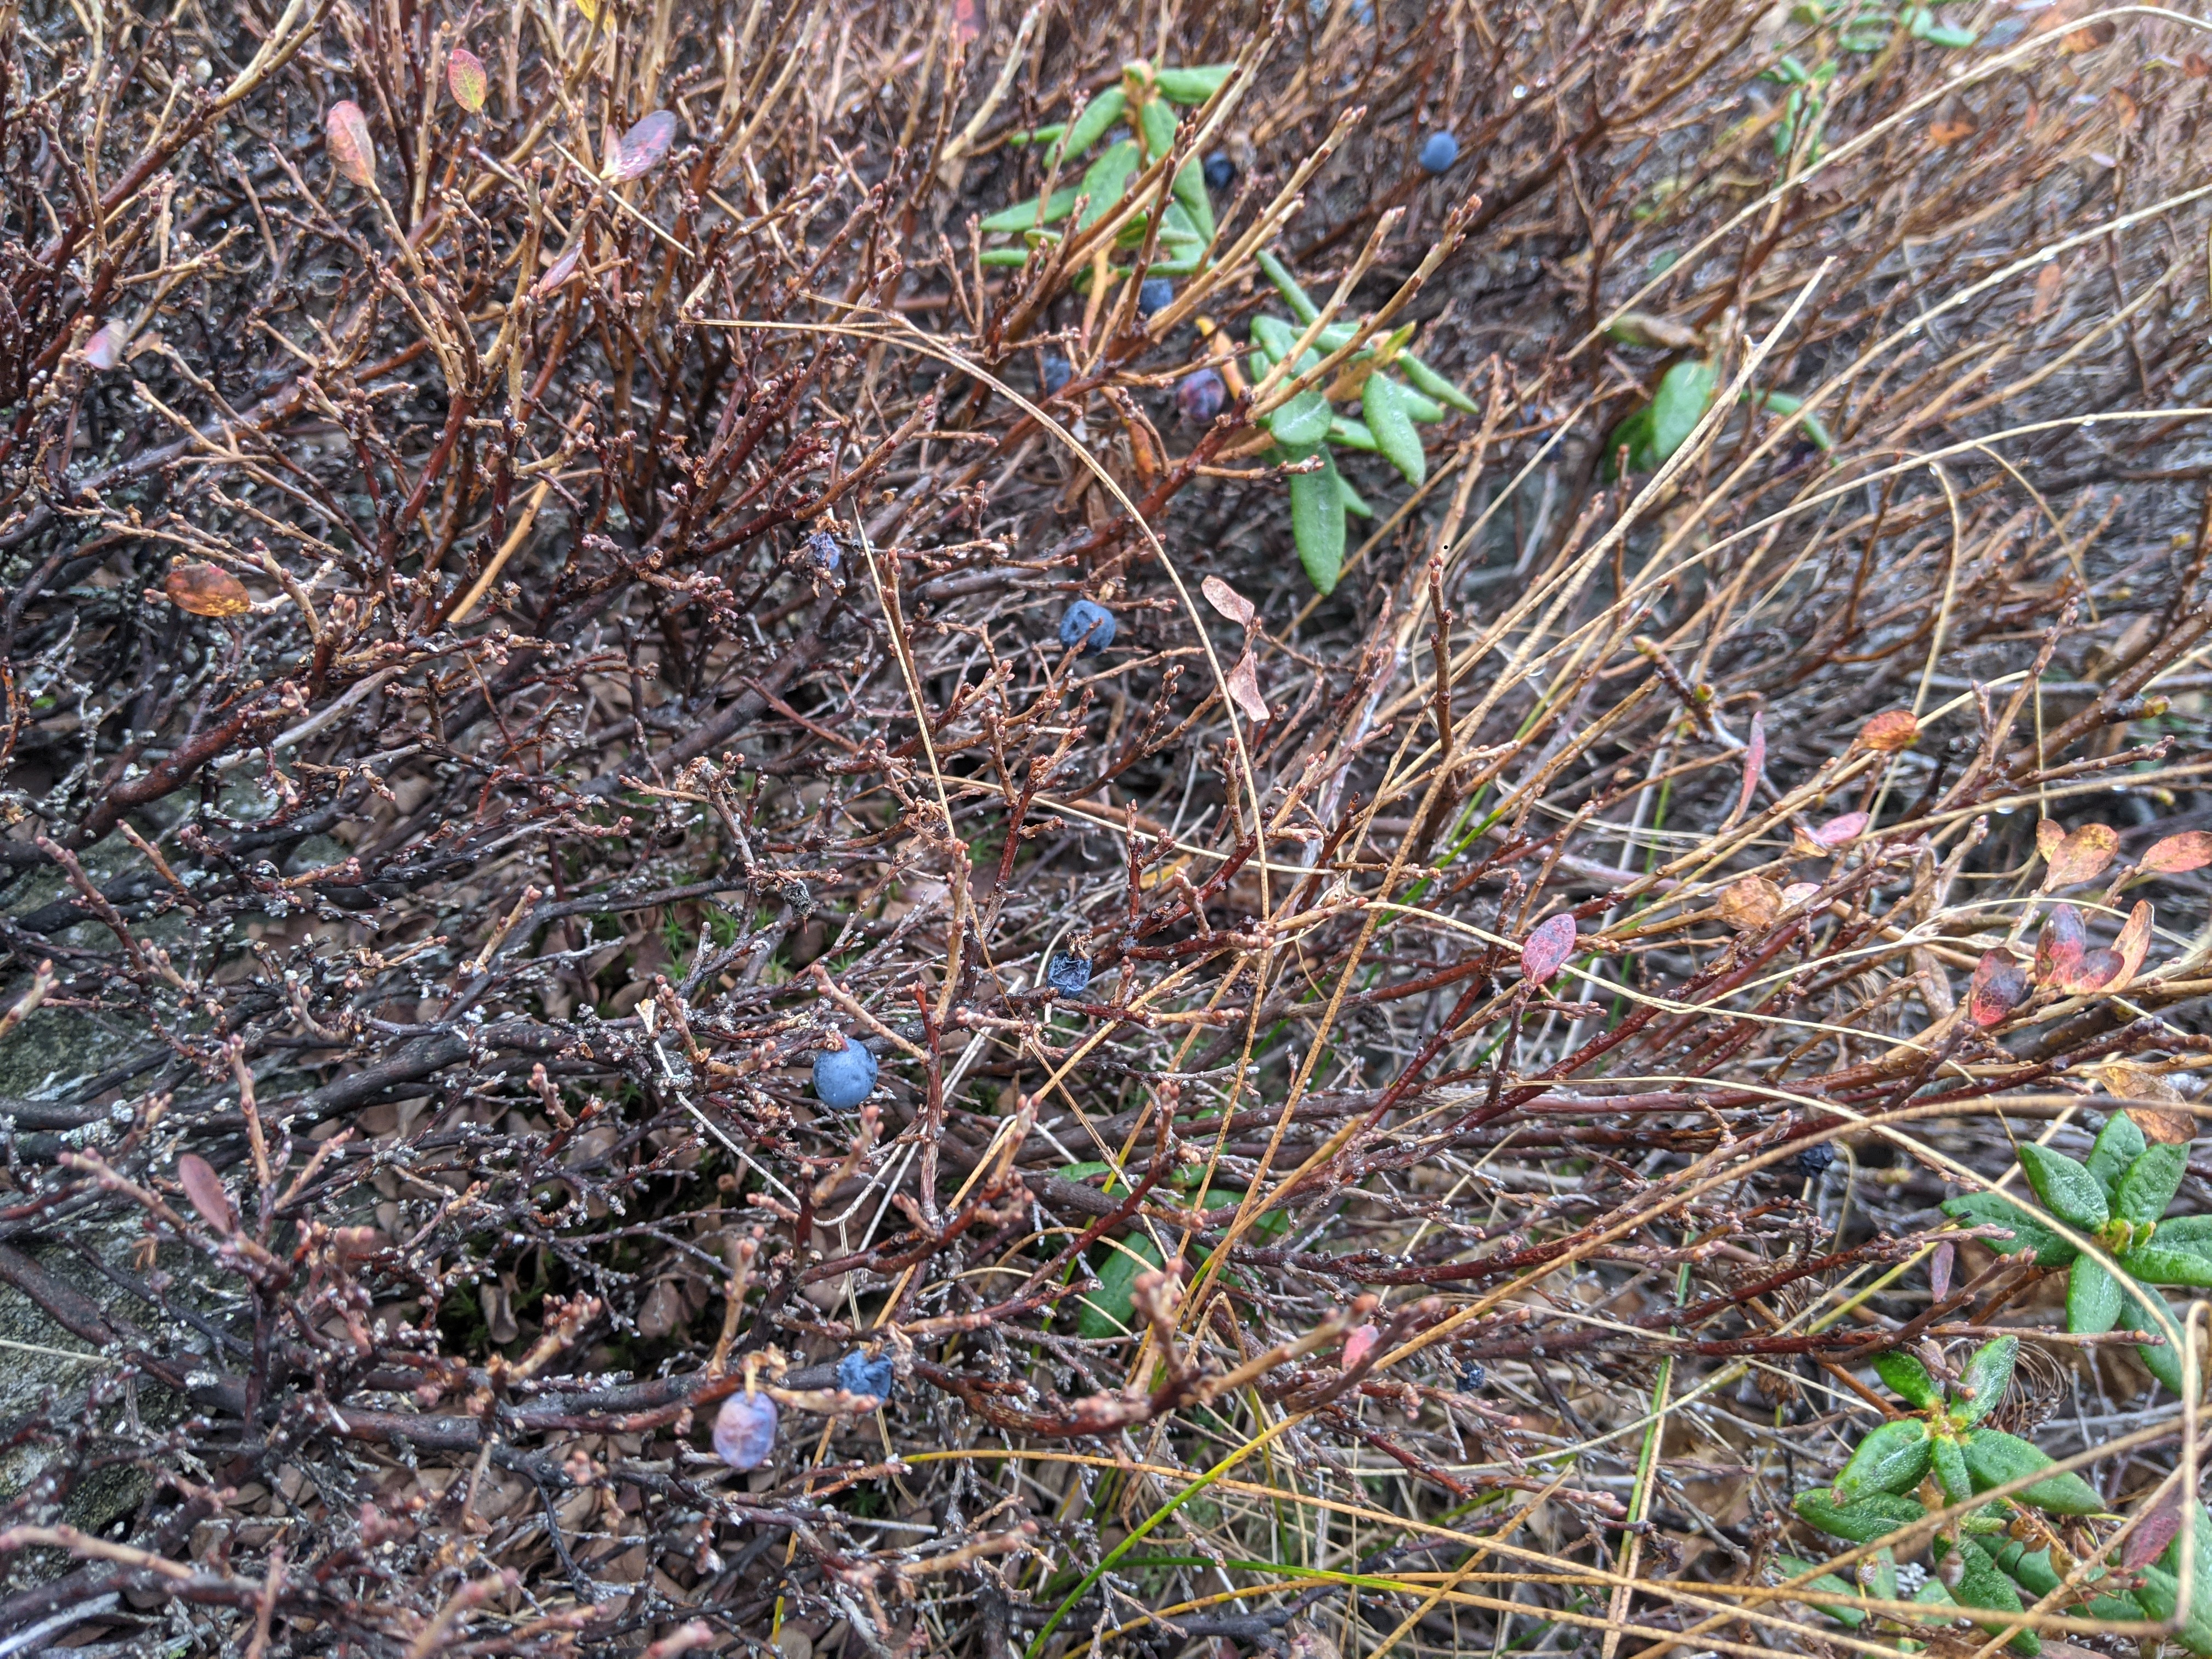
beefy blueberry bush
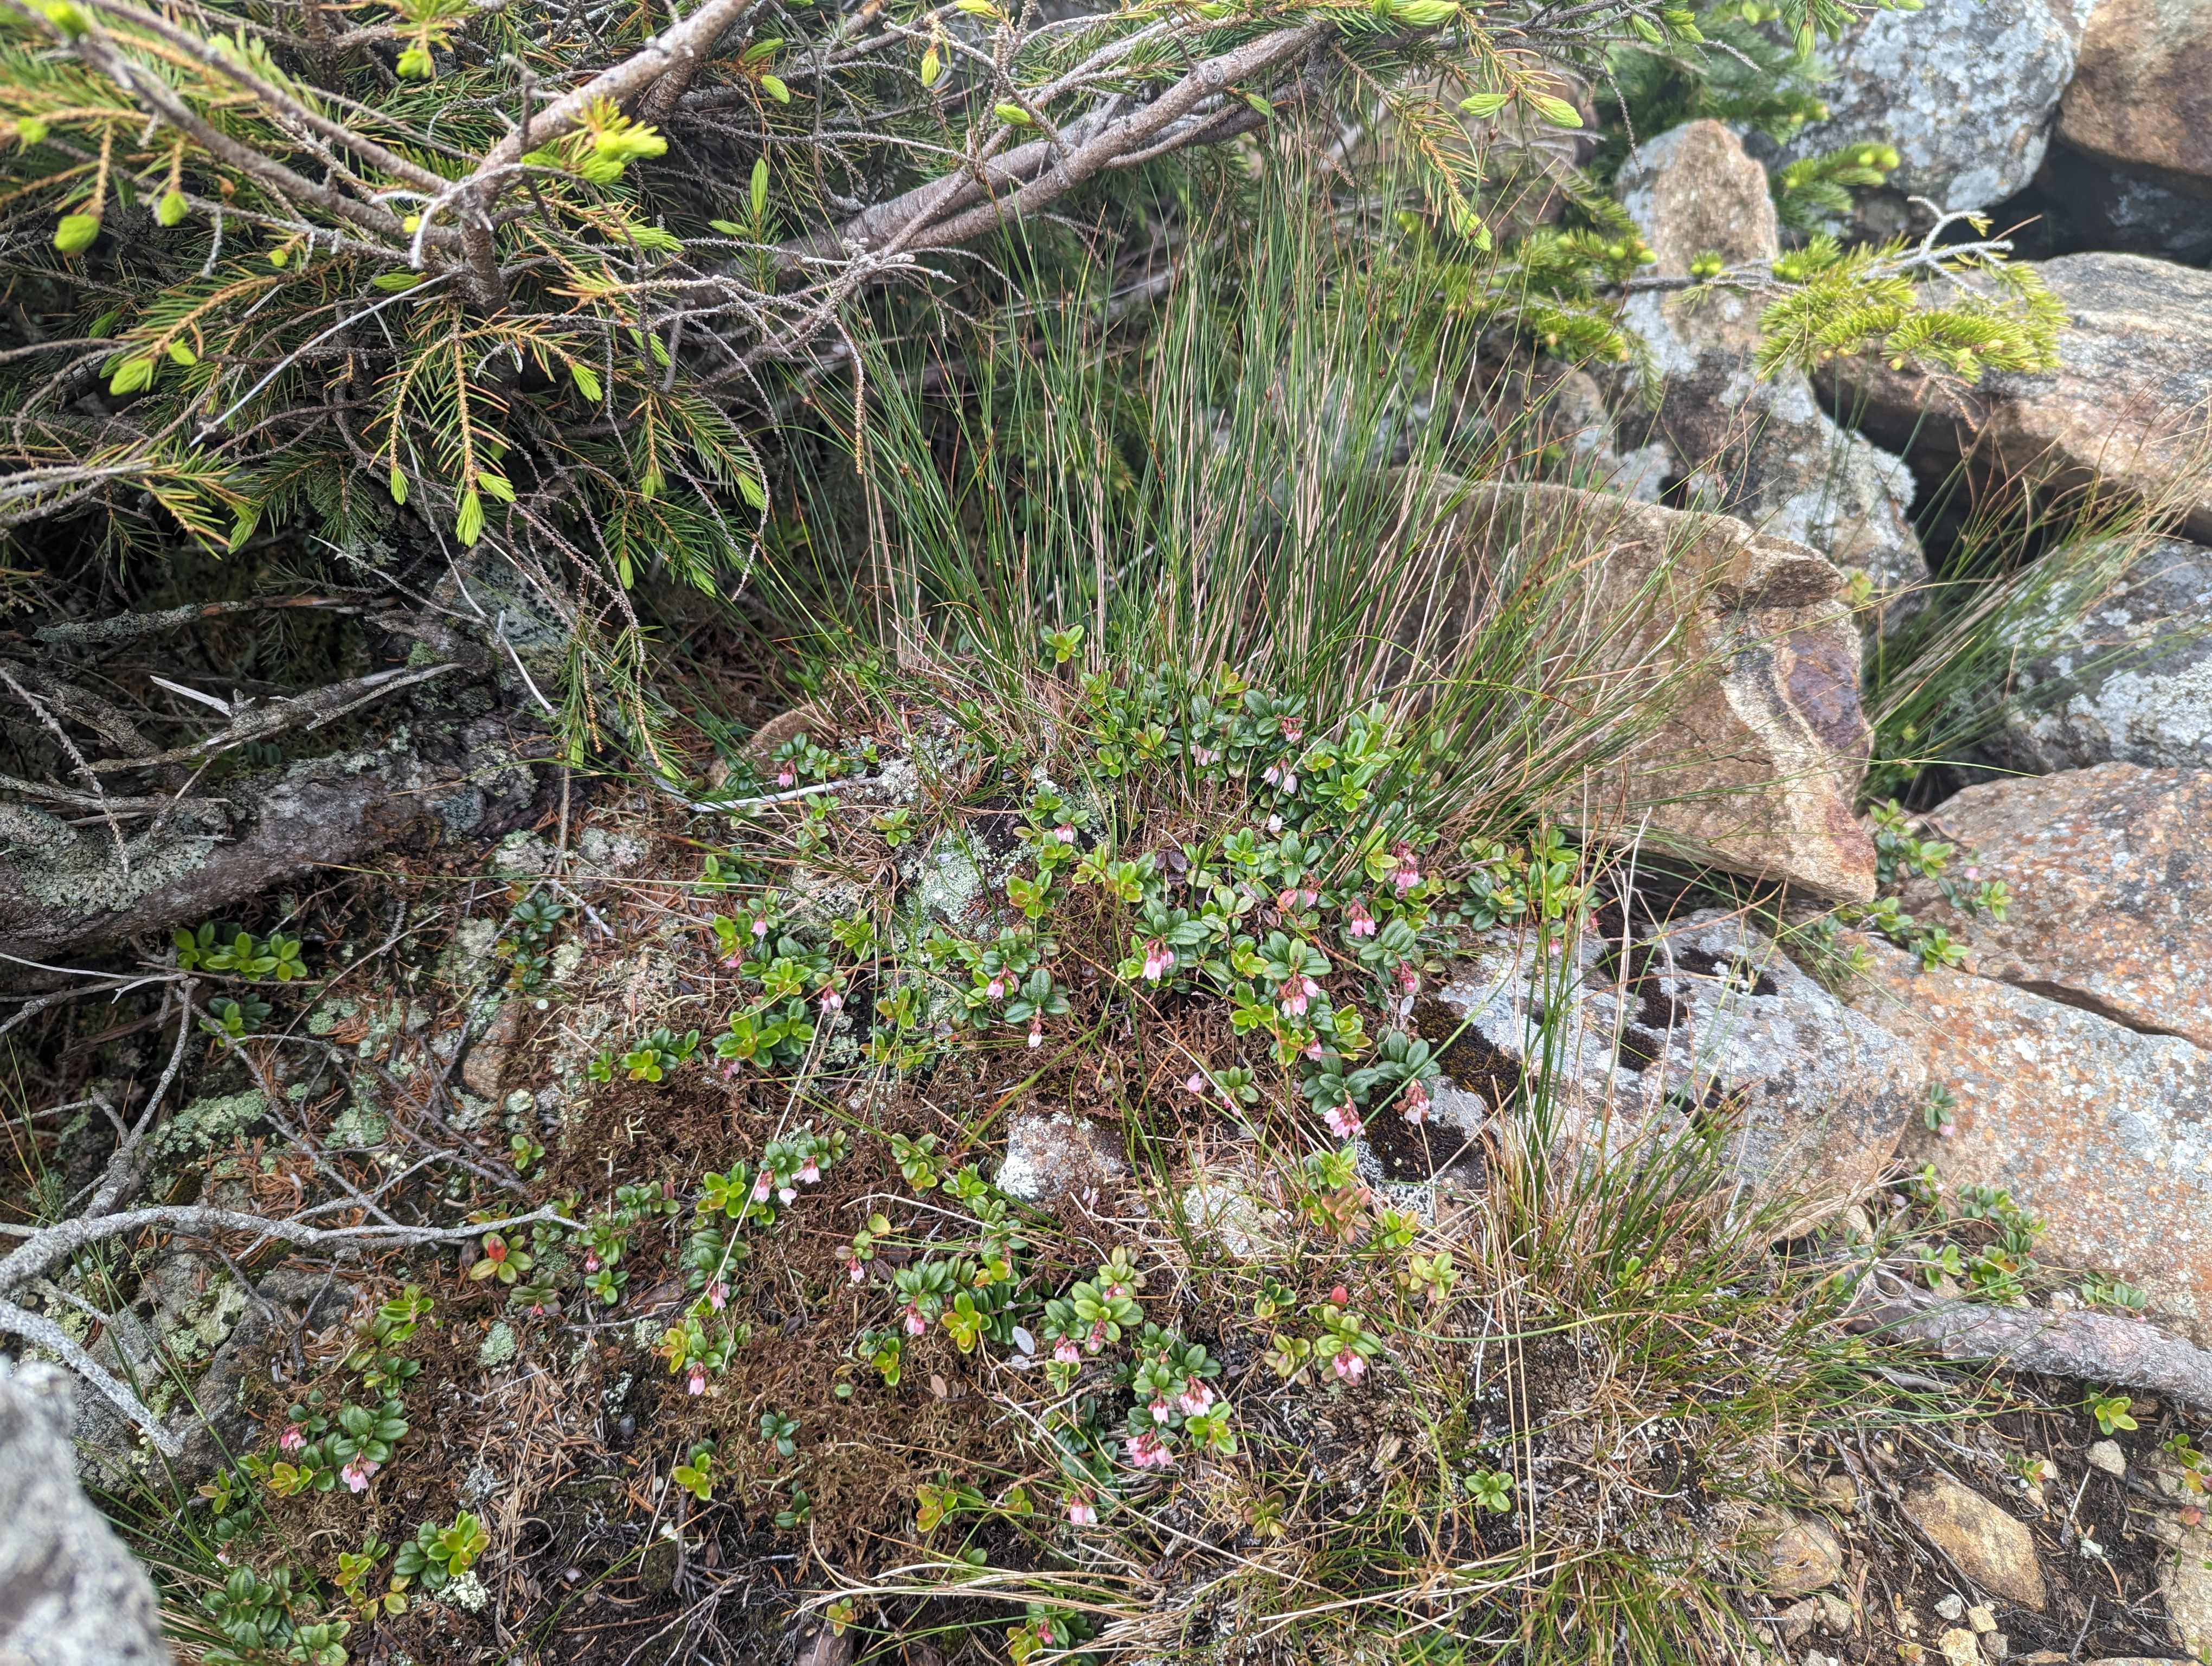
In contrast to the alpine garden trail/general mount Washington environ, the lingonberries/blueberries here seem to be a lot smaller. I suspect that is because there is a lot less soil due to the ridge being pretty exposed to the elements. Most lingonberry bushes were much smaller, with the plants being more individual instead of large mats. The blueberry bushes were low to the ground, but still large. Both the lingonberry and blueberry bushes are just starting to flower, although there were a few unripe adventitious blueberries hiding in the brush.
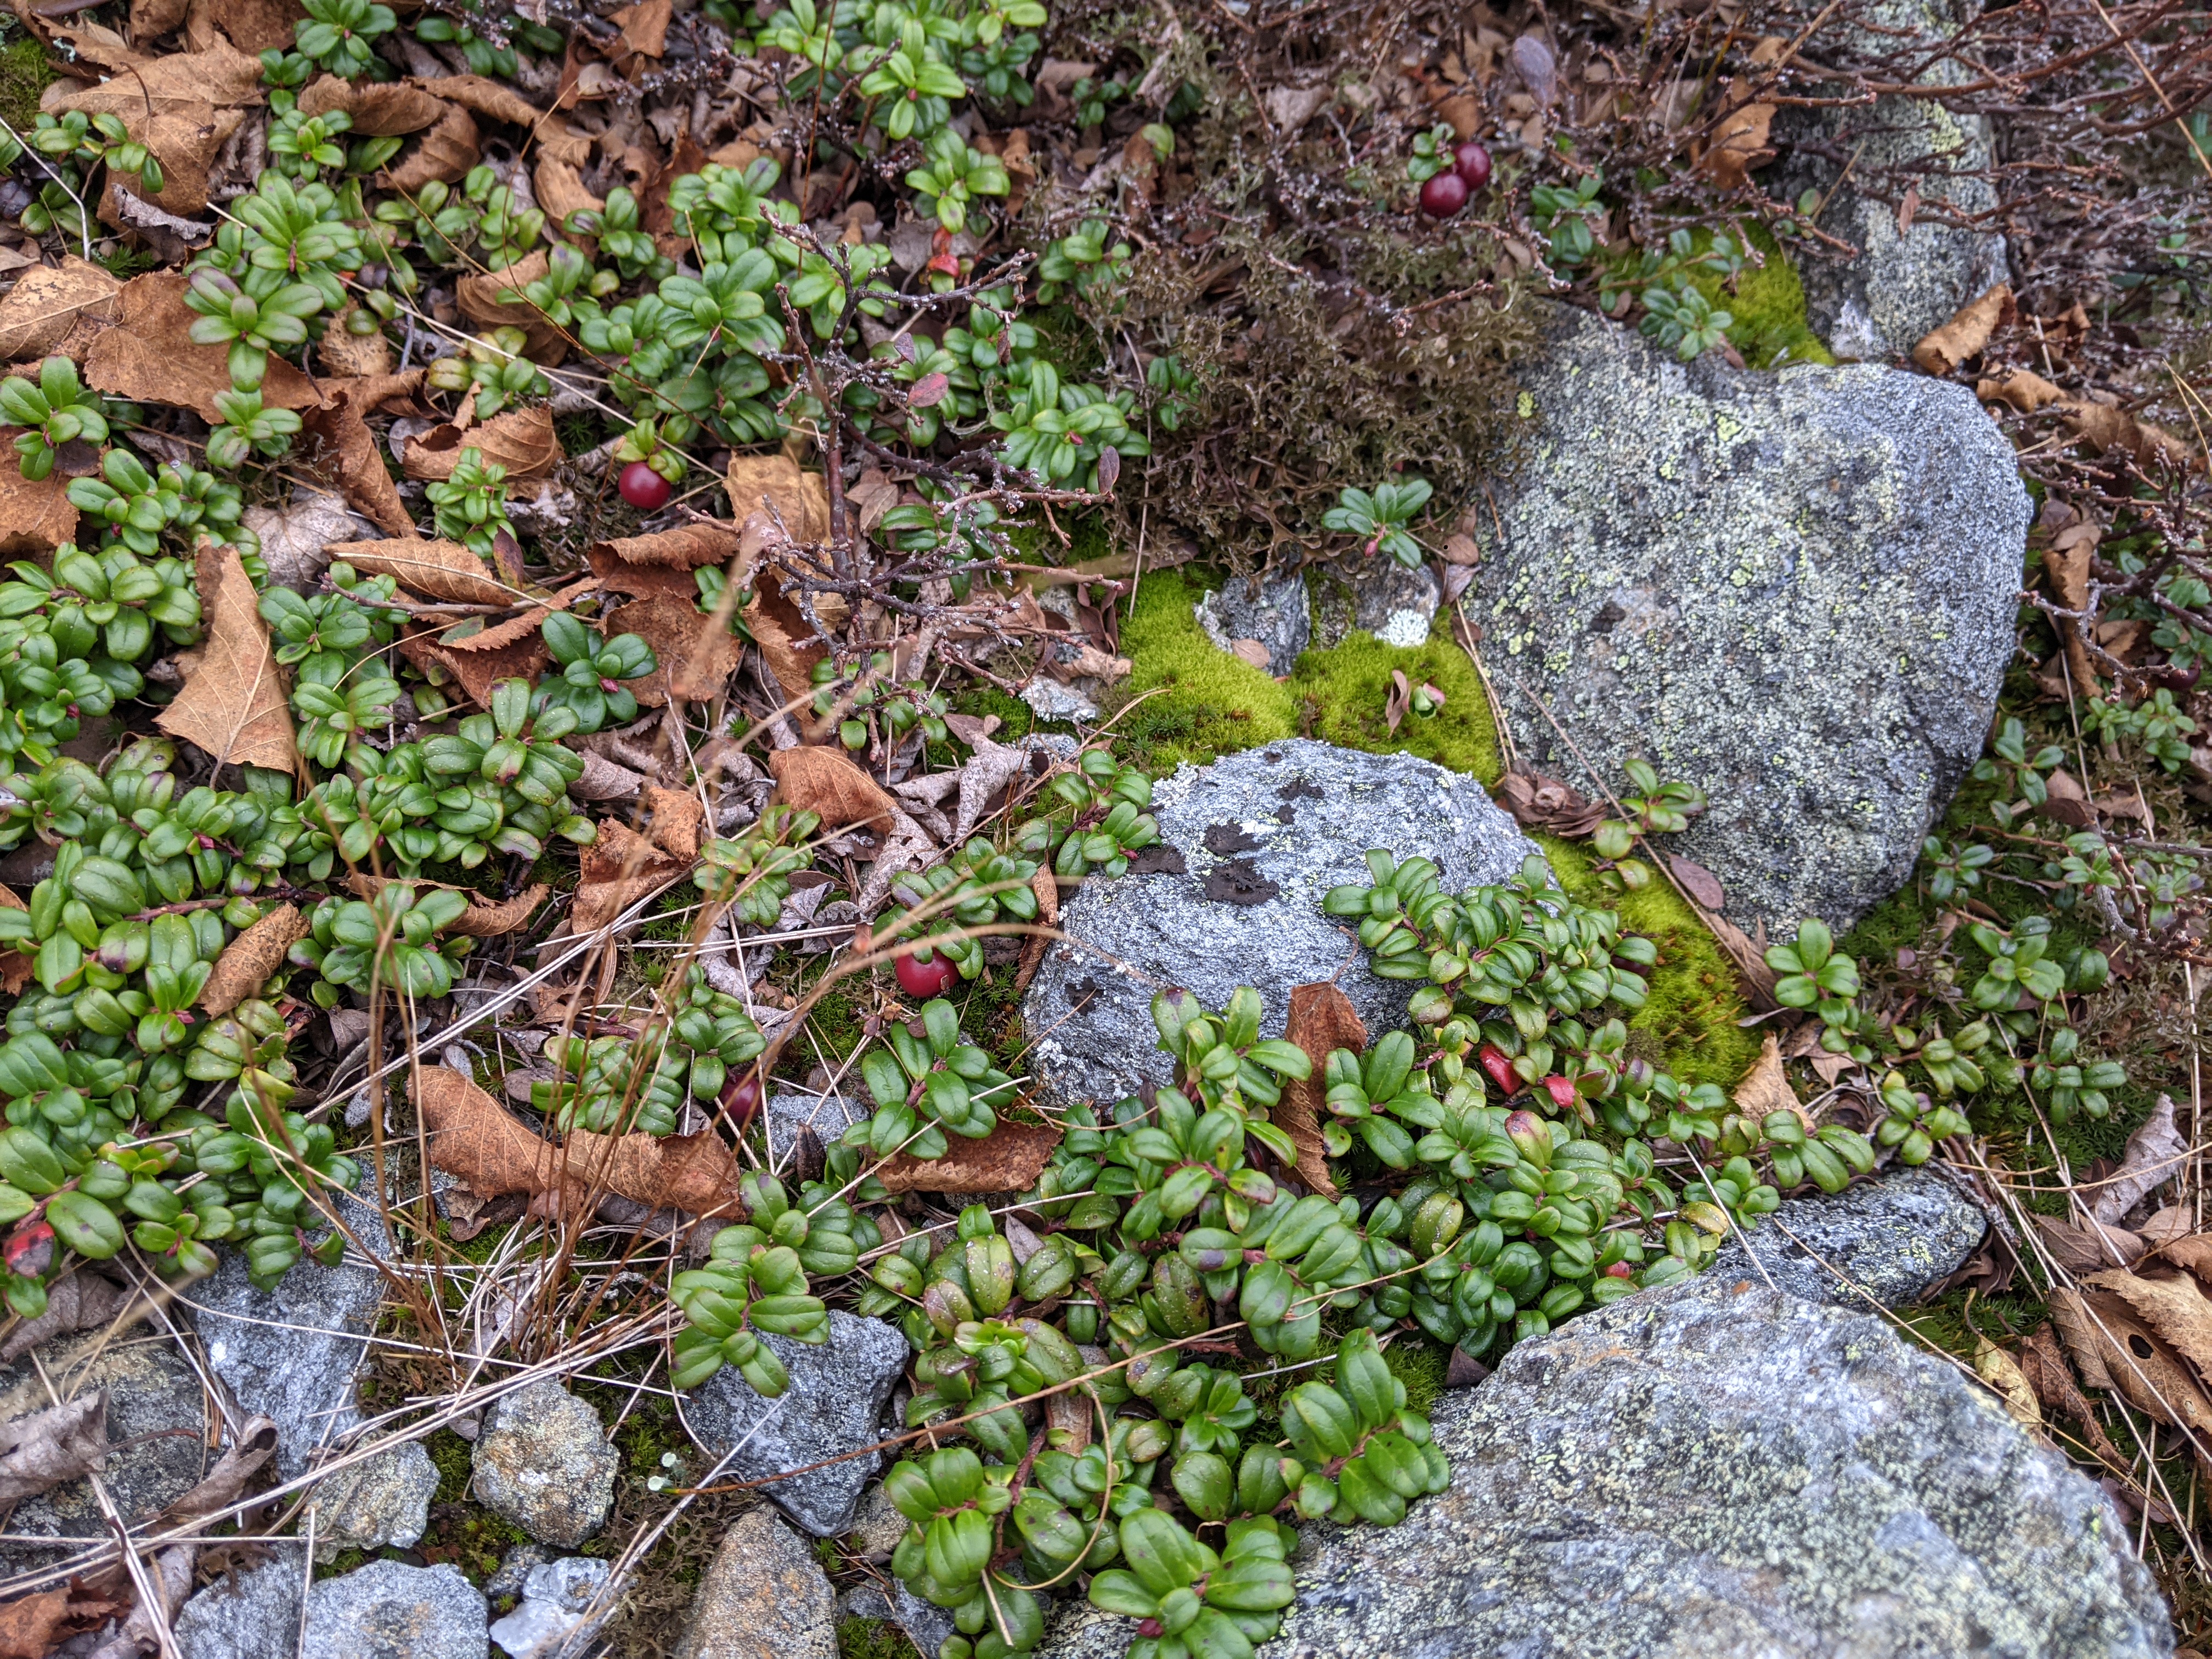
small lingonberry bush
Interestingly, the blueberries seem to dominate here. The bushes are large and healthy looking, and there seem to be many more blueberries than lingonberries. I wonder why that is. I stayed on the trail since its a high traffic area- maybe blueberries have some advantage in taking over disturbed territory? who knows.
Nature Notes from the Bridle Path
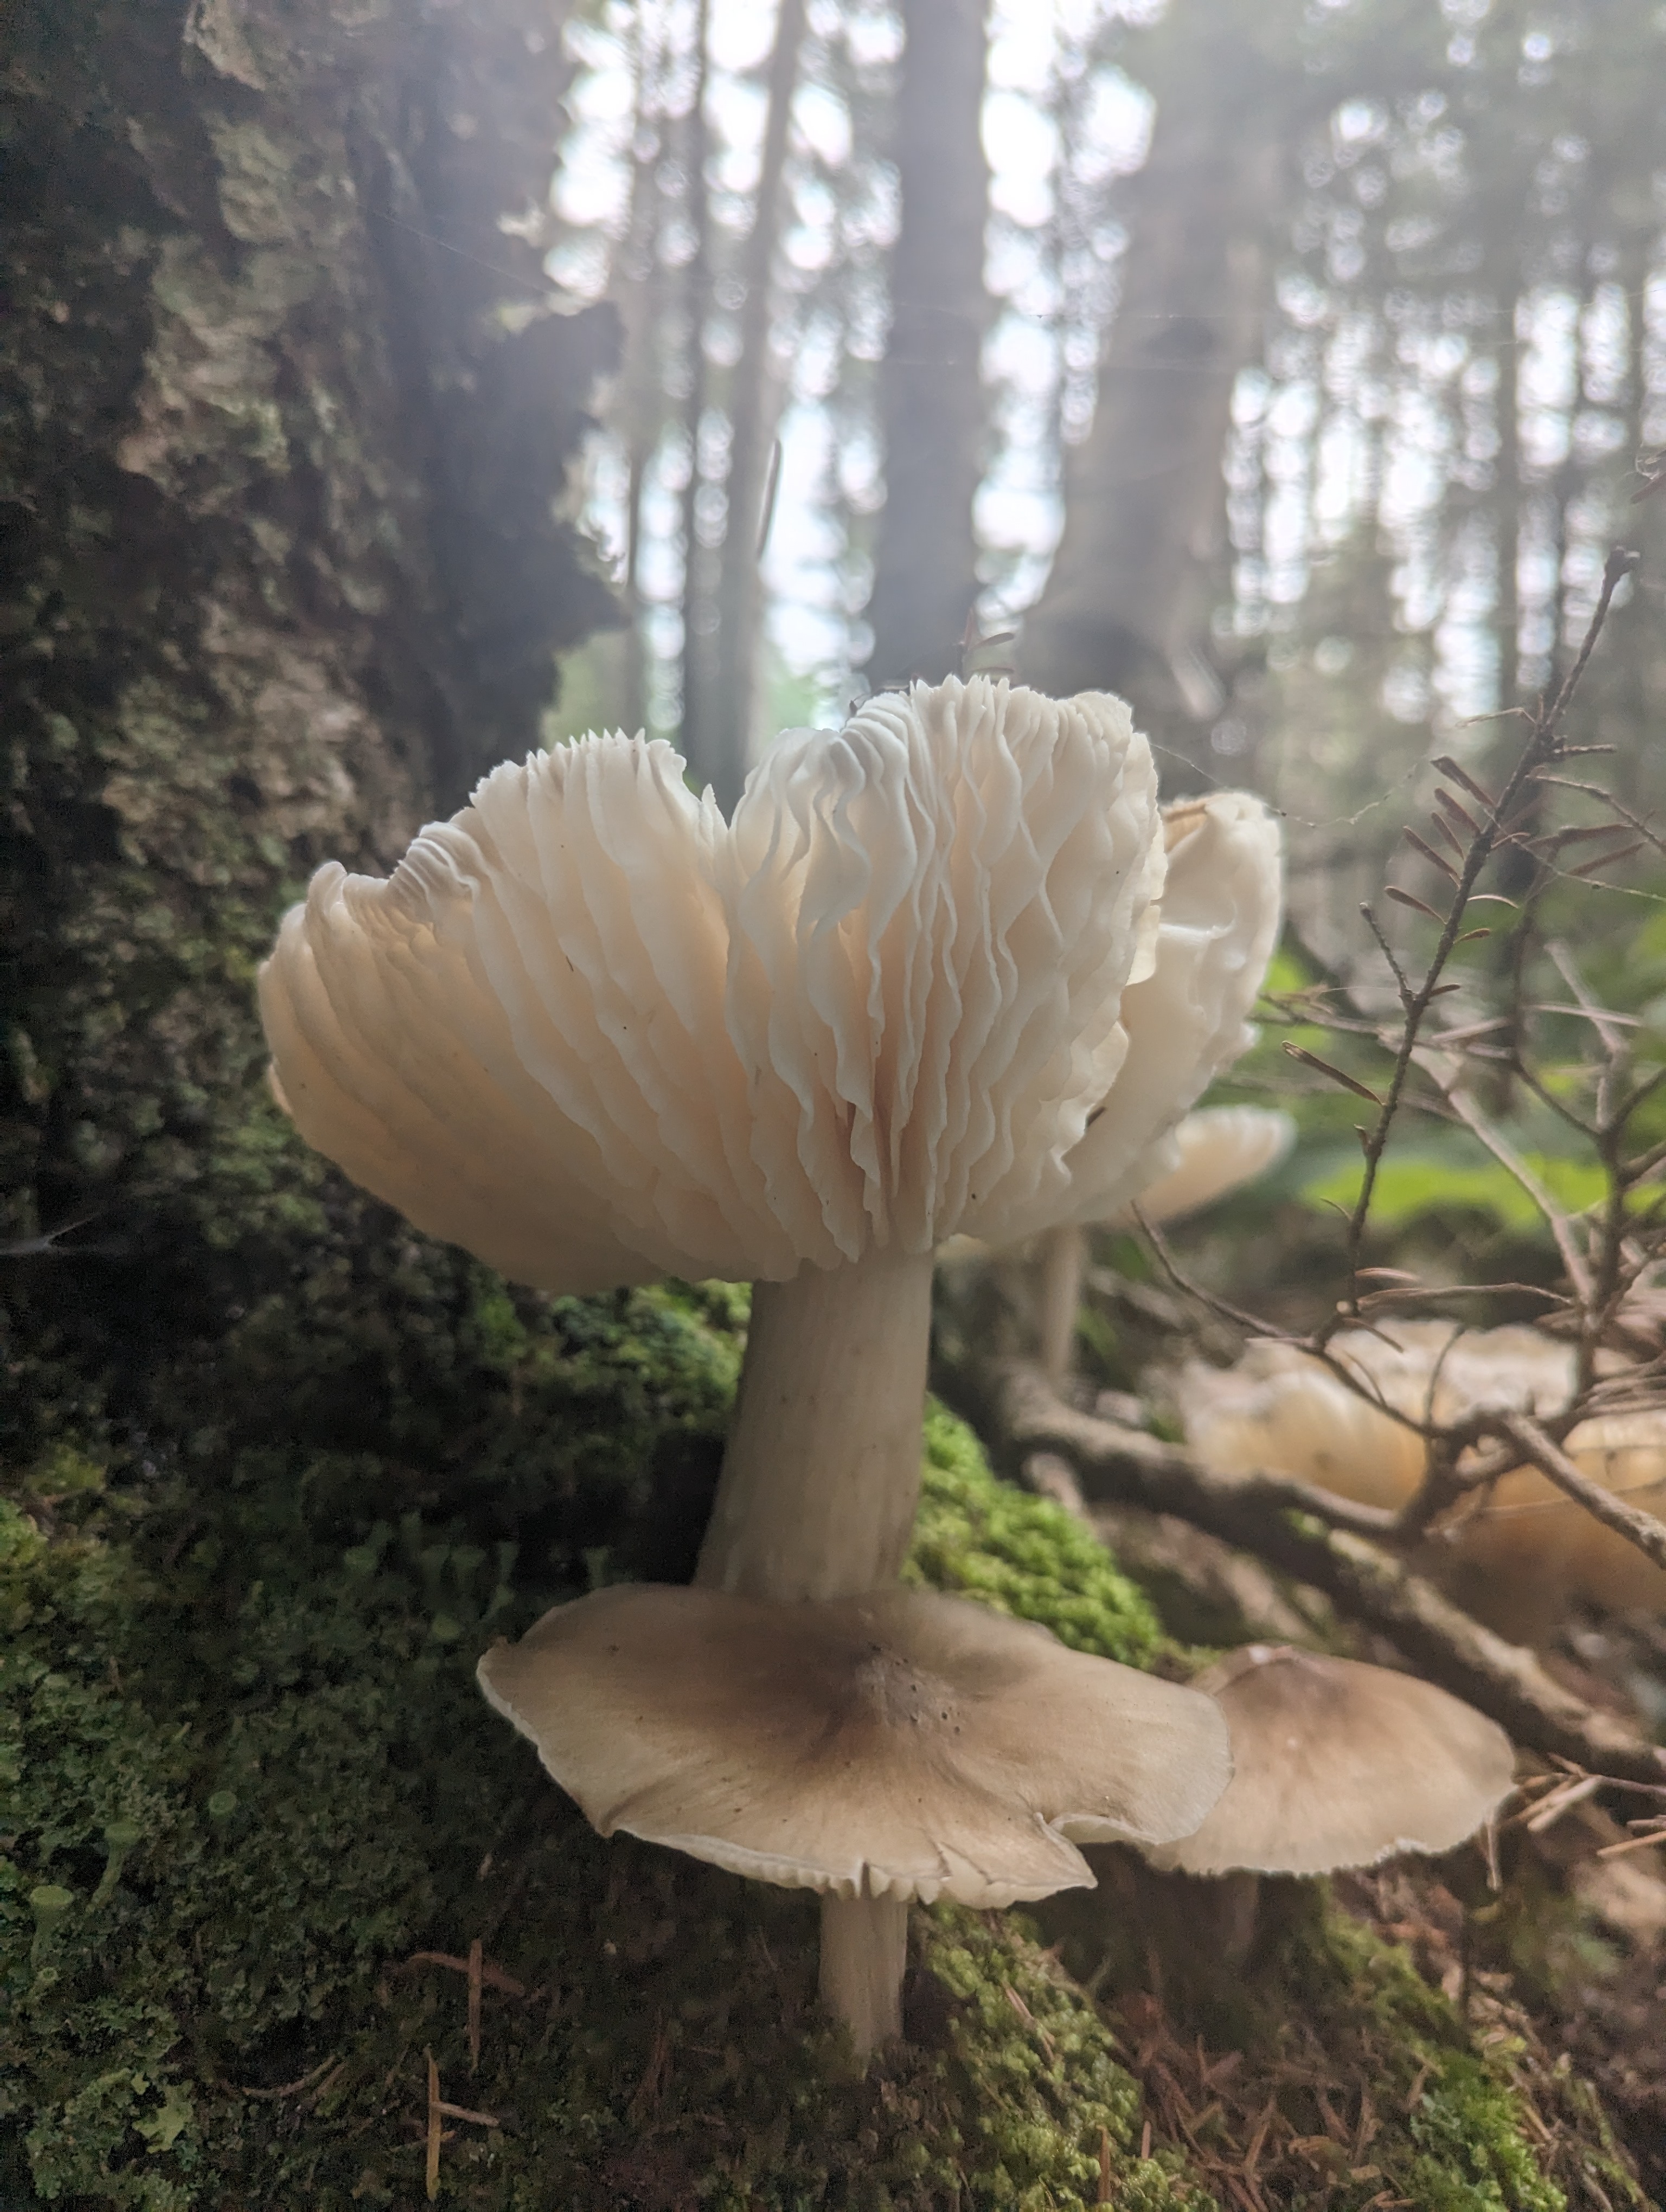
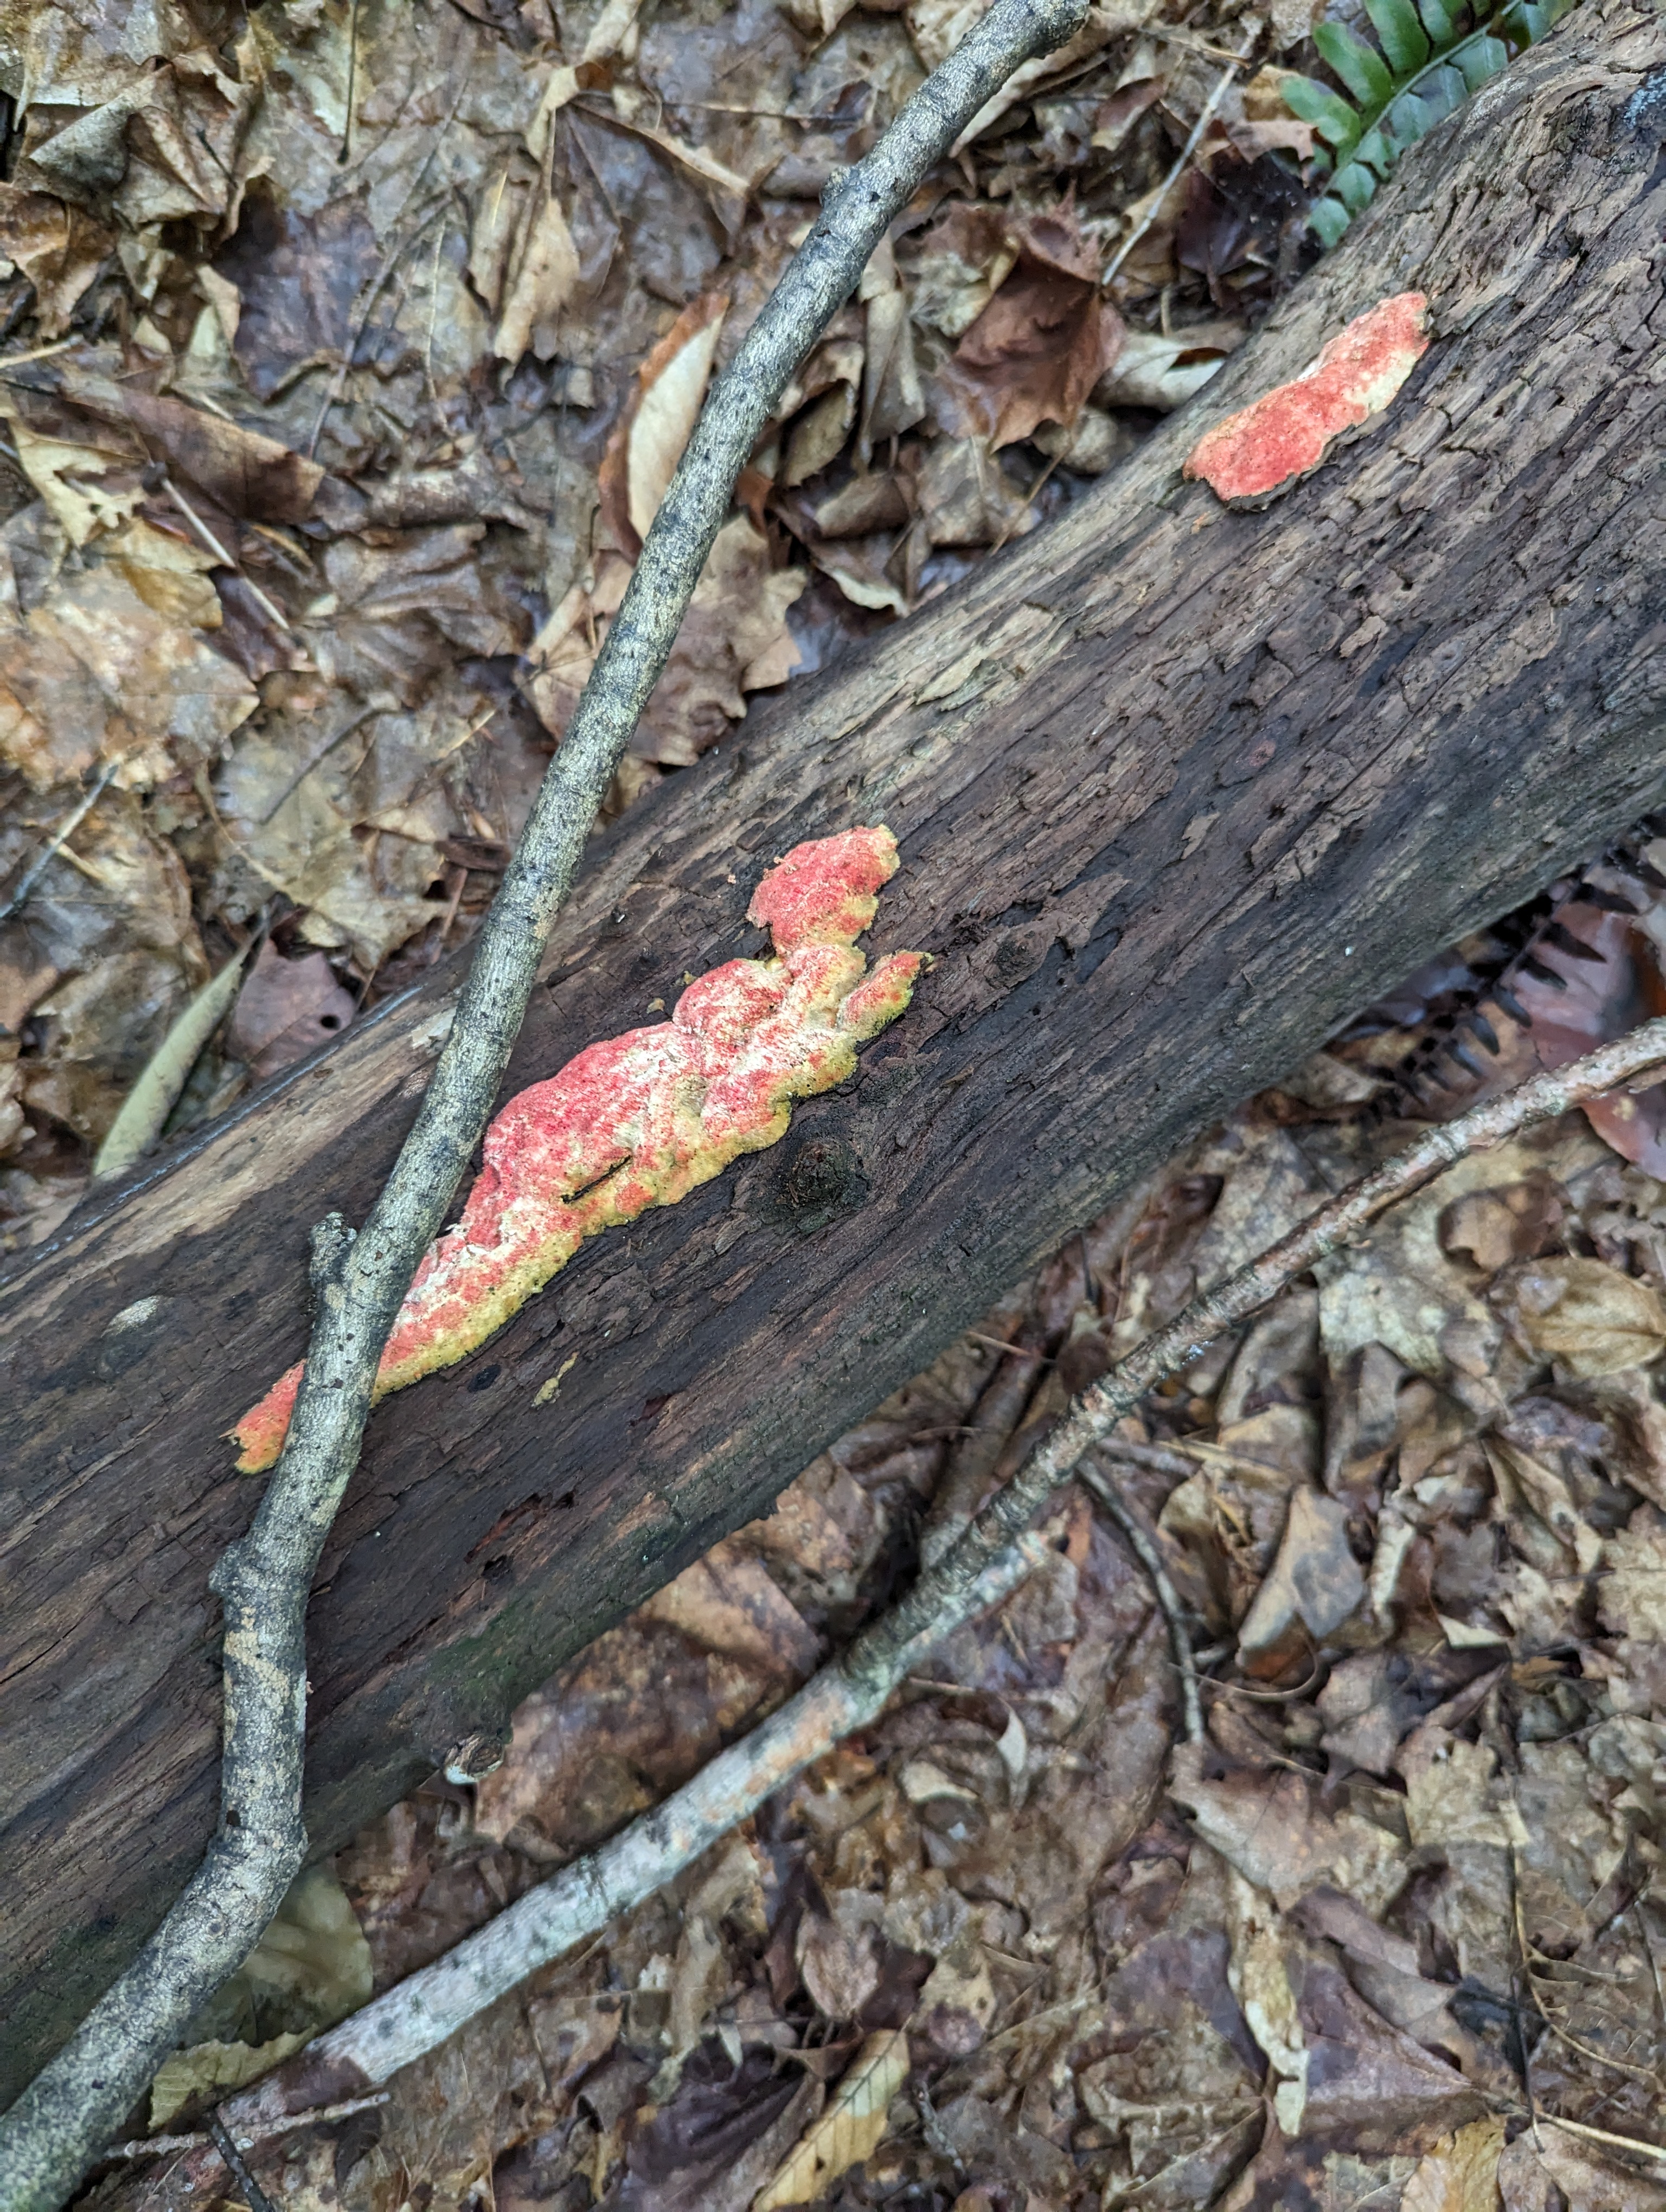
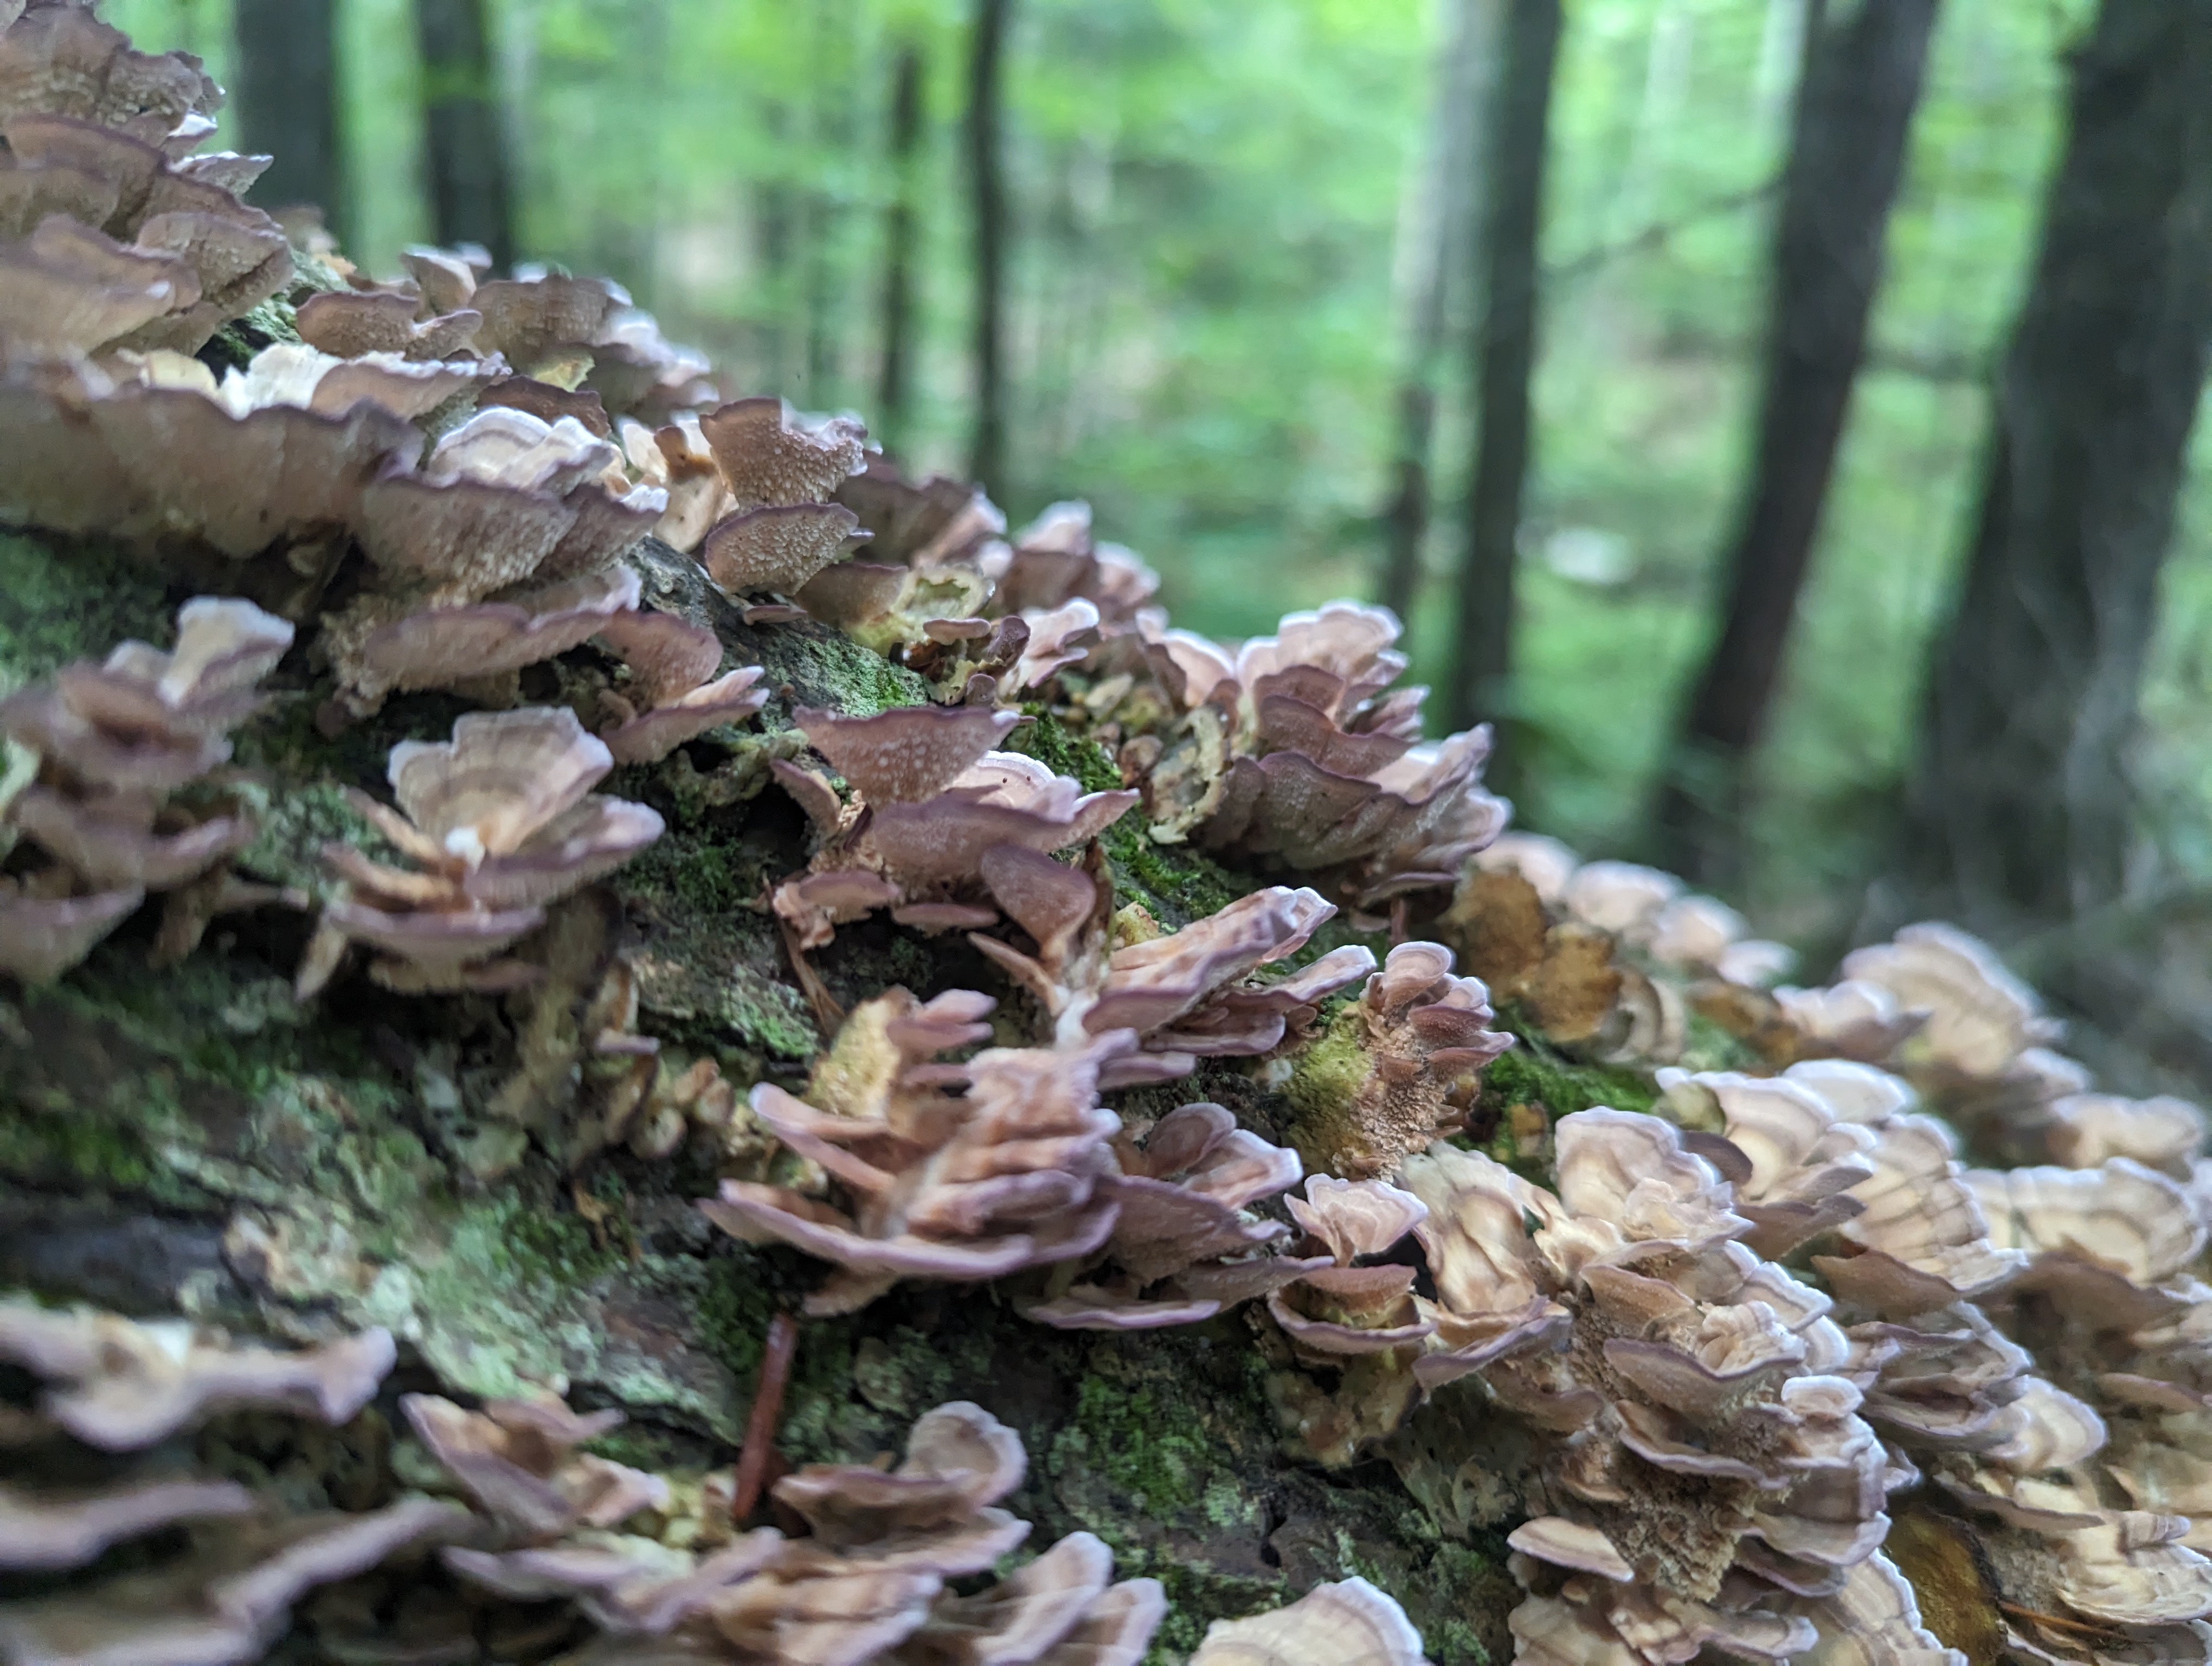
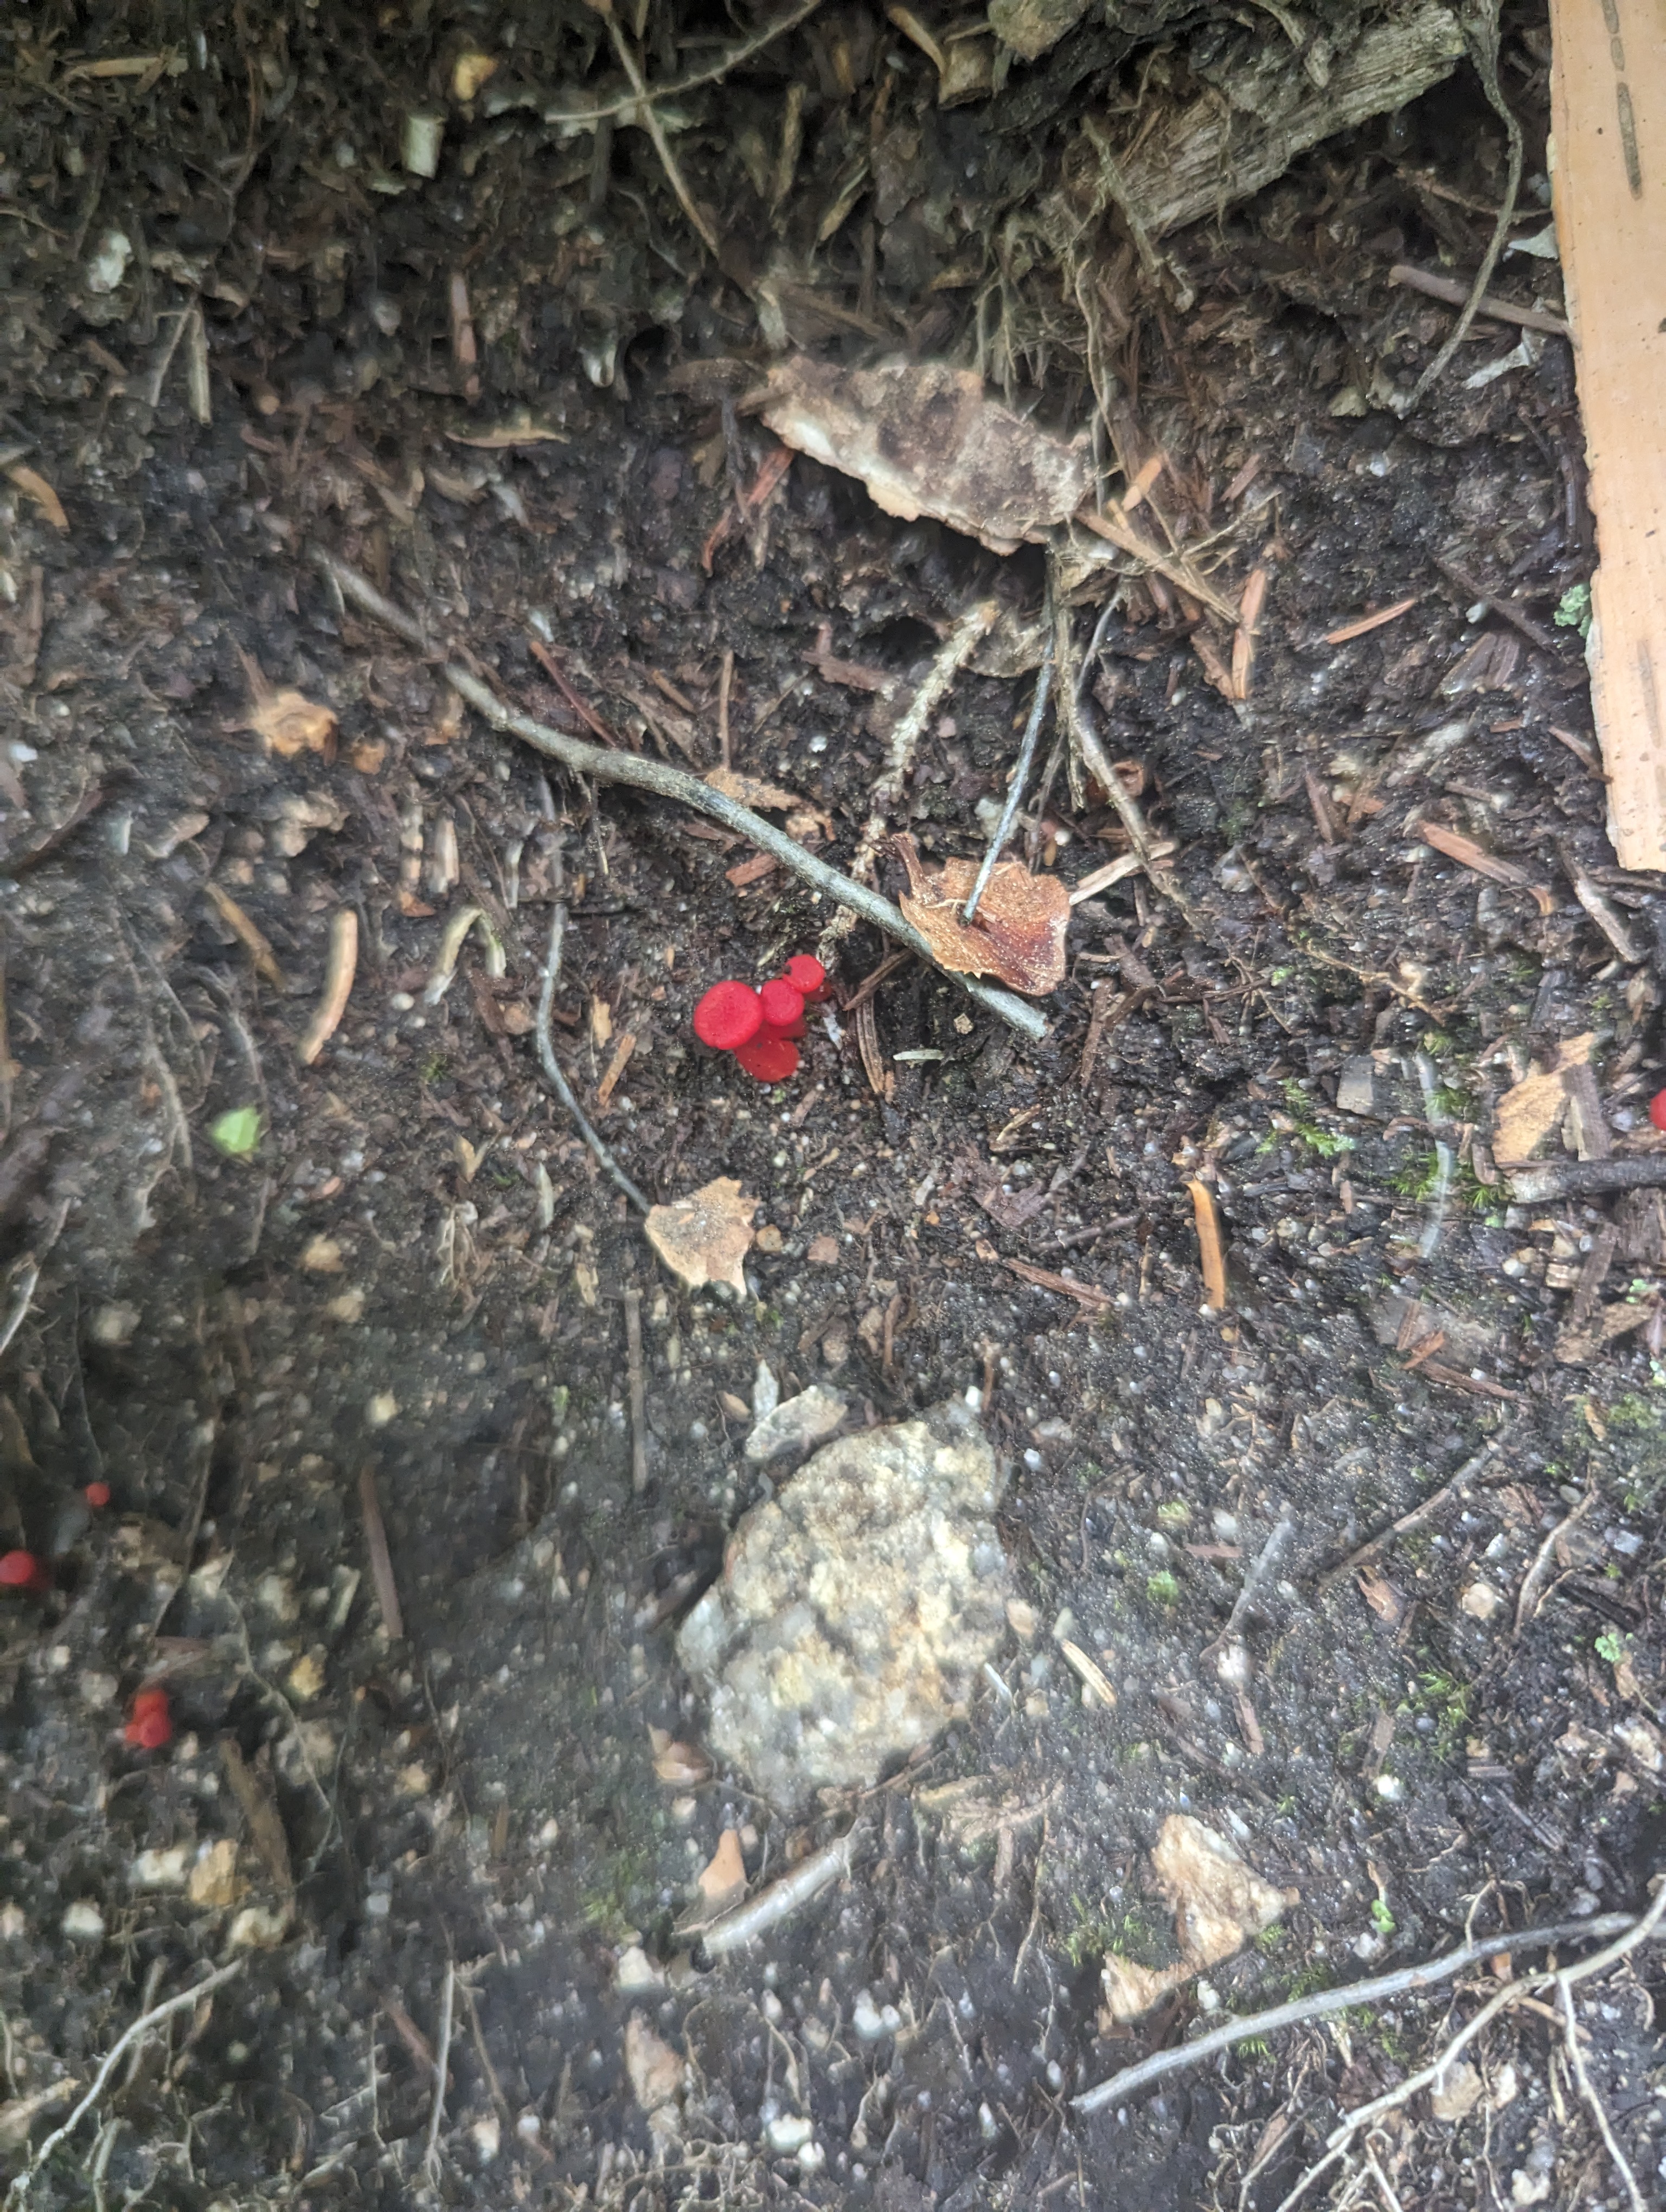
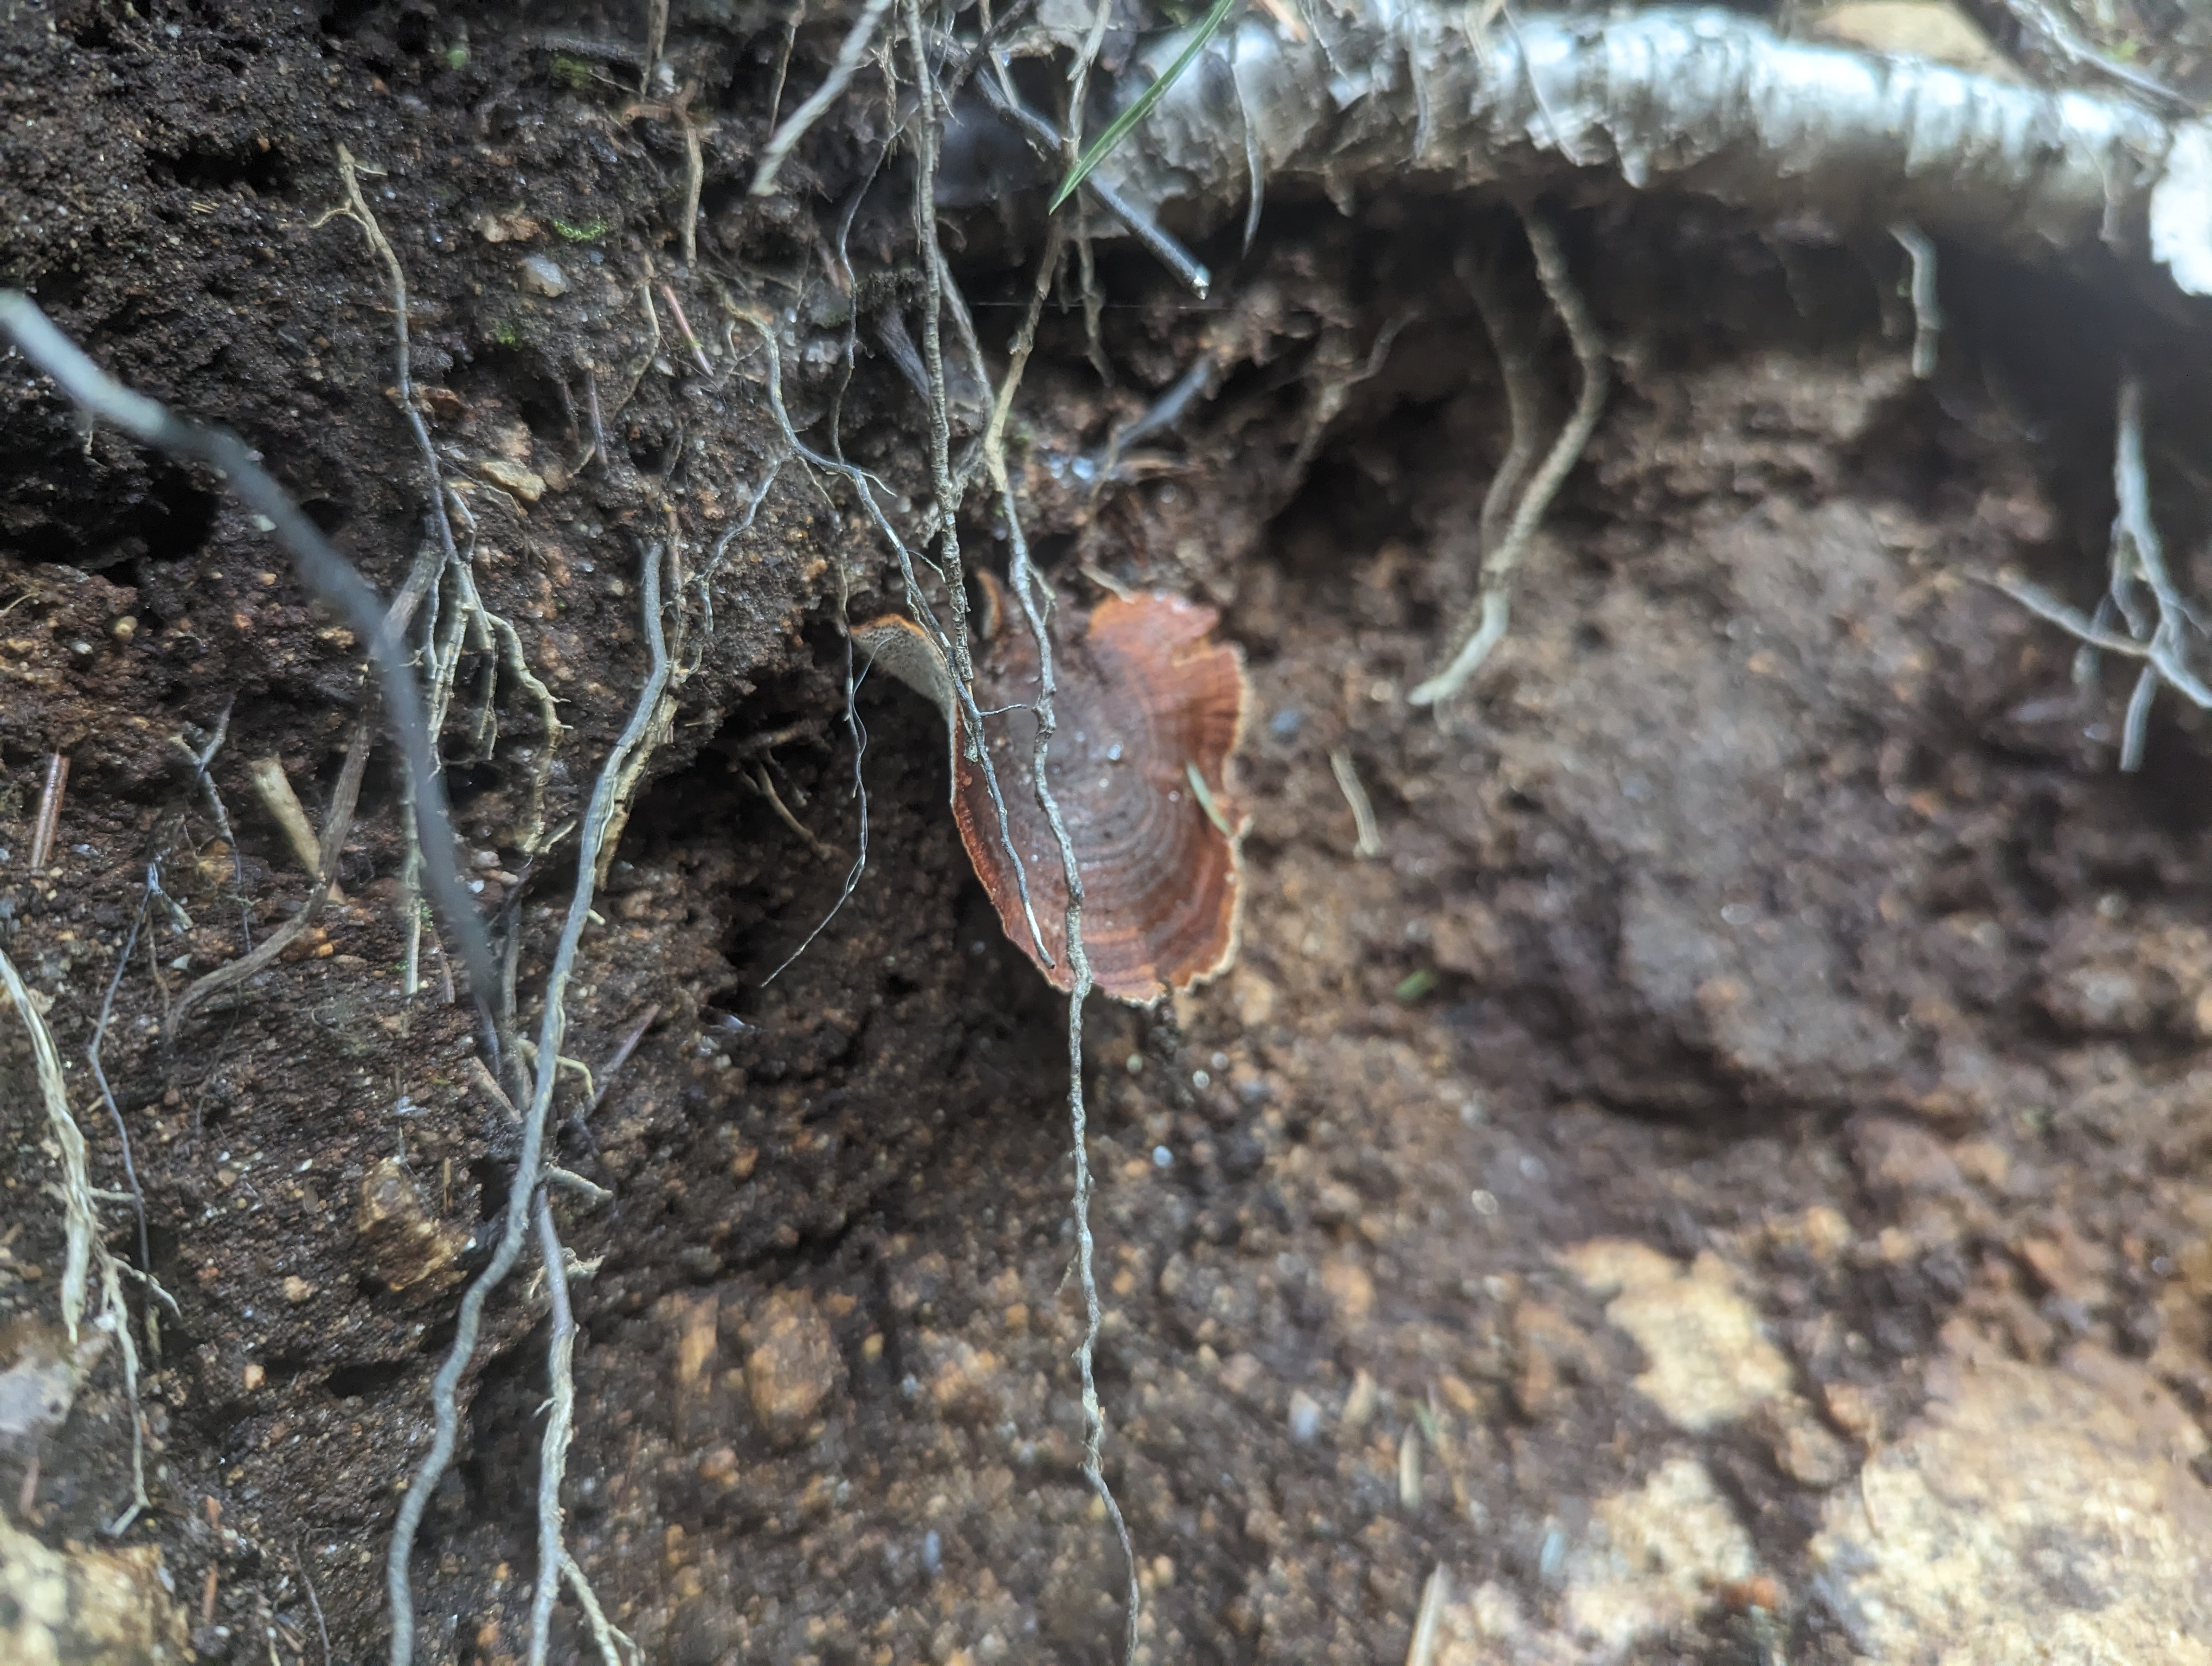
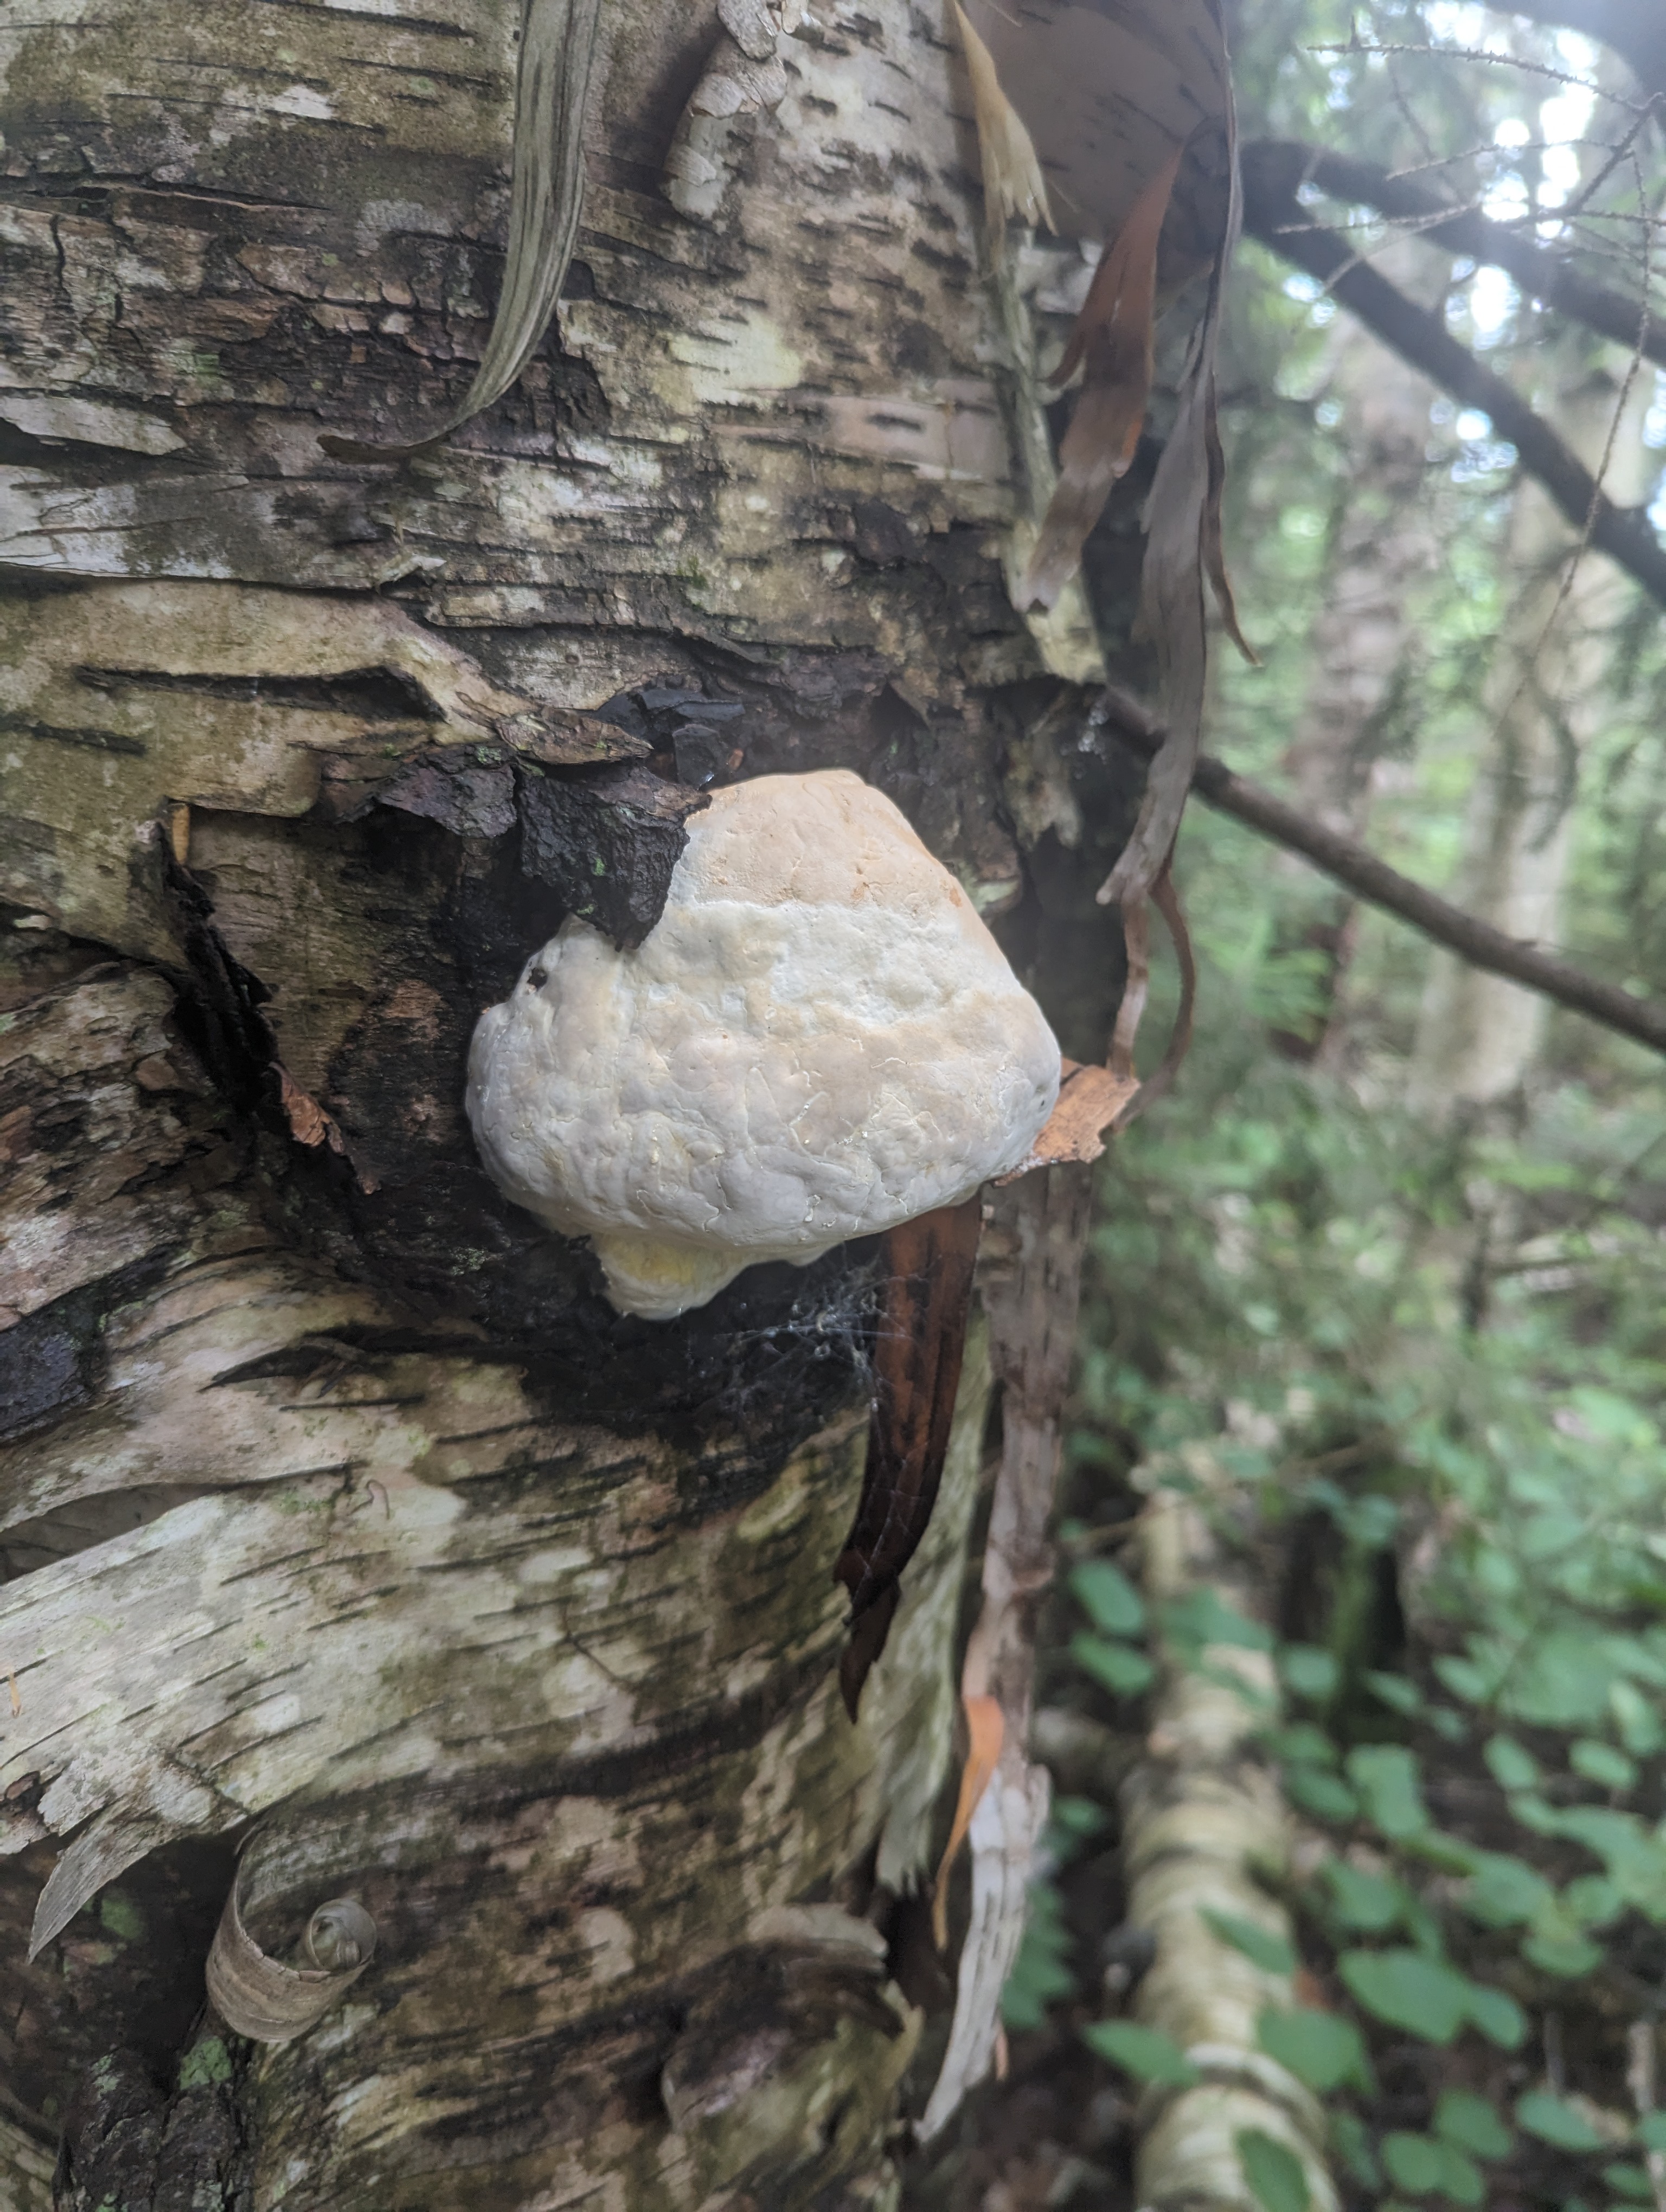
Due to the absolutely torrential rainfall that the northeast has been experiencing, the forest is DAMP!
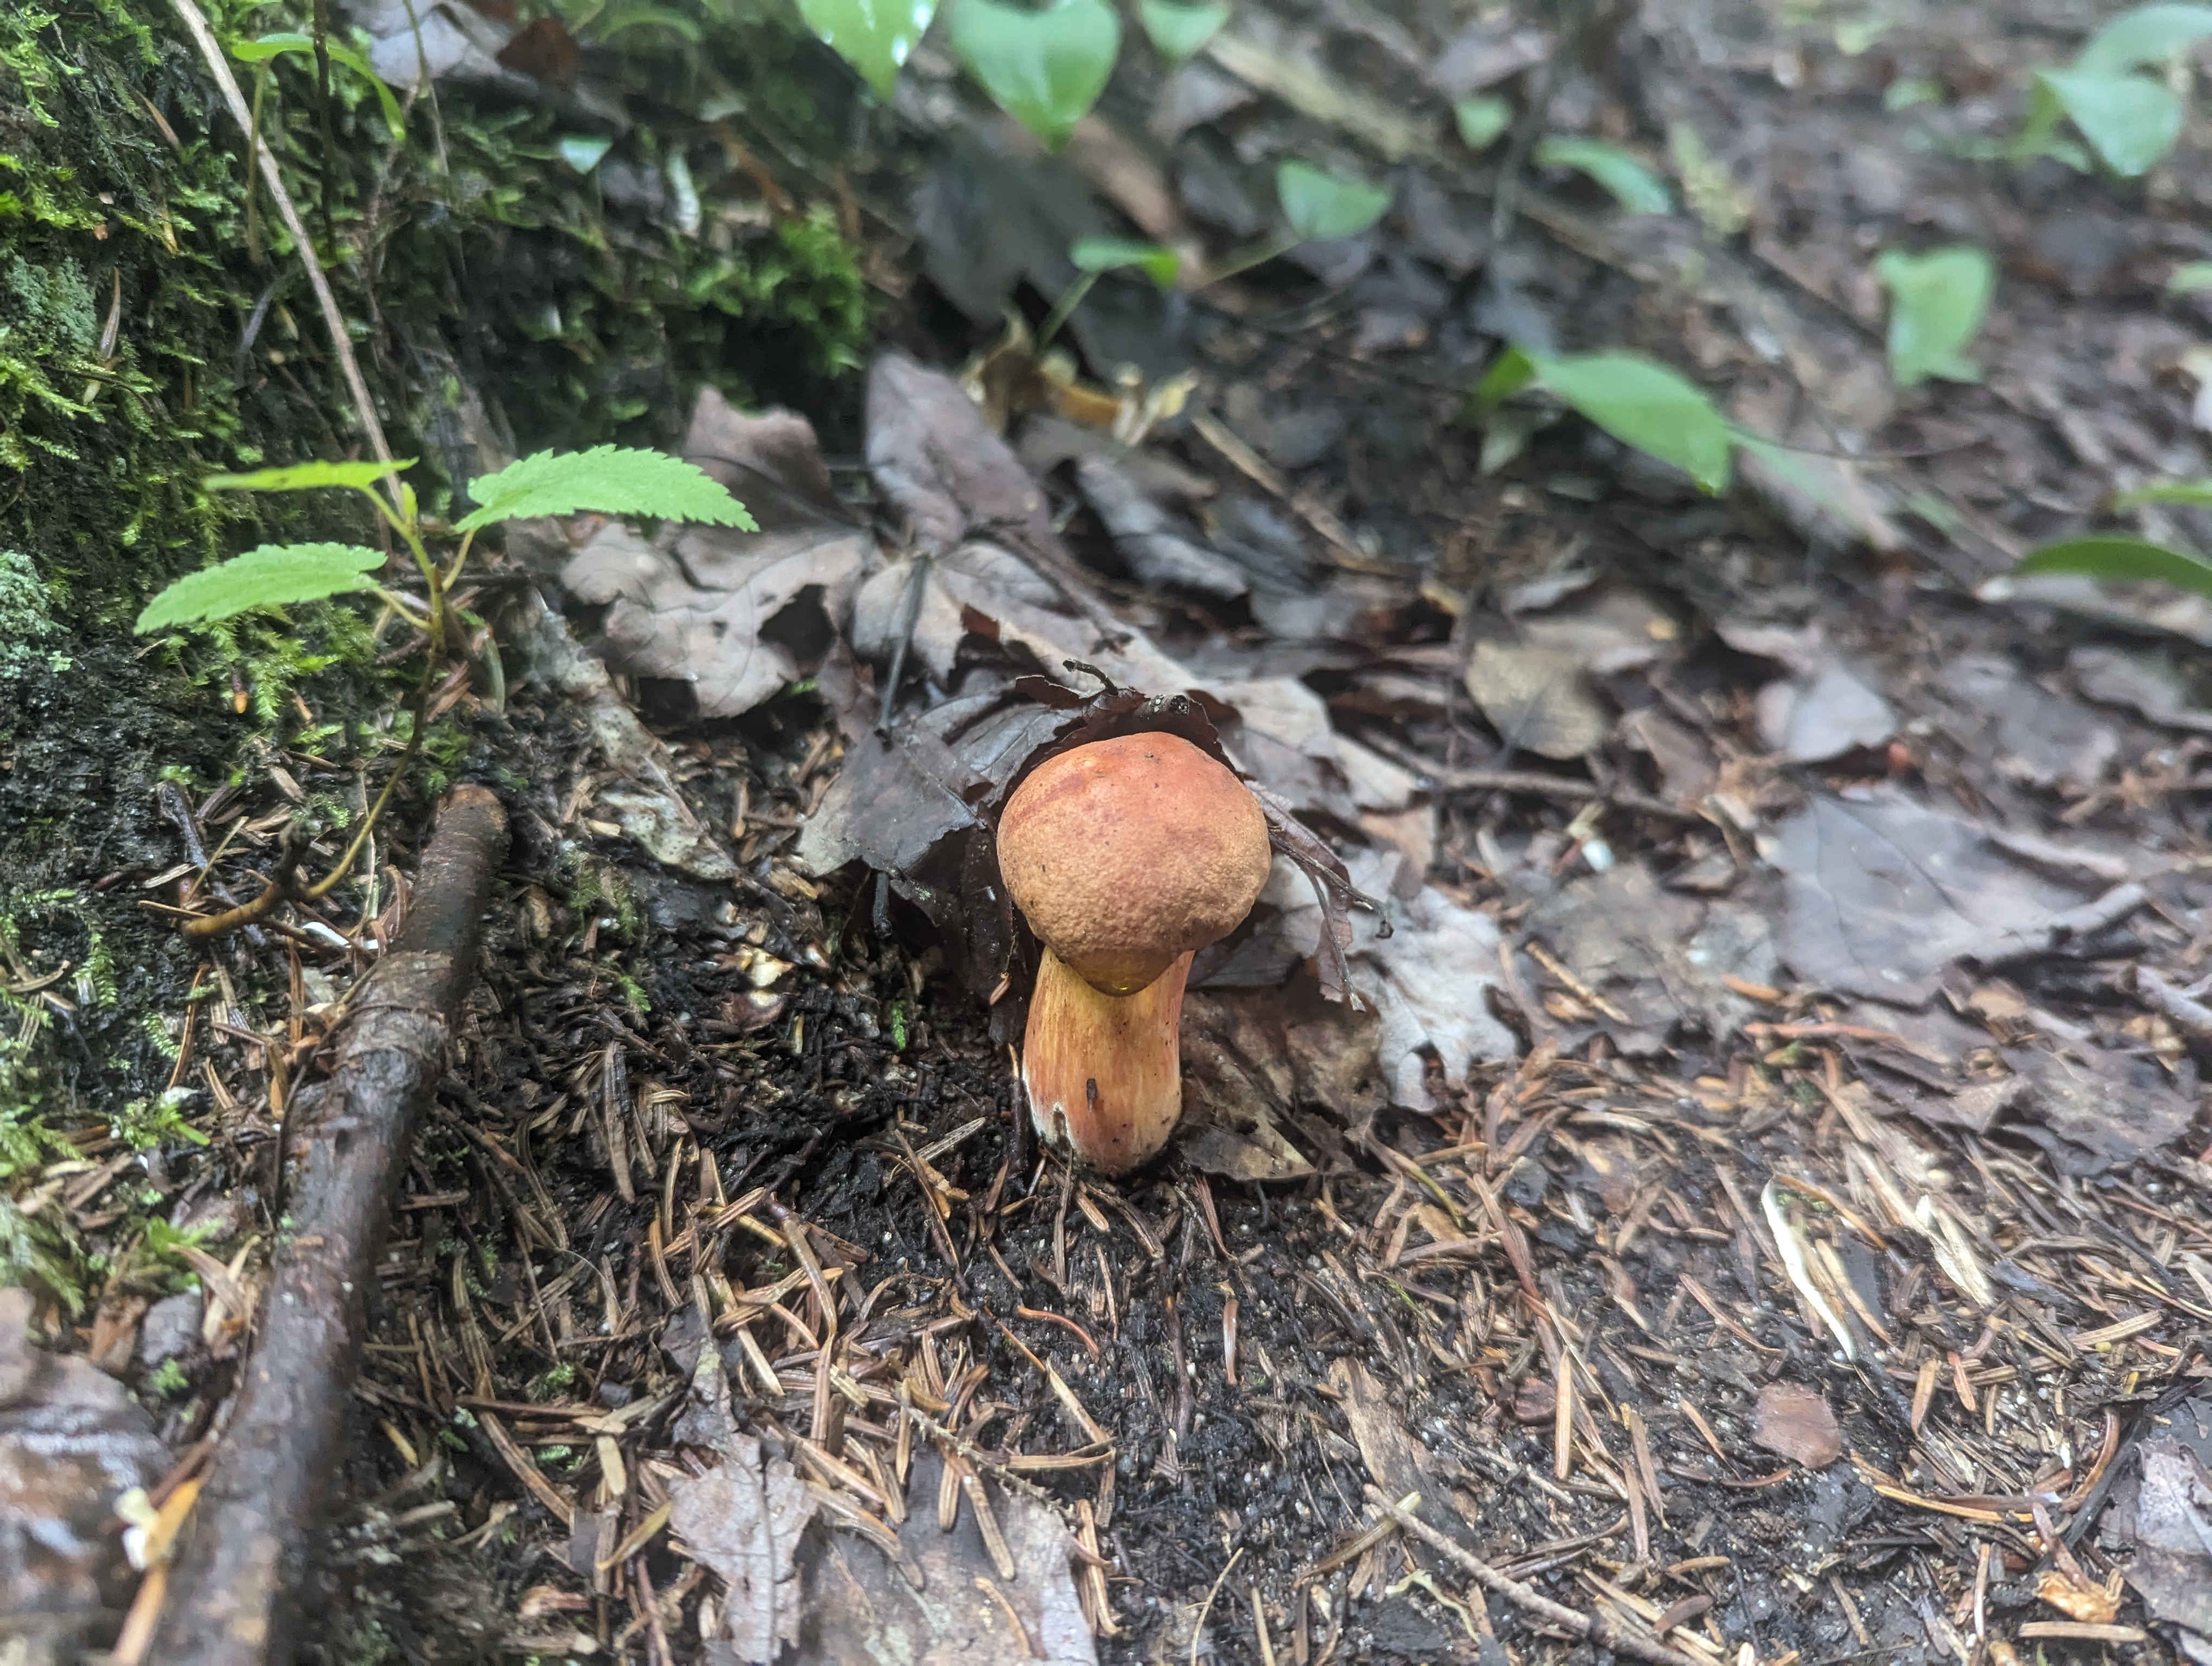
That means there are a ton of mushrooms fruiting. I don’t really know anything about these, but it was interesting to see. Some of these are from a small forest down the road from the ridge.
Trail/Nutrition Notes:
This hike took about 2 packets of gu and 2 packs of gummies, and just under 3L of water. It was hot hot hot! Falling water trail is fairly steep and rocky/slippery, but once on the ridge its smooth sailing to lafayette. There is a steep/wet/rocky section on the way down from greenleaf hut, but once that is passed it is easy to jog back to the car.
A few years ago my friend introduced me to a tasty and edible berry while we were on a hike up mount Washington. I had no idea what it was, and much later I learned that they were lingonberries, which are related to a lot of other shrubby berry plants like blueberries.
Recently I learned that plants are very sneaky and do not always come from seeds. In fact, most plant cells seem to be totipotent (capable of creating any other kind of plant cell) and capable of creating undifferentiated cell mass (callus culture) if you feed them the right stuff. I had previously considered a plant (particularly woody plants like trees) to be single monolithic organisms with parts that fall off that are dead/not useful. It seems like it is more the case that any part of a plant can turn into another copy of the plant, under the right conditions. Think about that next time you are looking at cabbages in the supermarket.
It turns out that most ornamental plants, and many commercial plants are grown not from seed, but basically from cuttings that are carefully grown in lab conditions to maximize growth and multiplication of the plants. This is called micropropogation, and its useful for getting (usually) genetically identical copies of plants. This is helpful for preserving desirable mutations.
You can probably see where this is going: tasty plant + new technique = a small project that will likely take many years to complete. I want to grow our local variety of lingonberries!
Media Prep:
these blueberries were growing right on top of the lingonberries!
After weighing my options on media I decided to go with a media that was actually recommended for blueberry bush micropropagation from “Plants From Test Tubes: An Introduction to Micropropagation”. While there was more specific media recommended in some papers on propagation, it was not clear to me (as a neophyte) that “modified ms media” was actually a specific modification of MS media, not MS+2ip. It was possible to have ordered that media, but a lot of items were backordered for months, so I ended up with regular MS media, and 2ip. At this point it was too late to get the specific modified MS, and blueberries and lingonberry plants grow right next to each other in the wild, so it seemed like it might work.
The media I made was not exactly per the book either, since I think my MS mix already had inositol. The final mix for initiation media was:
1L distilled water
2.3 g MS basal media
5ml 2ip @ 1mg/L (roughly .25 umolar)
20 g sucrose (refined white sugar)
6 g agar
The 2ip concentration was in line with what I had read was ideal for initiation from Jakkola et al. 2001, which was encouraging. The media was not checked for pH since I didnt have a meter or strips, but I would have liked to adjust it down to 4.8, which is a reasonable pH for a lingonberry plant.
One nice thing about this media is that it does not seem particularly rich (surprising given the sugars). I intentionally exposed a plate to contaminate it and it took weeks for some mold to show up. With LB, I would have expected it to be disgusting almost immediately.
Explant Collection:
Explants were collected from a population near the alpine garden trail on mount Washington. only a few grams of plants material was collected over about a hundred yards of trail, in order to minimize impact on the environment. Explants were stored in sterilized falcon tubes for transportation.
Explant Preparation and Plating:
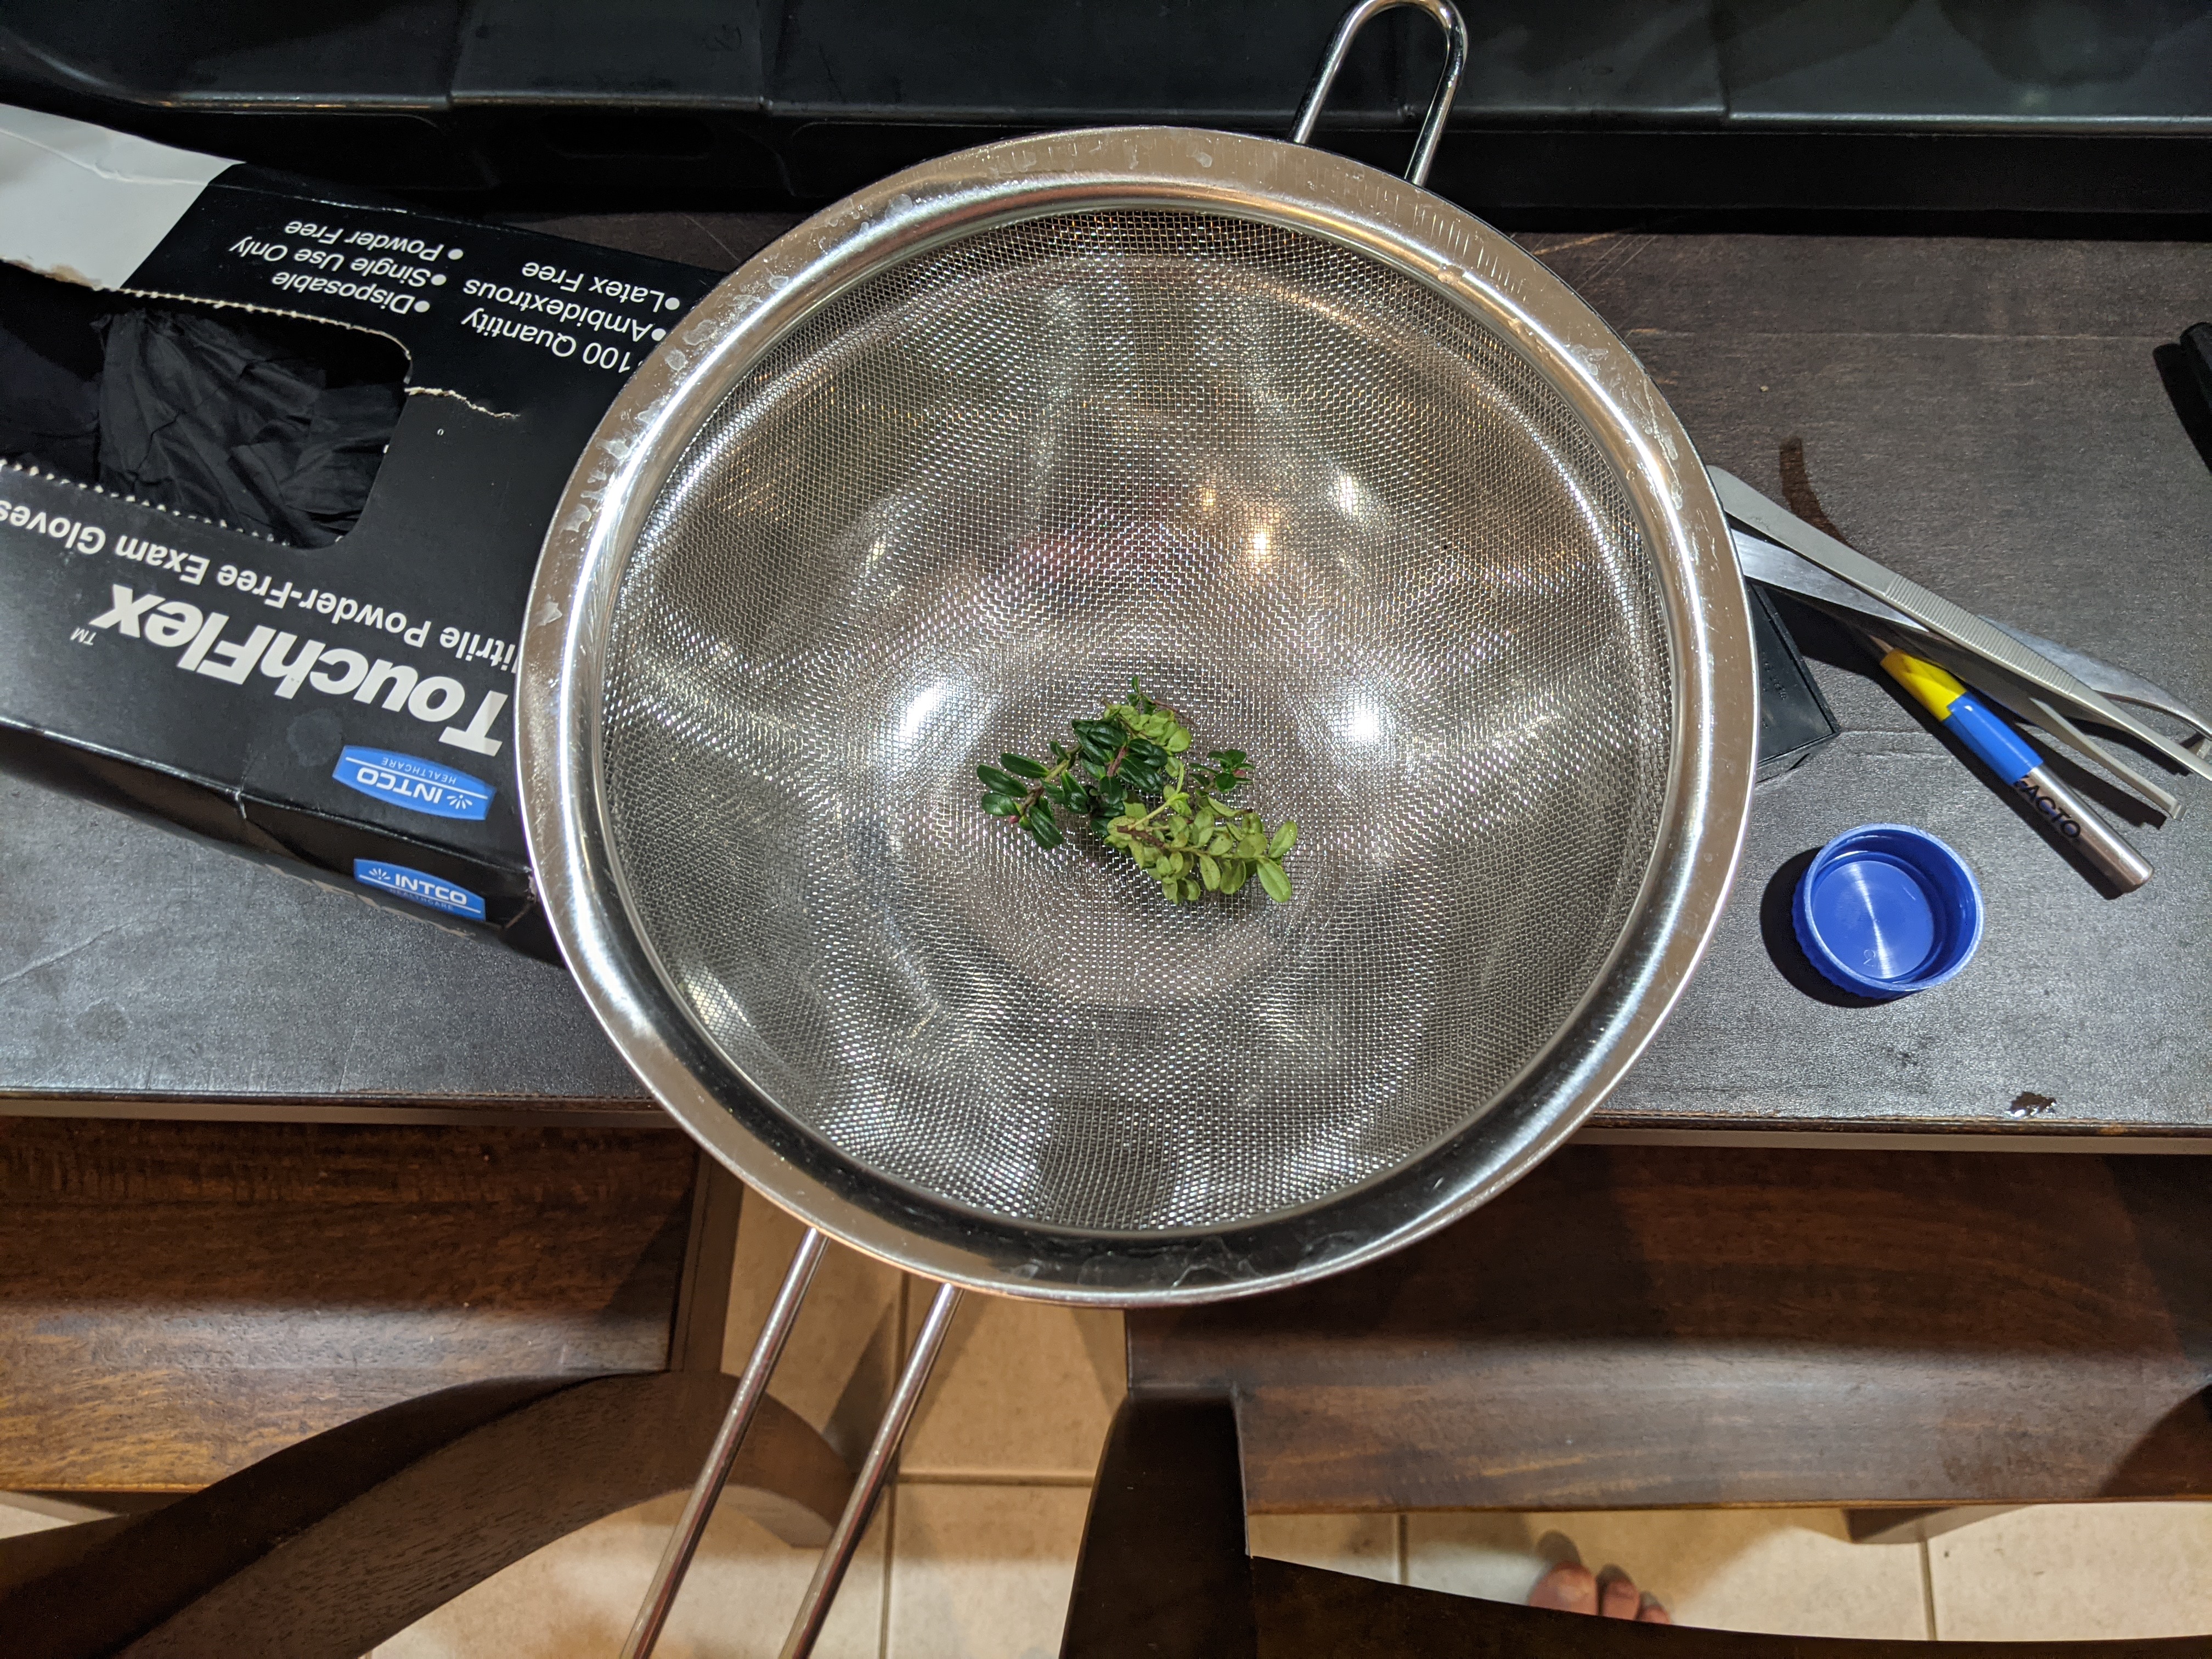
Explants were placed under running water in a strainer with a bowl beneath it in order to create an agitated water bath. The plant tissue was washed for 10 minutes under running water to remove dirt. explant material was then sterilized in 70% IPA for 30s, and then washed in 1:10 bleach solution for 25 minutes. a drop of dawn soap was added to the bleach as a surfactant. After sterilization, the plants were washed three times in sterilized water.
Plants were handled inside of a plastic bin that was sprayed regularly with bleach solution. Tools were sterilized/stored in bleach as well in between uses. I would recommend a clear bin for better lighting. It was challenging to cut the plants in a dark box, but after roughly three weeks, there was only one obviously contaminated sample.
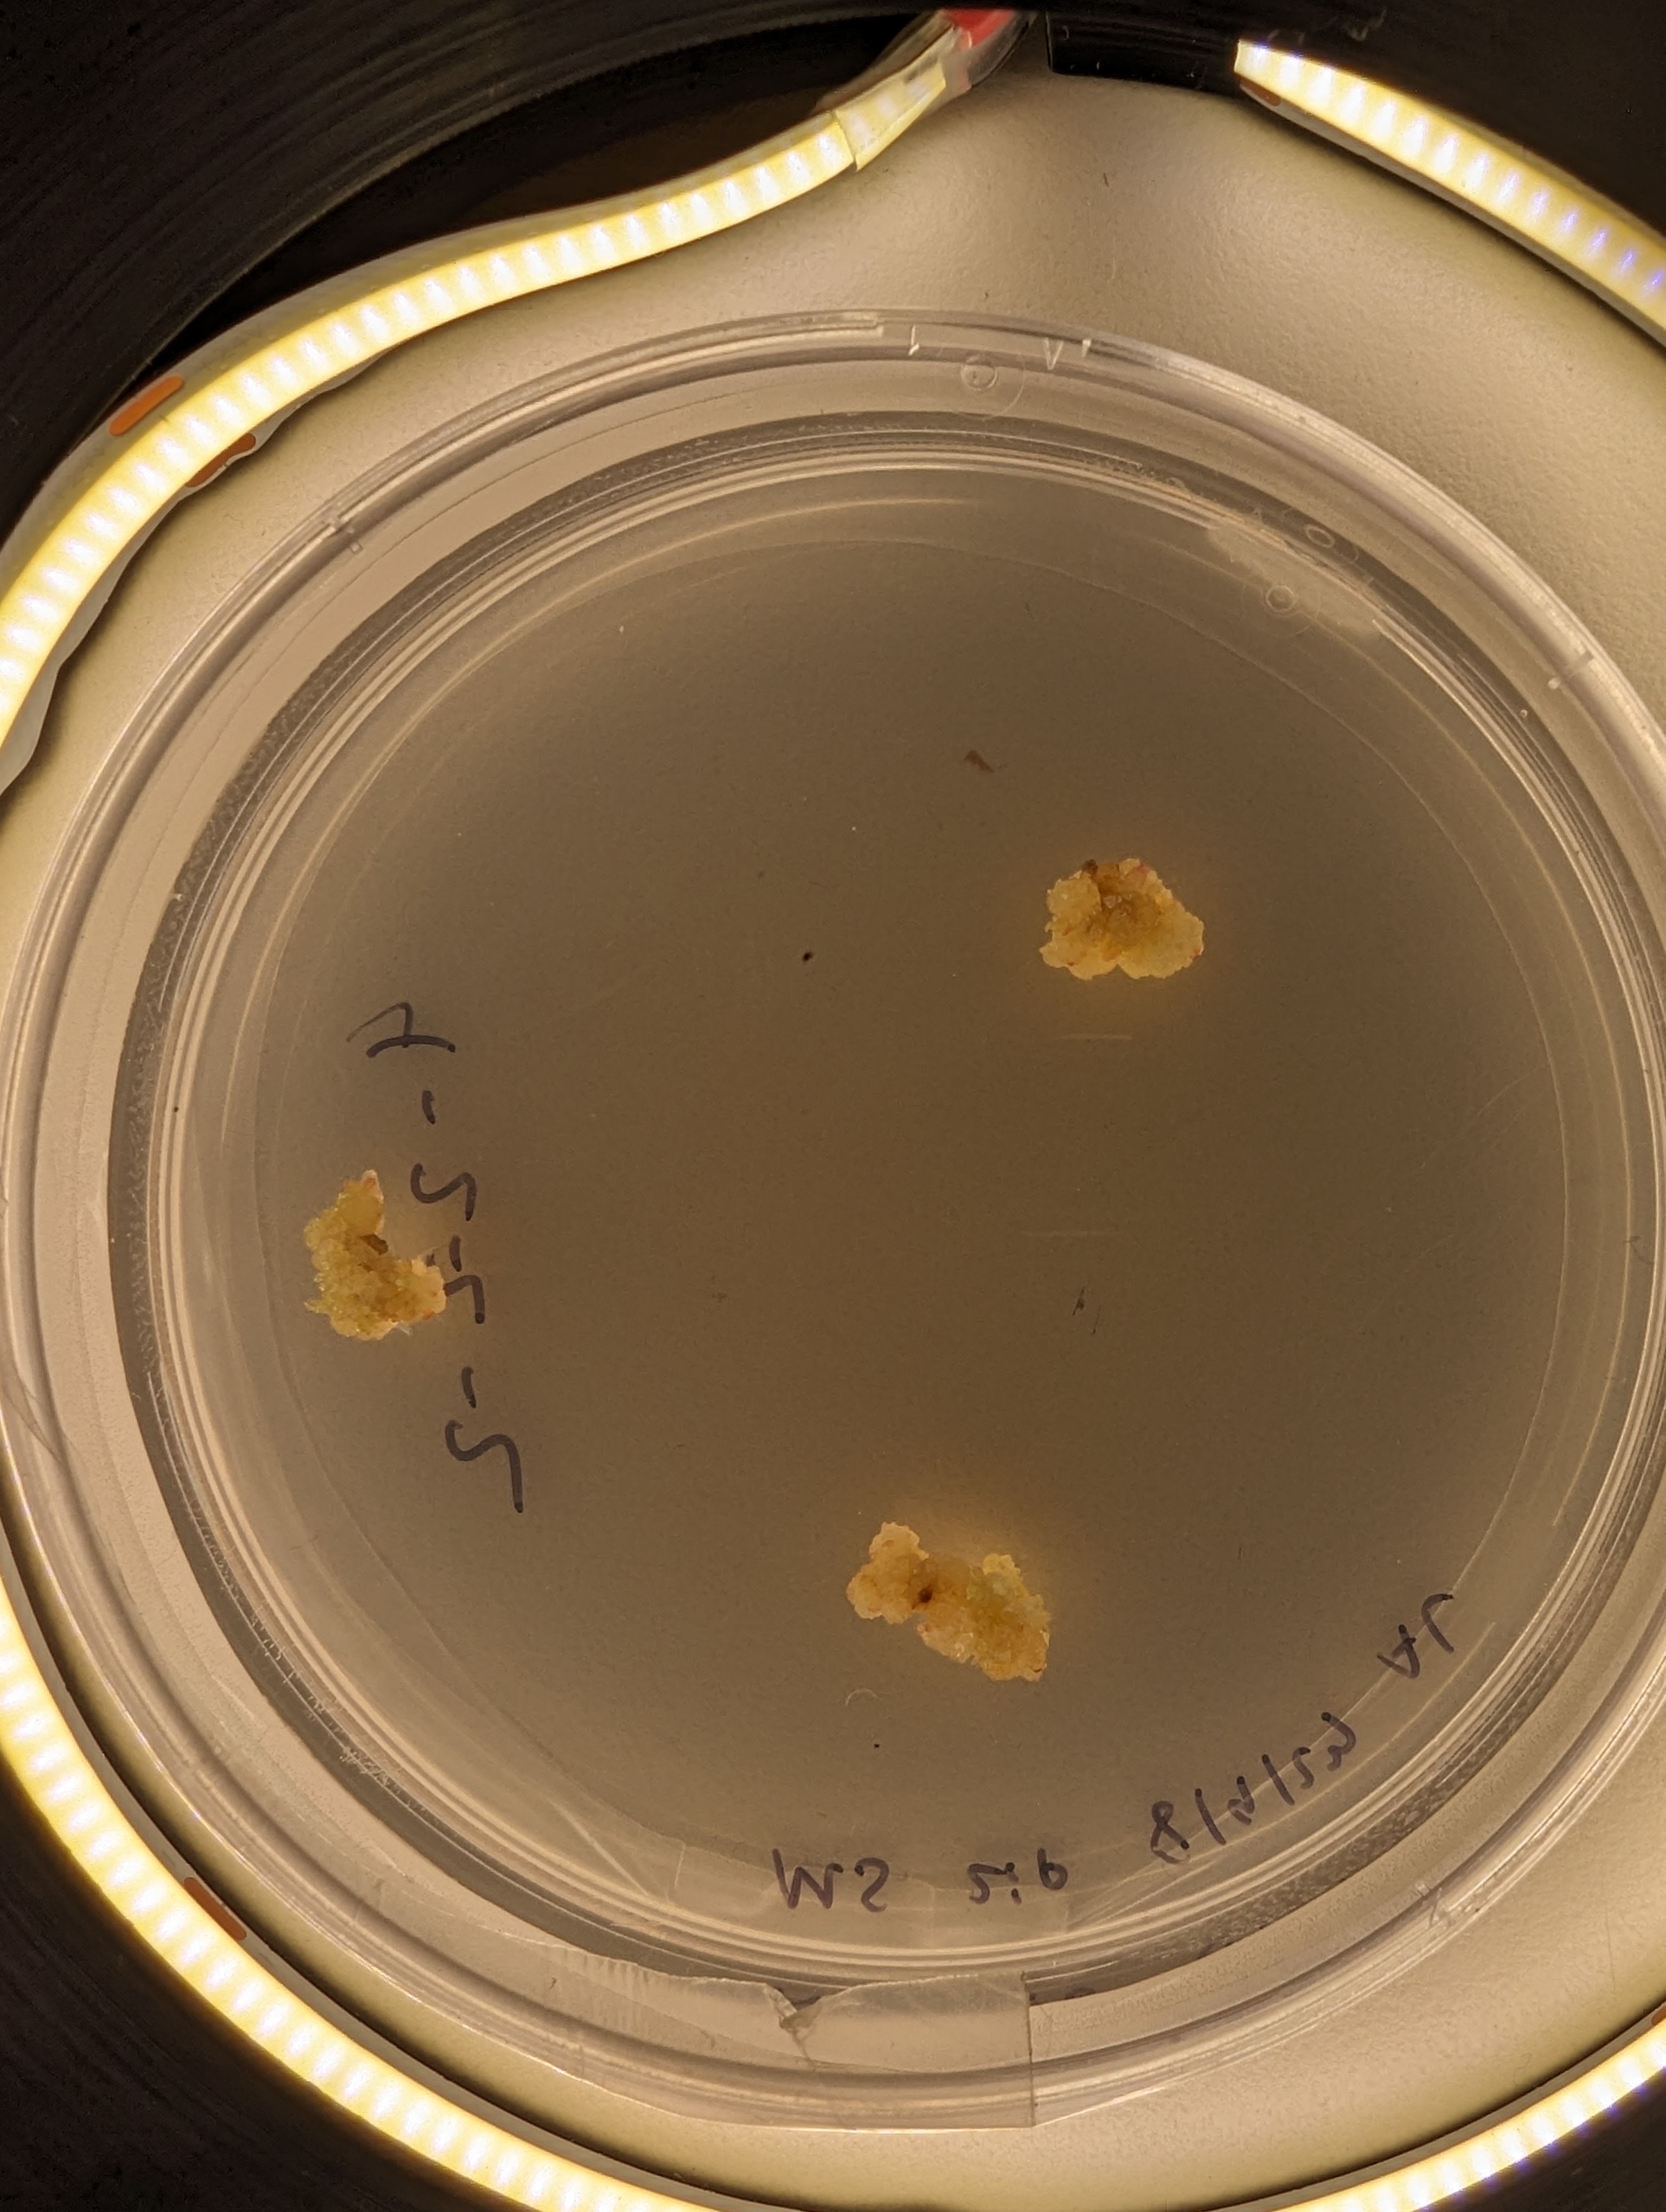
Results
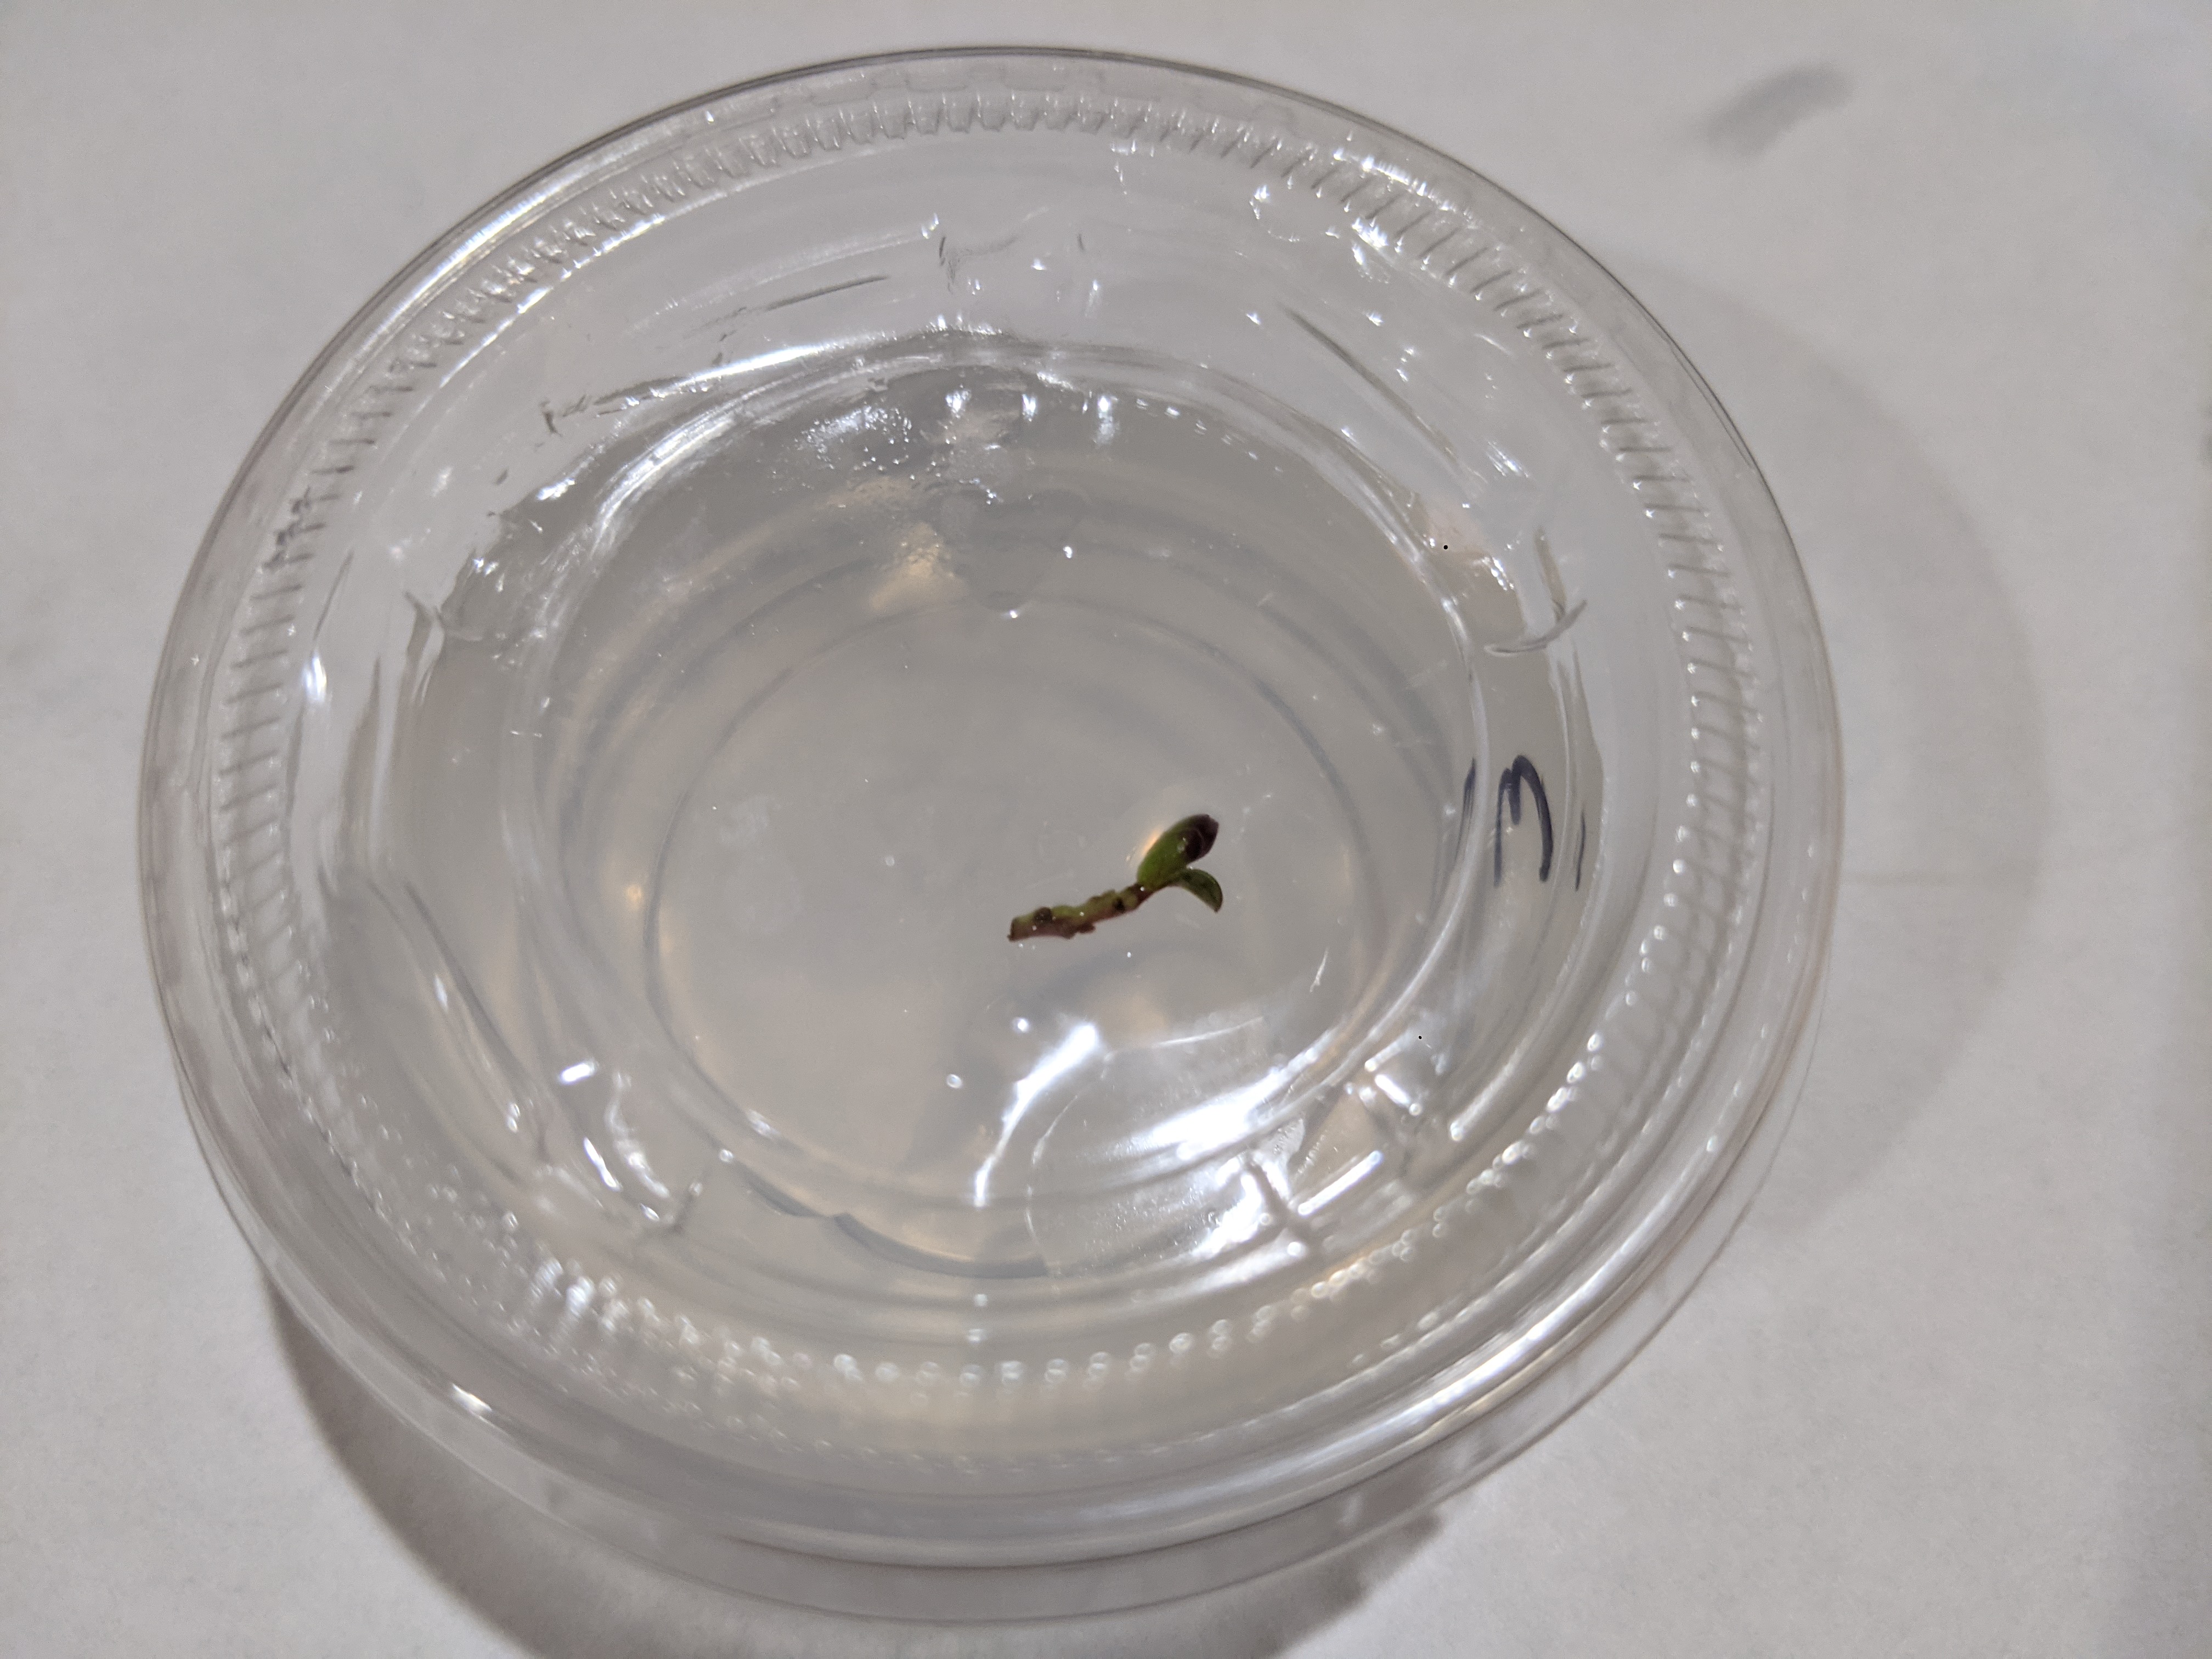
I’d like to call this section something more optimistic, like “success”, but I never really got anything to root. However, there was evidence that the media is sufficient to support the plants. In the photos above, the left photo (with new leaves) was grown from the small browned sprig on in the right photo. The right photo was taken on October 5, and the photo on the left was taken on the 19th, two weeks later. New leaves are clearly visible, and it seems like the plant is producing chlorophyll.
I’m not sure if this is strictly useful, but the lack of contamination and the plant being alive is a good first step.
Check out the bands on the right! Its a DNA ladder. Its pretty smiley because I was running at high amperage just to test the new stain.
I ordered some GelGreen from Phenix research the other day, because they sell it in .1 ml quantities, unlike the other suppliers in the US, and because they will just take my money and ship me things without a probing questionnaire or having to call or email them (again, unlike the other US distributors). The .1 ml quantity also sells at the same cost/unit as the .5 ml quantity! Combined with my ability to illuminate it with some cheepo blue LEDs from ebay, incredibly low toxicity and cell permeability, and stability at room temperature in water, I would recommend it as an alternative to Carolina’s “Carolina Blu” DNA stain, which is awful. It also makes a fine alternative to ethidium bromide if you don’t want to have hazardous chemicals around, or if you don’t want to have to buy expensive UV gel documentation equipment.
I guess my only question for Biotum is…why the heck is it called GelGreen? Nothing about it is green, as far as I can tell. Its Fluorescence is really more of a yellowy color, according to the datasheet.
Actually, we were in Walnut Creek, but it is close enough to call it San Fransisco!
As it turns out, the FBI and other defense organizations (Hello, DTRA) are pretty interested in DIYBIO. Coming away from the conference, it seems like the FBI is interested in exactly what you would expect: preventing bad guys (nefarious actors!) from doing Bad Things. The Defense Threat Reduction Agency on the other hand, is interested in buying technology from people who start in “garages”, or DIY environments, to use for defense work.
The room was pretty full! I didn’t know there were this many diybiologists! (some of these people are FBI agents/wmd coordinators. Hard to tell the difference in this photo)
The main focus of the conference was on the interaction between law enforcement and DIY biologists. It seems to be that the FBI is not concerned with DIY biologists, and that the FBI certainly does not view the DIYBIO “movement” as a threat. The position of the Bureau is that local DIYBIO folks should get a hold of their local WMD coordinator, It was also reassuring to know that the FBI hires PHD biologists and a lot of scientists to work in their WMD department- it would be nice if policy makers were just as well informed.
There was also a good discussion about the media- it turns out that both the FBI and DIYBIO folks both tend to kind of dislike the media, because as one attendee put it “They overestimate our abilities, and underestimate our ethics”. There were some good talks given on how to engage the press in a a way that cannot be misconstrued, and how to do due diligence when someone wants to cover your space. Rachel had an anecdote from when the BBC approached them to do a piece on the DIYBIO activities at MADLAB/MCR:
The approach that we got. we are interested in debate, is't that lovely, PCR machines, exclamation points. This is what we read: we're going to do a piece on bioterror and flu virus research. And we knew that, we knew that we were going to be portrayed as extreme. We're the only group that can kind of say these things, we weren't the right people, but we were going to be their people anyway, and it was. This is what showed up in the BBC website.. "growing concern about DIYbio.. FBI, oh there you are". Biological threat, all in the same sentence.
( quote from transcript typed by Bryan Bishop )
I thought it was very useful that we had Dan Grushkin, Rachel Turner, and Sascha Karburg -who have both done quite a bit of journalism- to tell us how the journalism works. It is important to have both sides of the story to really understand what is going on, so DIYers can engage the press more tactfully.
Speaking of Sascha, we got to enjoy his documentary on DIYBIO at the end of the first day. After a few years in the making, it looked pretty awesome! I didn’t understand what they were saying most of the time, as it was in German, but the images definitely told a story.
I think that the highlight of the conference was finally seeing who was out there, and what they were up to. If you want, you can read transcripts here, courtesey of Brian Bishop.
countries from left to right: USA, The Netherlands (behind the benches), Finland, Denmark, Germany, Turkey
The last day we all went down to Biocurious to play with some DNA. Biocurious walked everyone through the basic procedure for a chemical transformation, but the real highlight here was working with people from other places, and actually building a plasmid with the Genomikon kit.
Overall it was fun to meet everyone, and exciting to see what the rest of the diybio folks are up to. I think finally meeting the European counterparts helped bring the community together. And it was certainly good to learn that the FBI won’t be knocking on our door any time soon.
I have been invited to California to the FBI-DIYBIO outreach workshop. Day one is tomorrow. As I sit here slurping at the last of of my large java-chip frappacino (with whipped cream) at Bryant and Mariposa, I have to say that I am pretty psyched to see Biocurious, and meet all the other DIYBIO folks to compare notes. I will be posting my notes here on what happens!
A lot of people have been asking “How do I get started in DIYBIO?”. The answer is not easy. Biology is a broad field, ranging from studying entire ecosystems, to the chemicals that allow life to continue. But I have done my fair share of DIY molecular biology, and I have begun to write up protocols and reviews of equiptment- which I will begin to share on this site on the DIYBIO protocols page, and on BOSSLAB.
Today, amid the project crises going on for my various classes, I got some very good and very exciting news: my engineered microbial systems project seems to be going well!
A little background on the project and team:
Our team consists of three people: Neal Singer (MechE), Jea Young Park (E:Bio) and myself (MechE). Our professor is Jean Huang, who is awesome and exceedingly good at juggling multiple projects and inspiring us to do cool things. The goal of our team was to (in the span of a month), clone a gene from p. Atlantica into e. Coli. It sounds like it should be simple and routine, but it is actually quite a process. The good news is it seems to have worked!
How do we know it worked? Check out these gels:
This slideshow requires JavaScript.
The “top” of the gel is side with the wells closest to the edge. From left to right, we ran the PCR products from samples of plasmid from transformants in wells 1-9, and the 10th one was a positive control of PCR product of genomic DNA. The idea is that if the plasmid contains the gene, we would see a band near the positive control which definitely contains a copy of the gene. And the result is that we do! This means that when we ligated the plasmid and the newly cloned gene, some of the copies re-circularized without the gene, and some of the copies incorporated the new gene, and some of those copies of the gene ended up in bacteria that we have growing in the lab.